In this tutorial, we will show you how to restrict WooCommerce products based on the customer’s age. This can be very useful when your store sells products to people of legal age only.
WooCommerce does not allow you to do this, but here we will use the Product Restrictions by Zip Codes plugin.
This plugin allows you to restrict your products by zip code, store location, states and provinces, and it also allows you to add custom data like ages, for example.
Something important is that you can add at least four levels of restriction: individual products, product variations, category and attribute pages, and all products in the store.
You can download the plugin here:
Download WooCommerce Product Restrictions by Zip Code Plugin - or - Read more
Once you install and activate the plugin on your WordPress site, let’s learn how to restrict products by age.
1- Select the “Age” restriction method
The first thing you need to do is to configure the restriction method so that you can enter ages instead of zip codes or locations.
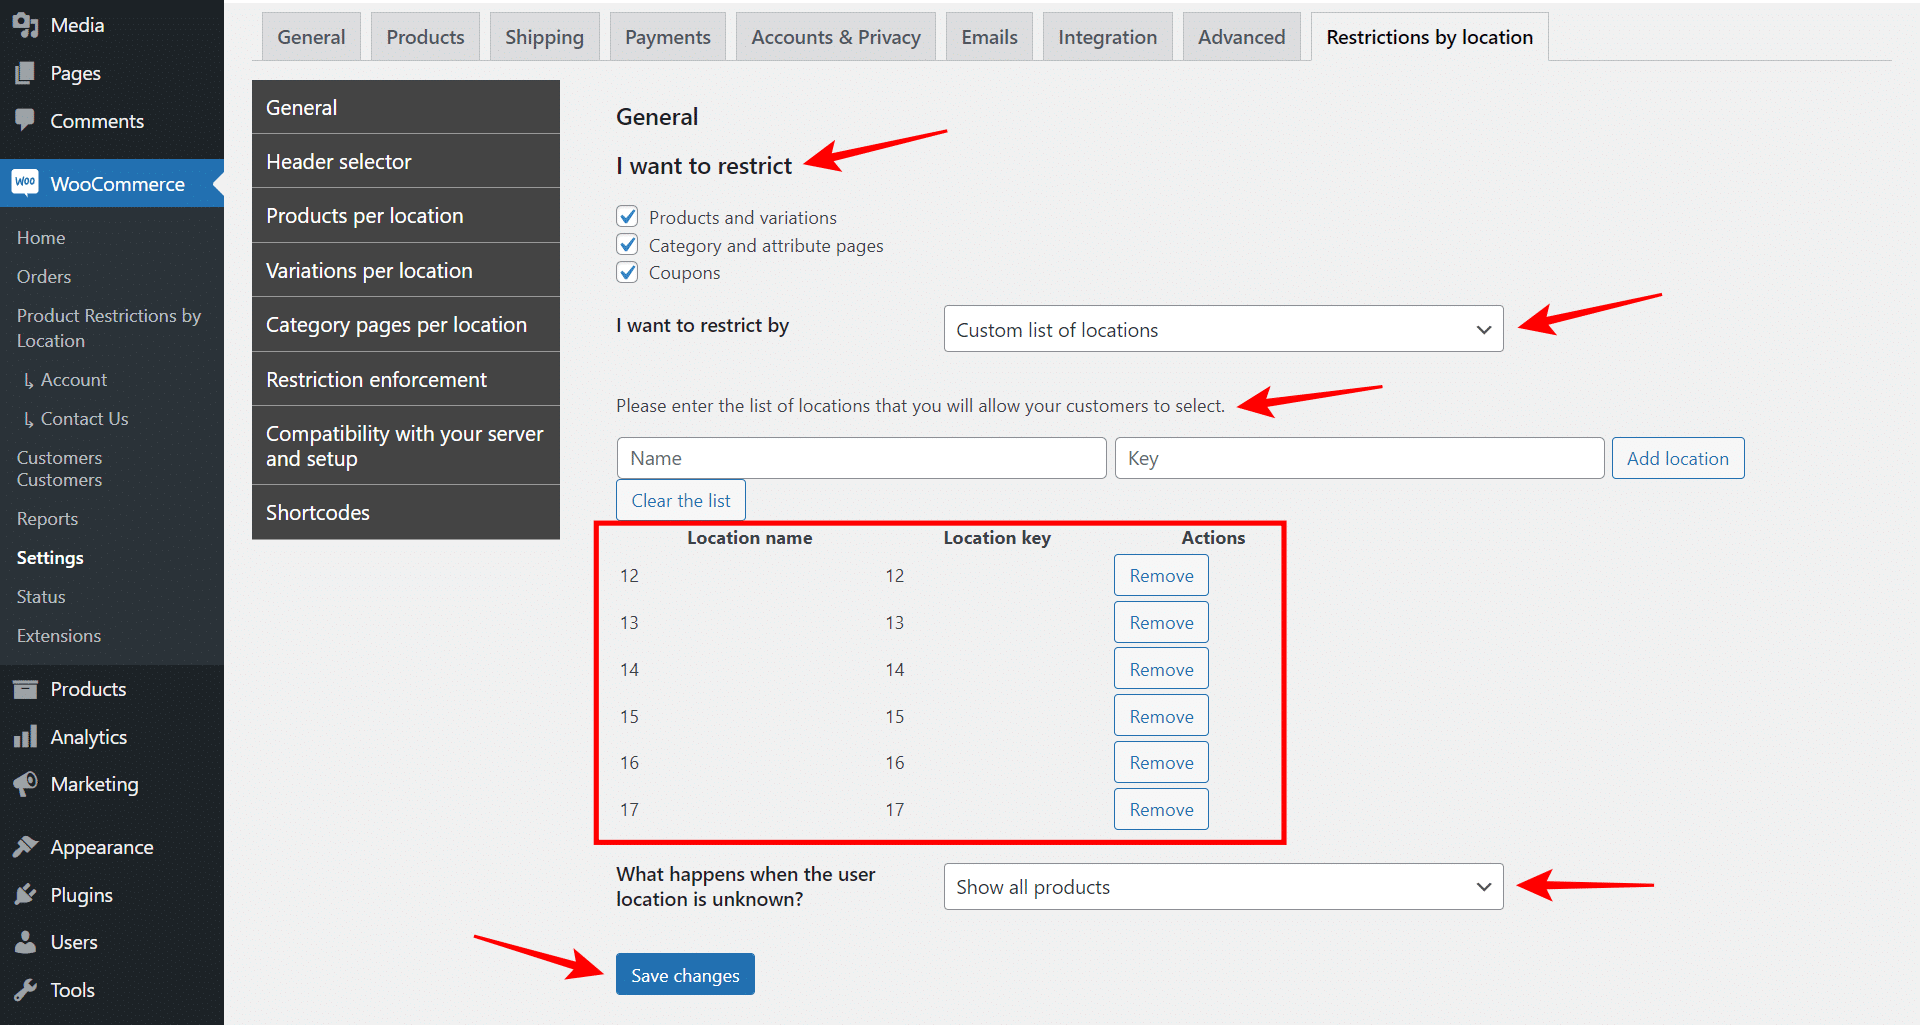
Go to WooCommerce > Settings > Restrictions by location and select the following values under General:
- I want to restrict: Here you need to select what you want to restrict. You can select all or any of the following options:
- Products and variations
- Category and attribute pages
- Coupons
- I want to restrict by: Here you need to select the Custom list of locations option.
- Please enter the list of location that you will allow your customers to select: In this field, we need to add one by one the ages of our customers. For example, we want to sell products only to people of legal age, so we will add ages from 12 to 17, and then we will change the title to the “Other” option to be called “+18”.
- What happens when the user location is unknown: Here you can hide or show the products. In this case, we’ll select “Show all products” because we’ll hide the Add to cart button and the product price from our restricted products.
- Hit Save changes.
2- Set up the “Age” selector
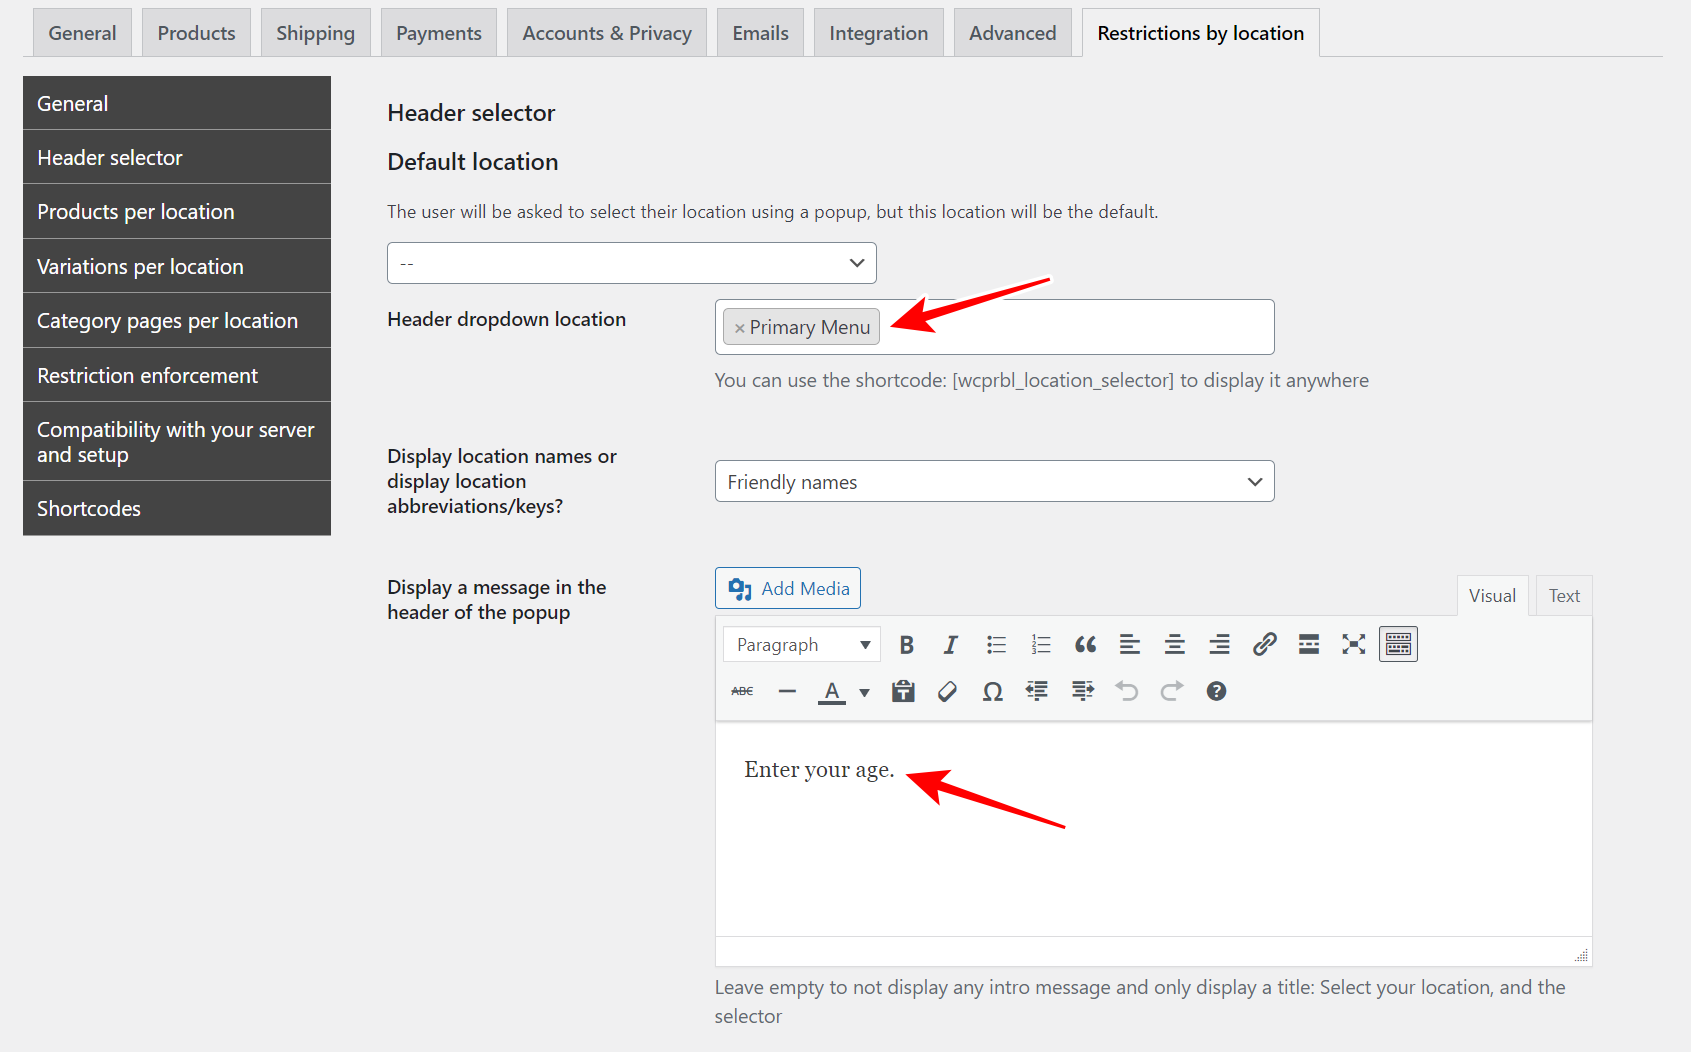
Now move to Header selector and select the following values:
- Default location: This is optional. You can select a default age or leave it empty.
- Header dropdown location: You can select where you want to display the dropdown where users will be able to select their age.
- Display a message in the header popup: When customers visit your store, they will see a popup asking them to select their location. However, we can customize that message, so we’ll enter something like “Enter your age”.
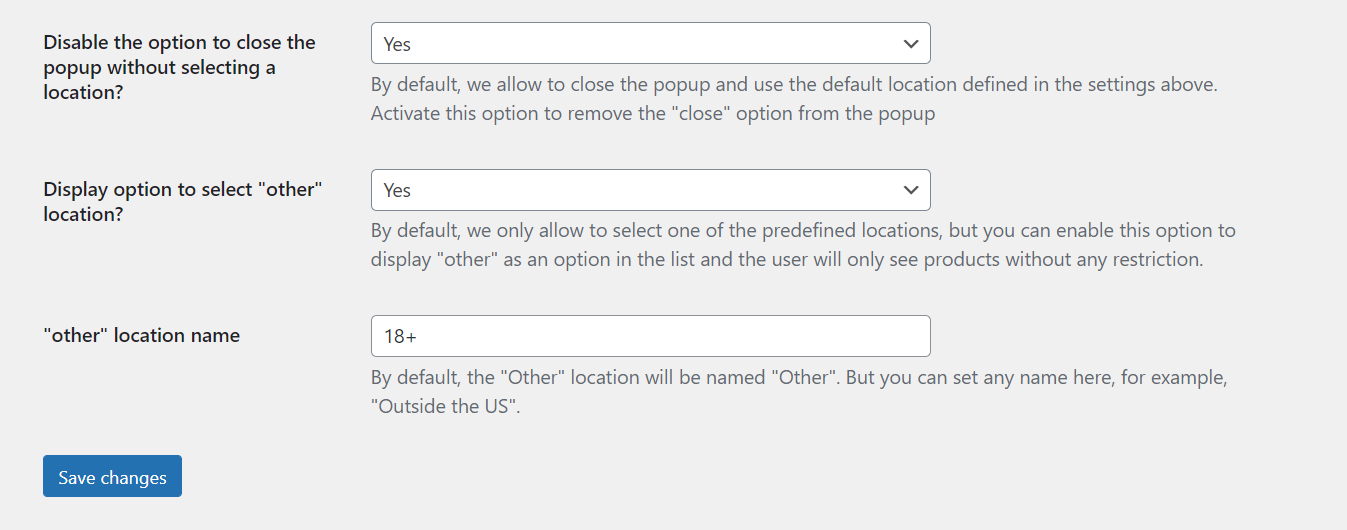
- Disable the option to close the popup without selecting a location: If you don’t want users to visit the website without entering their age, you can select “Yes” here.
- Display option to select “Other” location: Yes
- “Other” location name: You can change the name of the Other option, and we’ll call it “18+”. When users select this option, they will be able to view and purchase the products in our store.
- Hit Save changes
Now that you’ve set up the age restriction method and the age selector for your website, it’s time to apply the customer age restriction to your products.
3- Restrict all your products by customer age
You can easily hide all the products from your store by the customer’s age. This is useful for stores who sell products to people of legal age only.
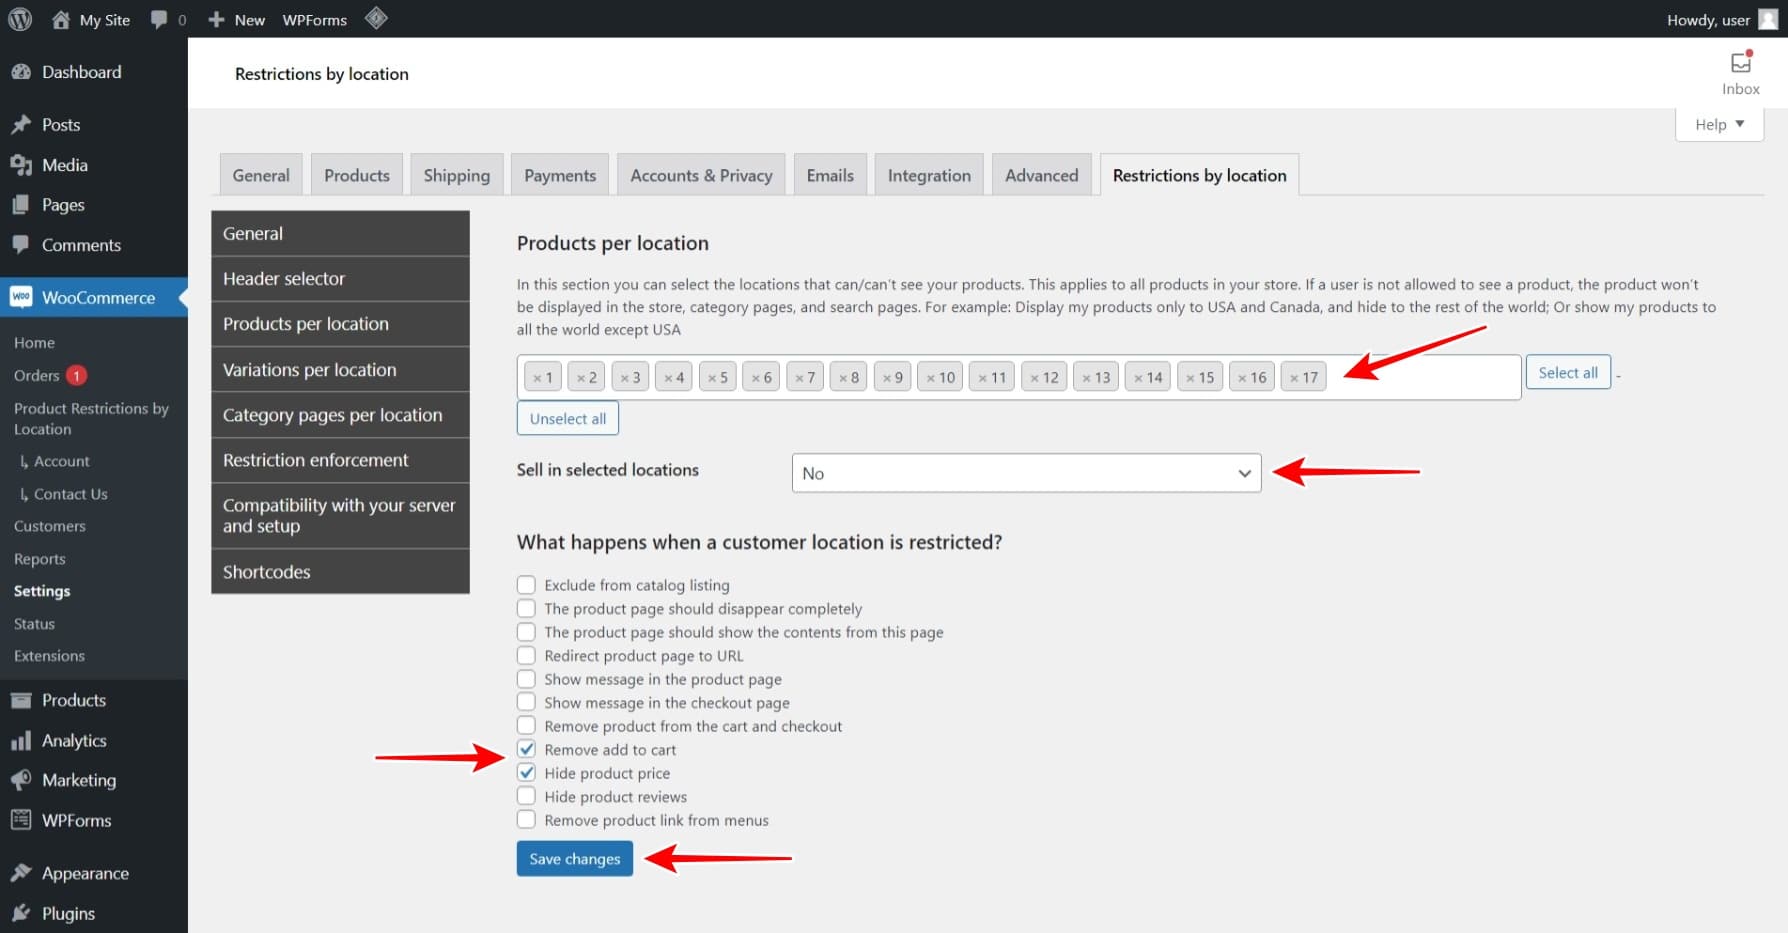
Go to Products per location and select the following values:
- Products per location: Select the ages for which your products will be restricted. In this case, we’ll hit Select all because we want to restrict our products to users younger than 18.
- Sell in selected locations: No
- What happens when a customer location is restricted: Here you have several options to select what happens. In this case, we’ll select Remove add to cart and Hide product price.
- Hit Save changes.
Once you apply these changes, only users over 18 will be able to purchase products in your WooCommerce store.
4- Restrict individual WooCommerce products by age
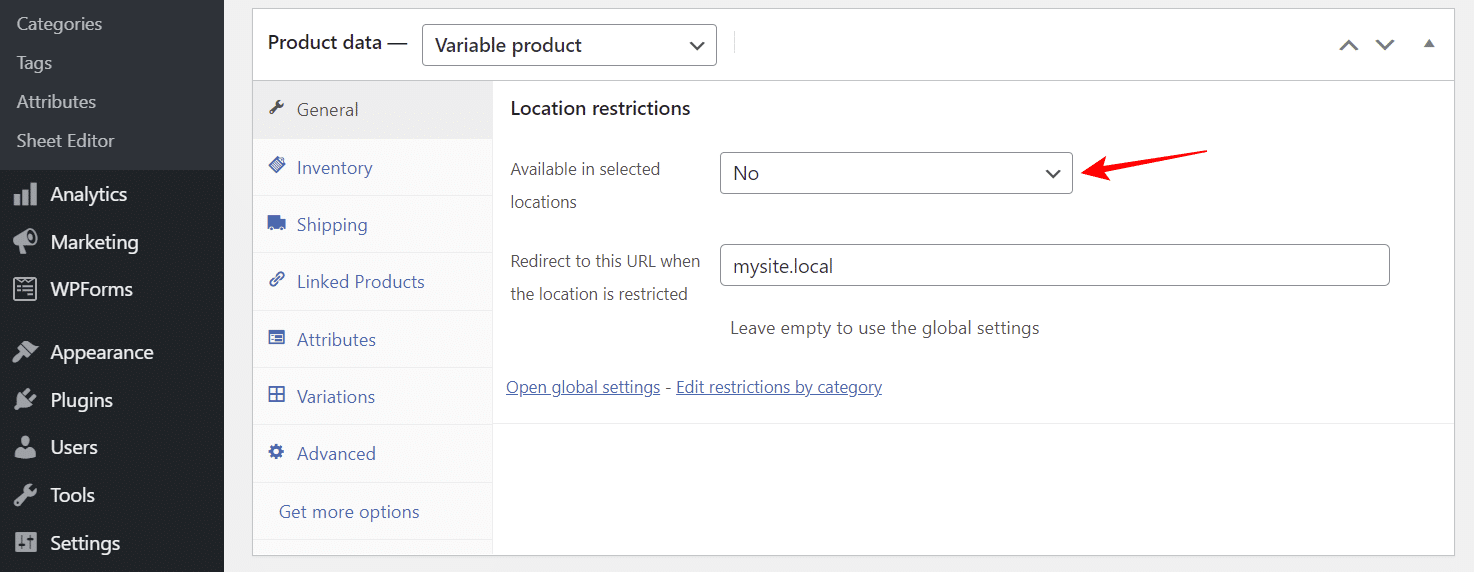
Instead of restricting all the products from your store, you can restrict specific products. In this case, you need to open a product you want to restrict, go to Product Data > General, and select these values:
- Available in selected locations: No
- Redirect to this URL when the location is restricted: Optional.
Once you select these values, hit Update to apply the changes to your product.
5- Restrict WooCommerce variations by age
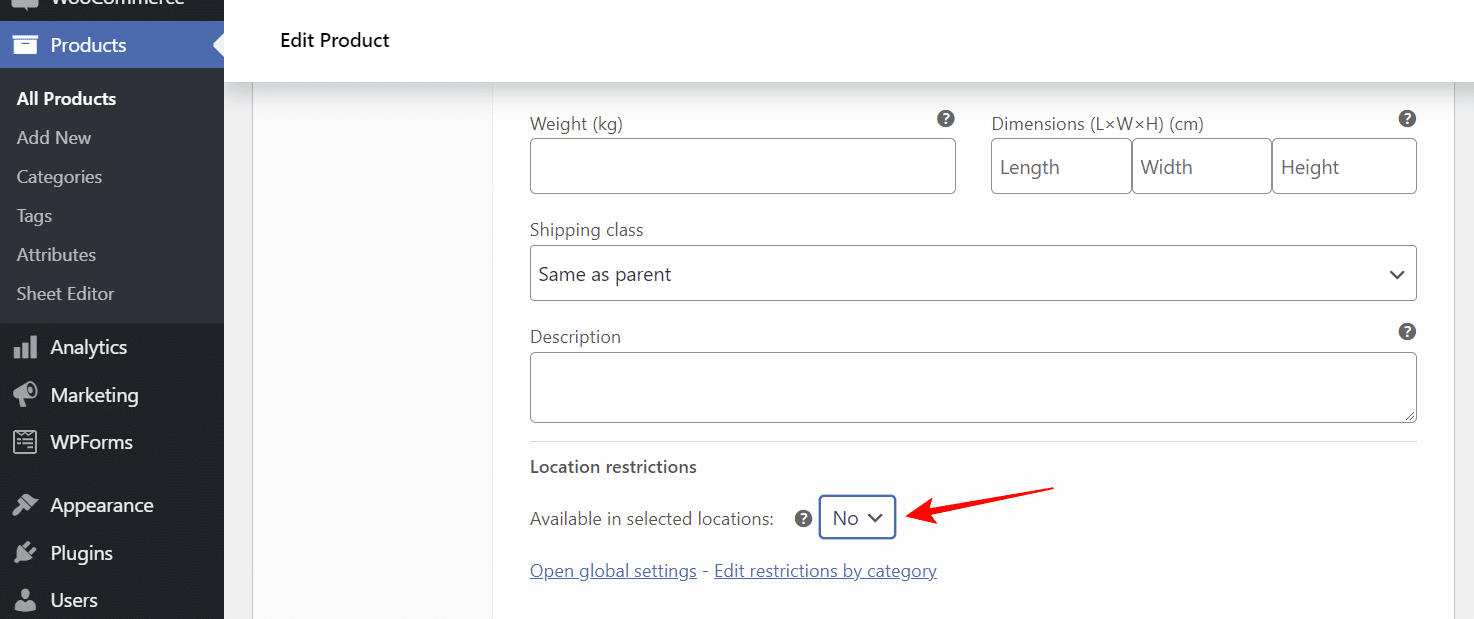
If you have variable products by you don’t want to restrict the whole product with its variations, you can easily open a variation’s options and restrict that specific variation only. Just select these values:
Available in selected locations: No
Once you’re done, hit Update to apply the changes to the product.
6- Restrict product categories by age
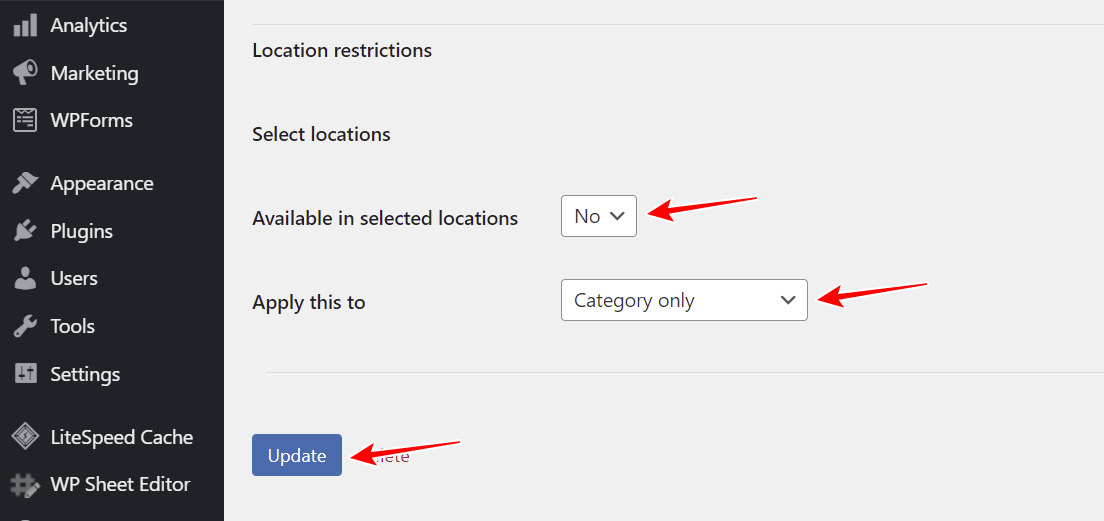
You can also restrict product categories based on the customer’s age. In this case, you need to open a specific category and select these values:
- Available in selected locations: No
- Apply this to: You can apply this to the category page only, or to both the category and the products within that category.
- Hit Update to apply the changes.
Let’s see the results!
When your customers visit the website, they will see a popup asking them to enter their age:
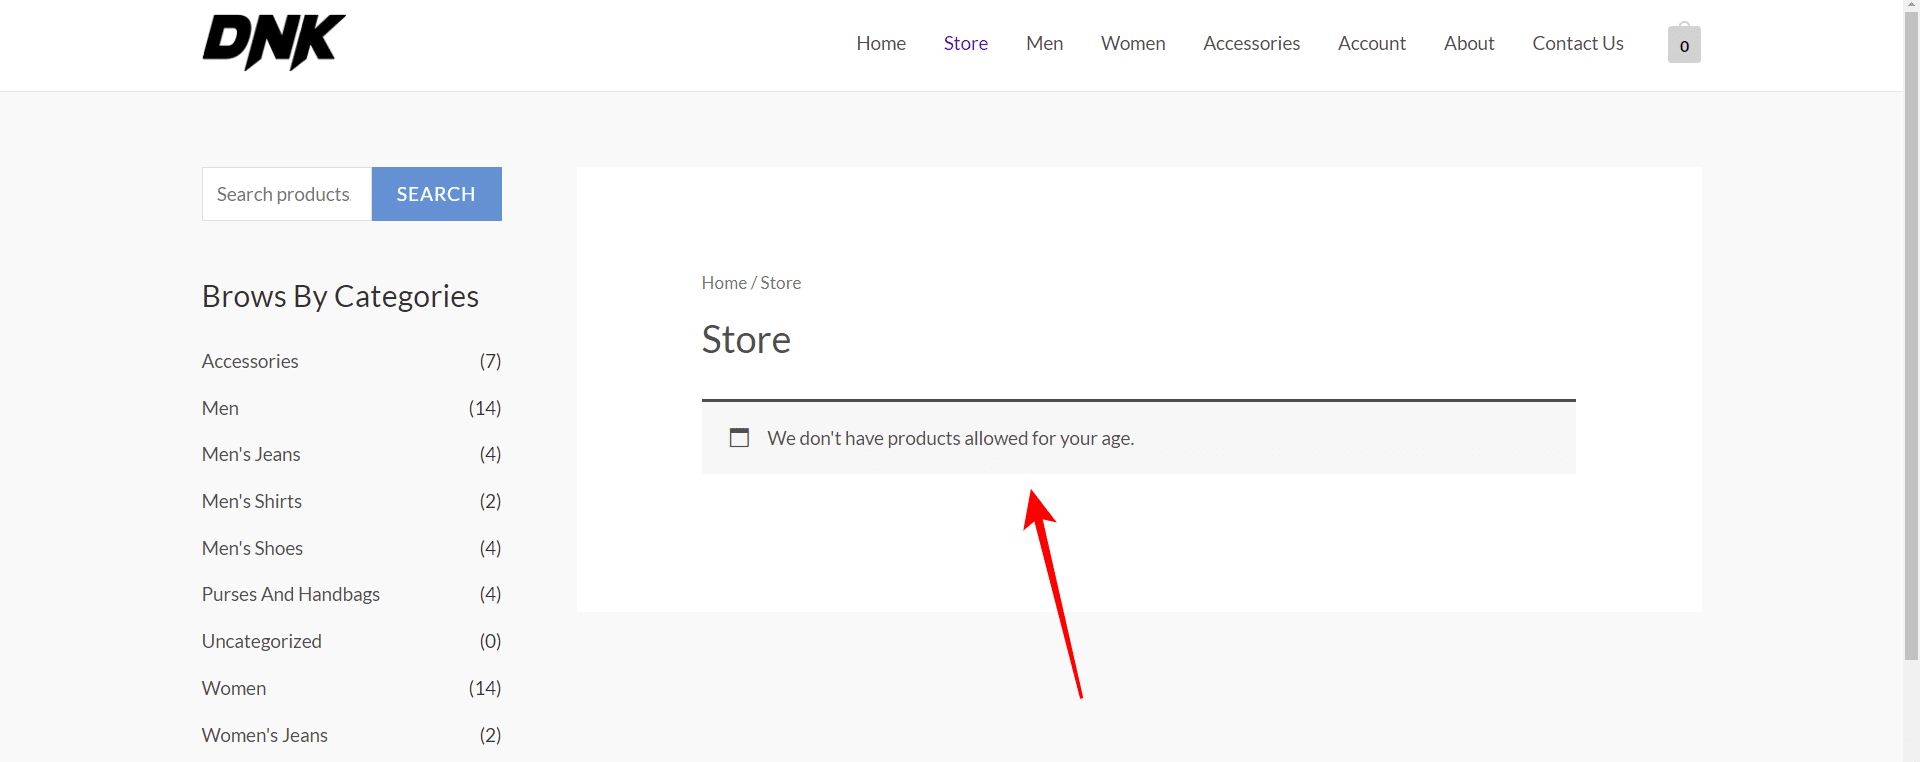
Depending on how you have restricted your products, your users can view a message telling them you don’t have any products available for their age.
Note – You can change this message at WooCommerce > Settings > Restrictions by location > Restriction reinforcement > Message shown when the products list is restricted.
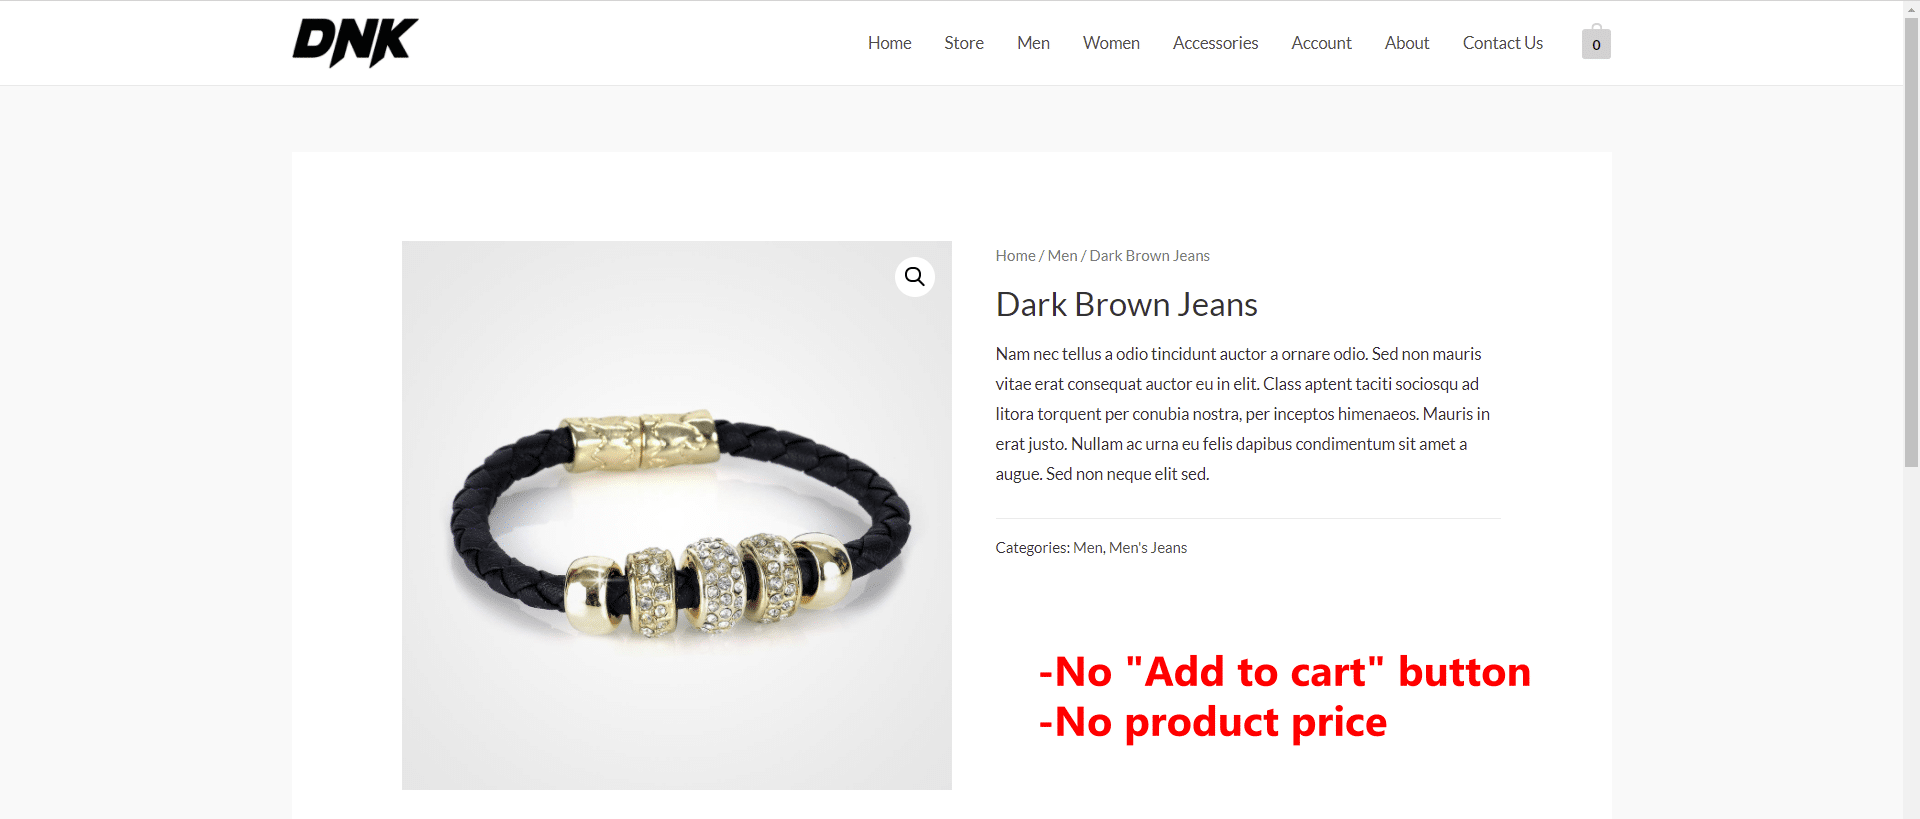
Since we selected that the Add to cart and the Product price should be hidden from the product page, this is what customers will see:
As you see, restricting your WooCommerce products, variations and categories based on the customer age is really simple with the Product Restrictions by Zip Codes plugin.
You can download the plugin here:
Download WooCommerce Product Restrictions by Zip Code Plugin - or - Read more

