In this tutorial, we will show you how to restrict WooCommerce categories by states or provinces.
Restricted categories will automatically be hidden from the site when customers select a blocked state or province. It’s a great way to add conditional visibility to product categories based on the customer state or province.
Benefits of blocking categories by states or provinces:
Restricting WooCommerce categories by state or province can offer several benefits, depending on the nature of your business and the products or services you offer.
Here are some potential benefits:
- Compliance with regulations: Certain products or services may be regulated differently in various states or provinces. By restricting categories based on location, you can ensure compliance with regional regulations and legal requirements.
- Shipping and logistics optimization: Different regions may have varying shipping costs and delivery times. By restricting categories based on location, you can improve your shipping and logistics processes, providing more accurate estimates and improving overall customer satisfaction.
- Localized product availability: Certain products may only be available or relevant in specific areas. Restricting categories by state or province ensures that customers see products that are applicable and accessible to them, reducing confusion and enhancing the shopping experience.
- Legal and tax considerations: Tax rates and regulations may vary by location. By restricting categories based on state or province, you can ensure that the appropriate taxes are applied to each transaction, helping you stay compliant with local tax laws.
WooCommerce category restrictions by location plugin
To restrict our WooCommerce categories by state or province, we will use the WooCommerce Restrictions by Location plugin.
With this plugin, you can restrict several WooCommerce content types based on the customers’ location:
- Products
- Variations
- Categories
- Attributes
- Coupons
You can restrict WooCommerce categories by state or province, country or continent, zip code, or using a custom list of locations.
You can download the plugin here: Download WooCommerce Product Restrictions by State and Provinces Plugin - or - Read more
After installing and activating the plugin, follow these simple steps:
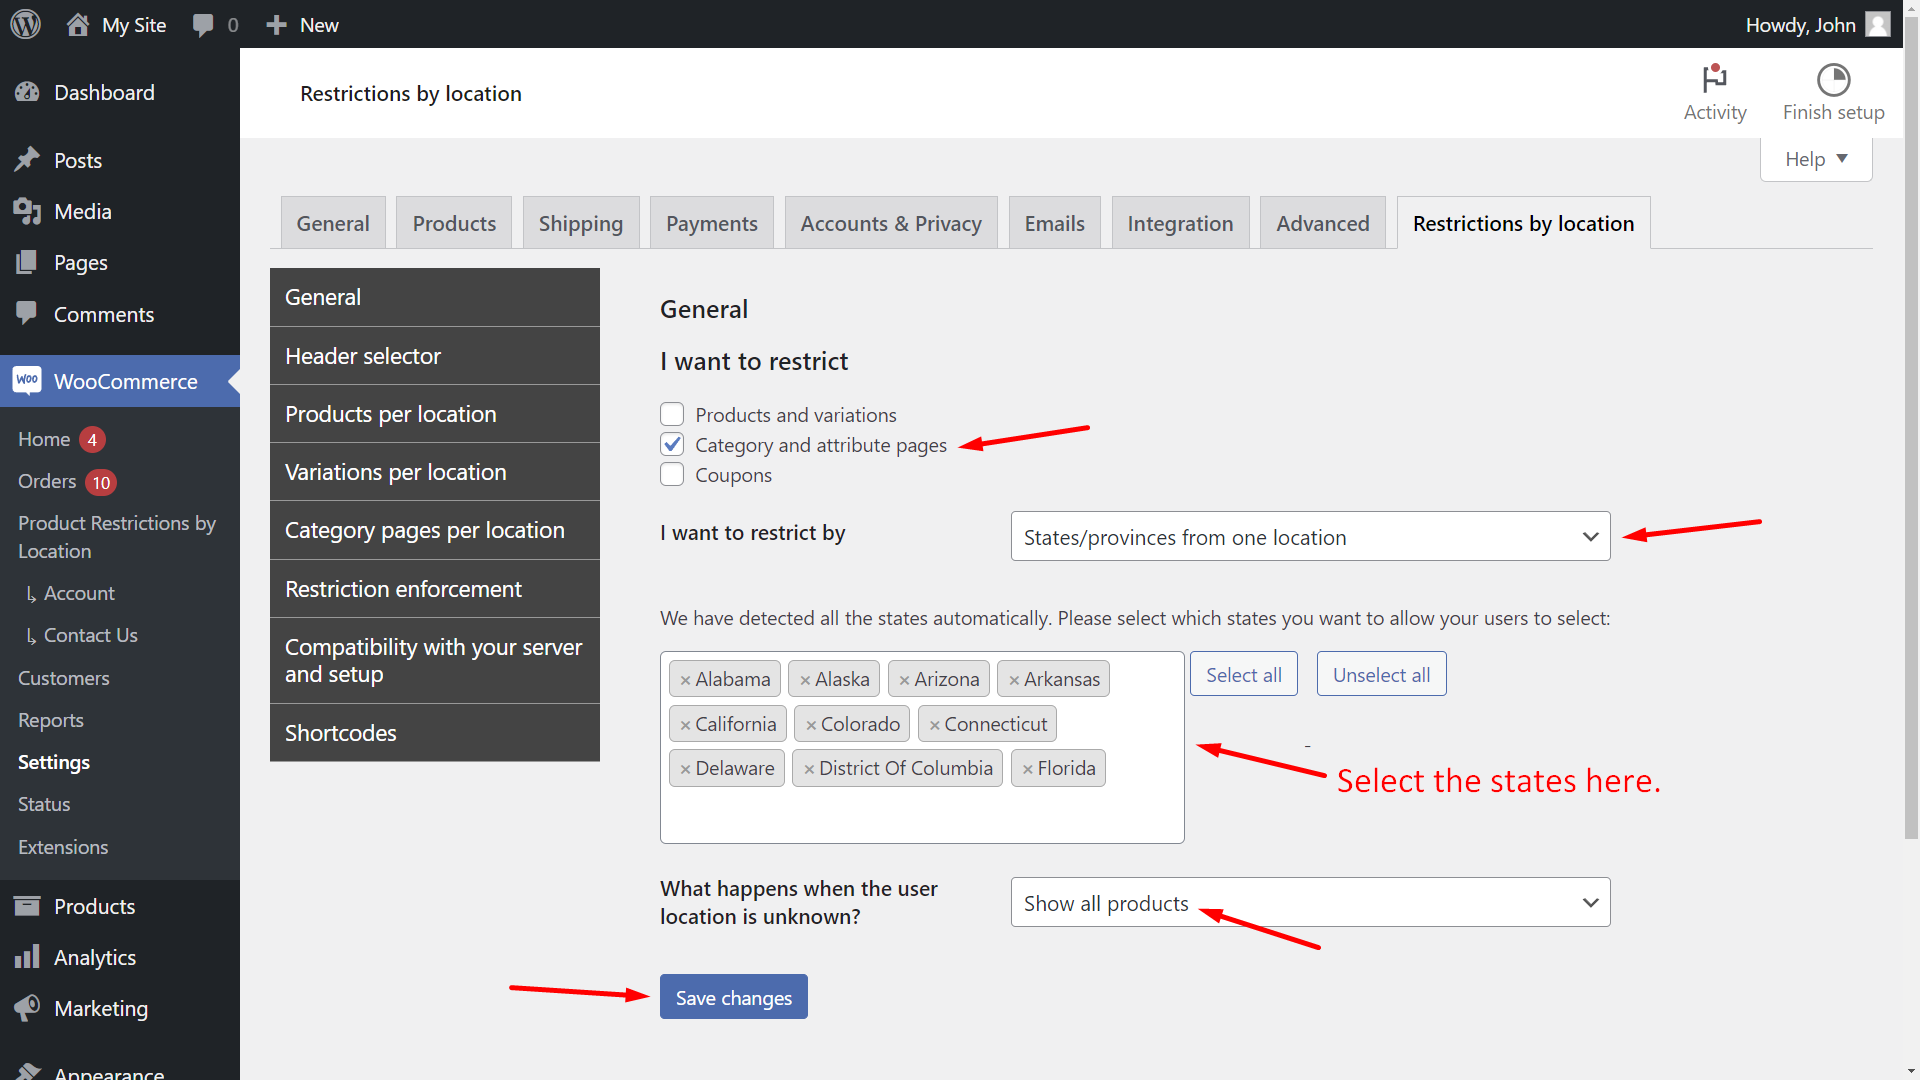
Step 1. Set up the global settings
We will start by setting up some global settings that will allow us to restrict product categories by state or province.
Go to WooCommerce > Settings > Country Restrictions.
Once there, select the following values under the General settings tab:
- In I want to restrict, make sure you tick the Category and attribute pages checkbox.
- In I want to restrict by, make sure you select States/provinces from one location
- Next, you need to select the states you want to allow your users to select when visiting your website.
- In What happens when the user location is unknown, select if you want to show or hide the products.
- Click on Save changes.
Some important notes:
- The restriction by state does not work with IP geolocation (automatic detection) because the automatic detection is unreliable for small states, it only works with the dropdown selector (the user selects the state in the dropdown on the header), billing state, and shipping state.
- The list of states will be from the “base country” defined in the WooCommerce settings. To change the base country, go to WooCommerce > Settings > General > Store Address > Country.
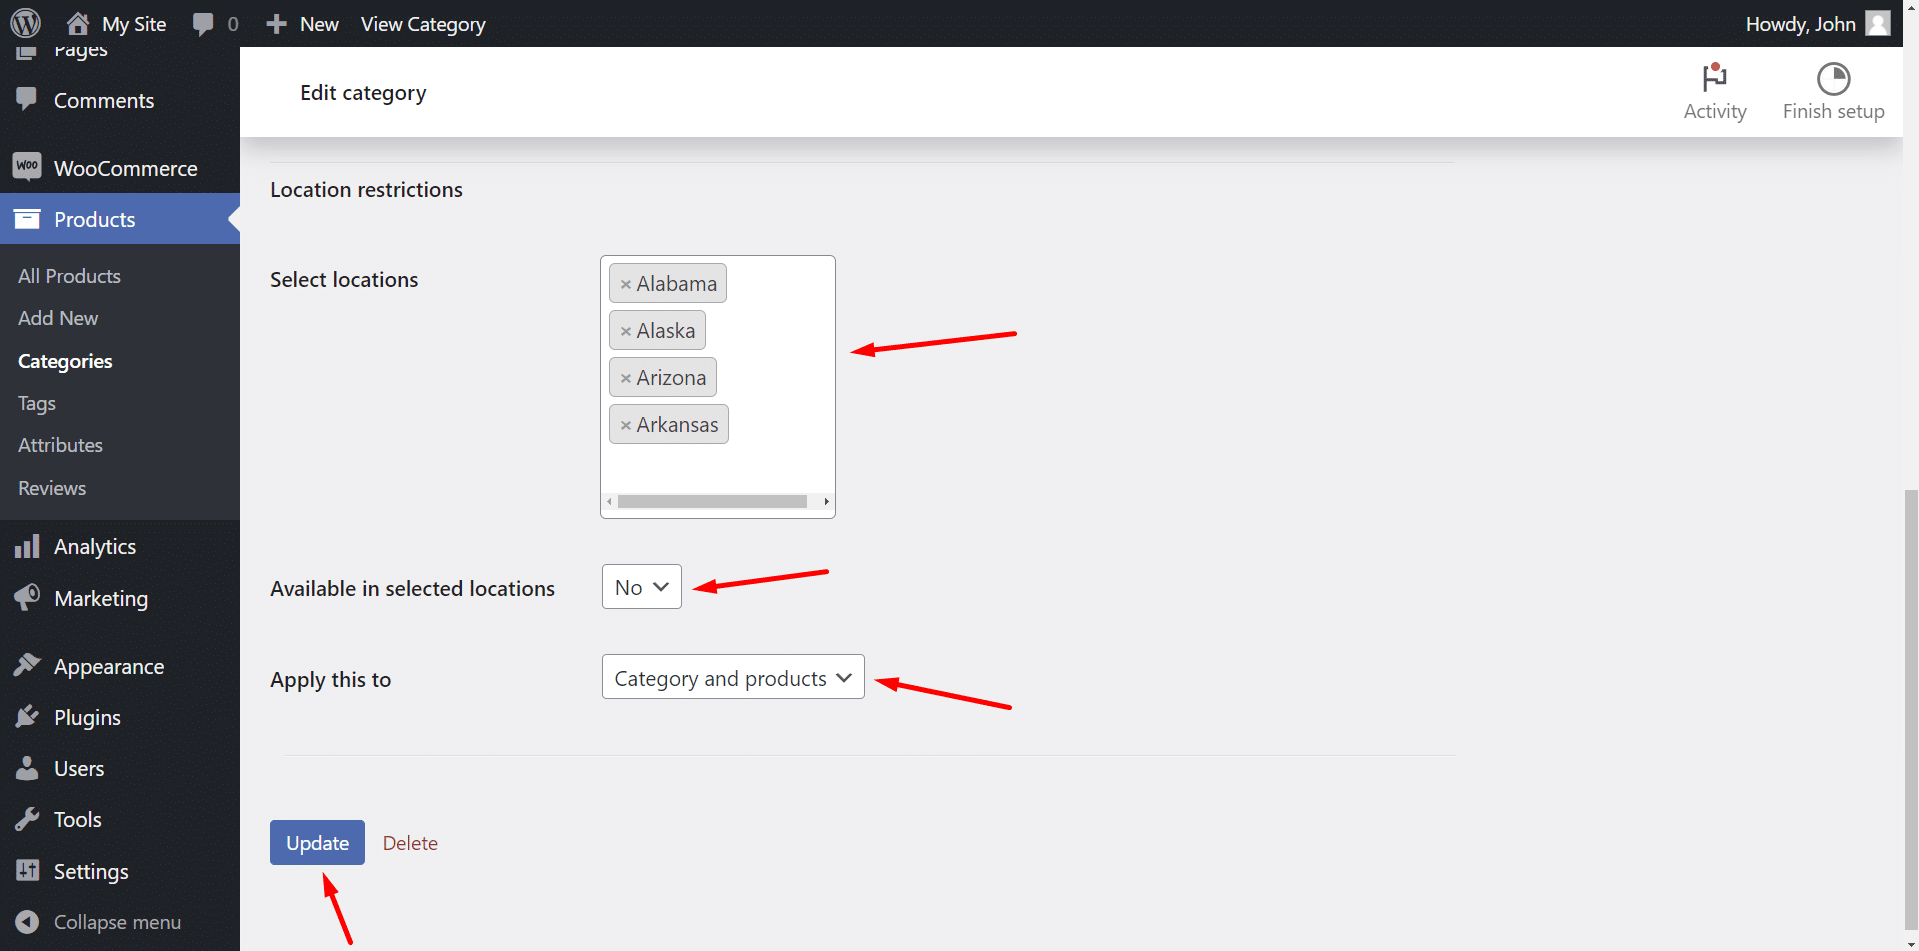
Step 2. Restrict your categories by states or provinces
Once you’ve selected the global state and province restrictions, you can proceed to restrict your categories by state or province.
Go to Products > Categories in wp-admin, and open the category you want to edit.
Now you need to select the following values to restrict your selected category:
- Select locations: Here you need to select the states where your categories will be restricted.
- Available in selected locations: No
- Apply this to: Category and products
- Hit Save to apply the changes.
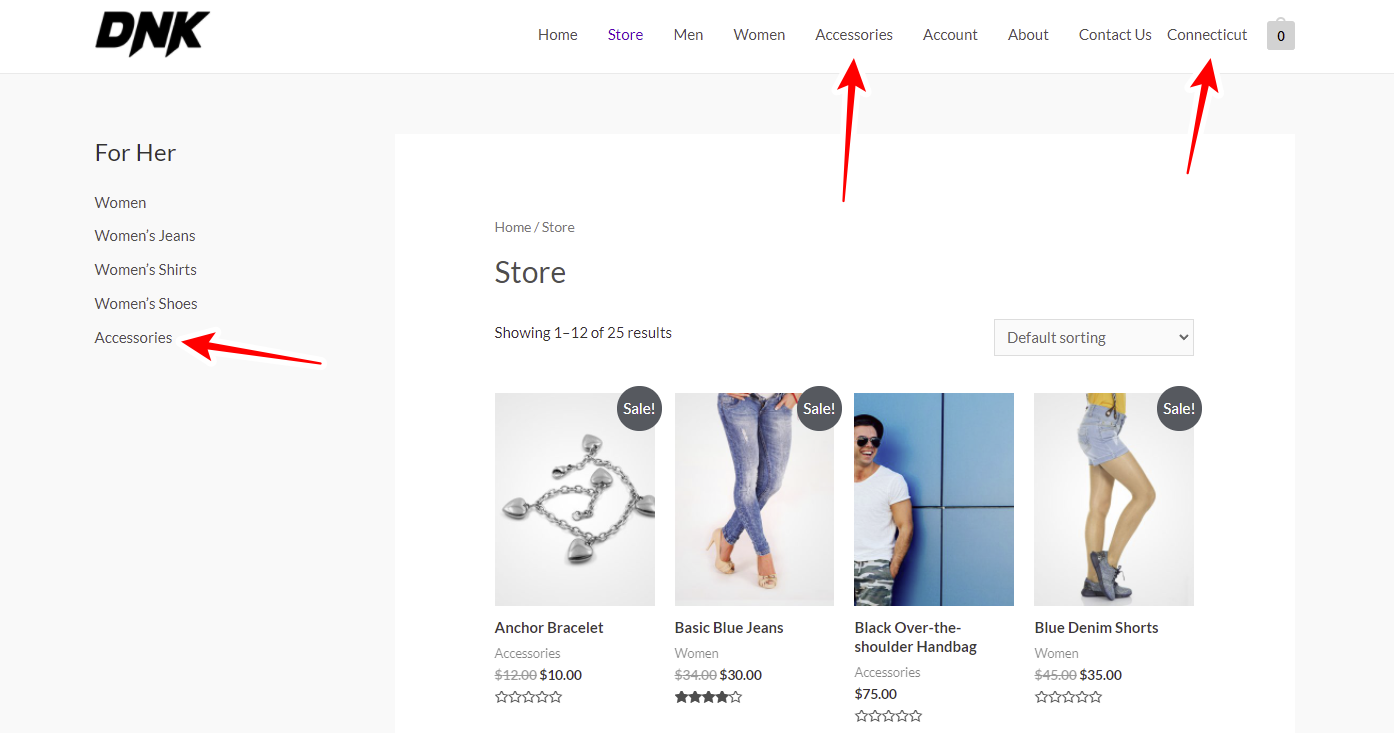
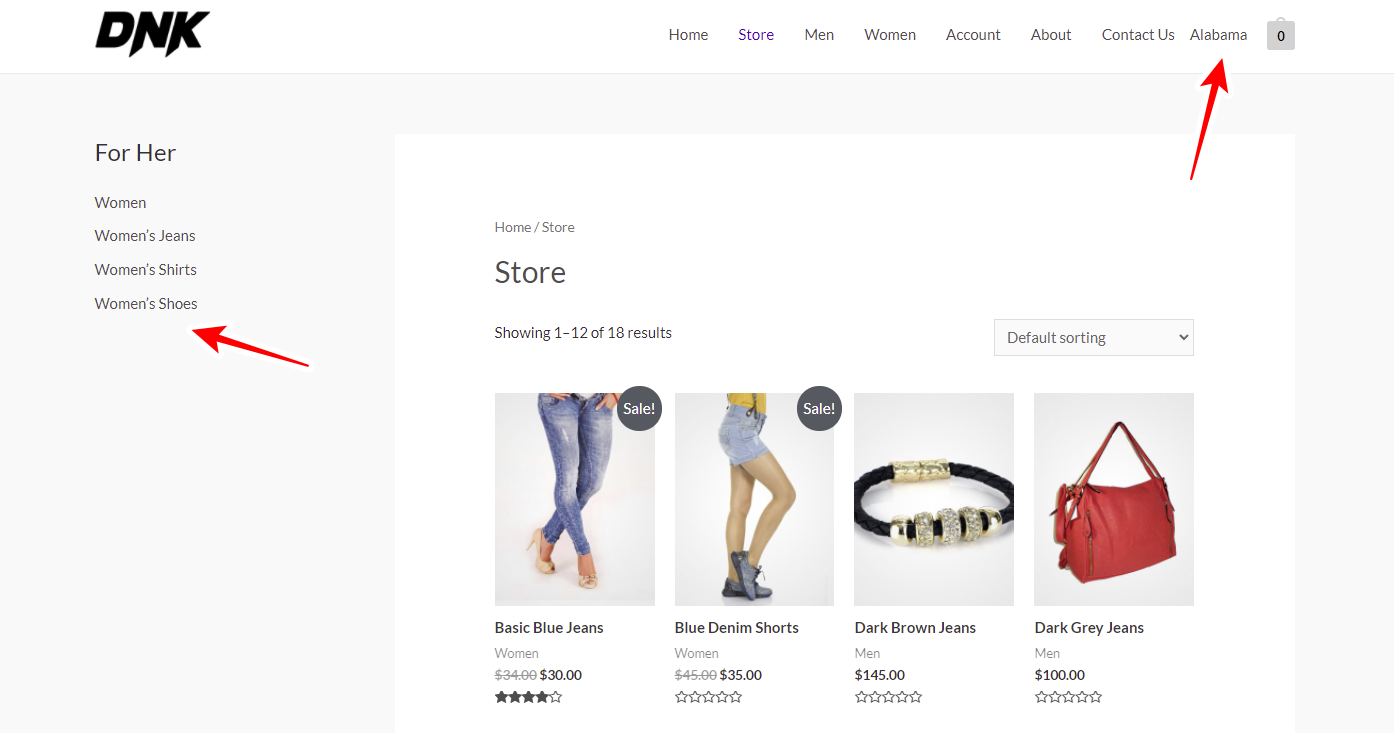
Once you restrict a specific category, it will disappear from the website and the store page. For example, we have restricted the Accessories category.
When users visit your store, they will see a popup where they can select their state or province.
Once you restrict a specific category, it will disappear from the website and the store page.
For example, we have restricted the Accessories category.
When users visit your store, they will see a popup where they can select their state or province.
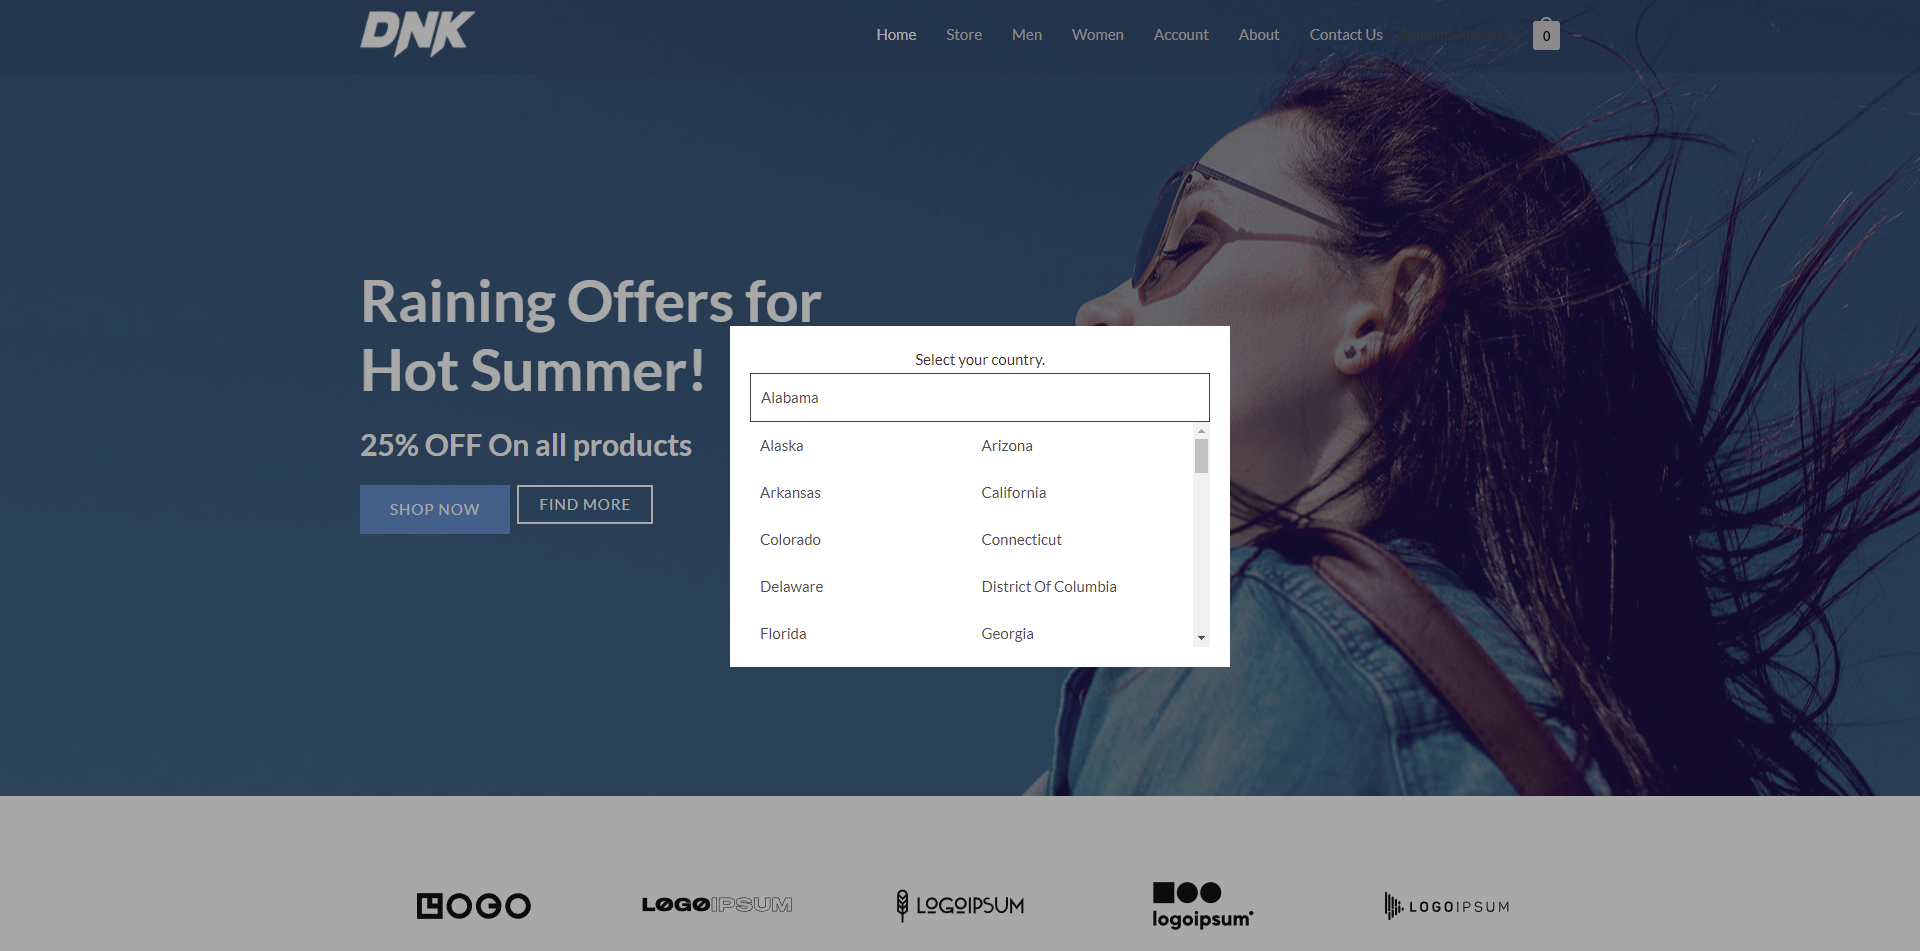
If the customers select any of the states where your category is not restricted, it appears without any problems in the navigation menu and sidebars.
However, if they select any of the restricted states, they will see that the restricted category will disappear completely from the site.
Restricting WooCommerce categories by state or province is really simple if you use the WooCommerce Restrictions by Location plugin.
You can download the plugin here: Download WooCommerce Product Restrictions by State and Provinces Plugin - or - Read more