Let’s take a look at how to edit product country restrictions in WooCommerce using a CSV file.
The WooCommerce Product Restrictions by Location plugin, formerly known as (Country Catalogs for WooCommerce) allows you to hide products from selected countries. However, if you need to edit hundreds of product country restrictions, you may spend several hours opening and editing your products one by one. Fortunately, we have CSV files. They help us edit hundreds of products in Excel or Google Sheets.
Therefore, we’ll show you how to edit hundreds of product country restrictions in a CSV file and how to import it to WooCommerce.
Of course, you need to have the WooCommerce Product Restrictions by Location plugin installed and activated to edit your product country restrictions.
You can download the plugin here: Download WooCommerce Product Restrictions by Store Location Plugin - or - Read more
Now you need to follow the steps below:
1- Edit at least one of your products
We recommend that you edit at least one of your products to add the codes of the countries in which your products will be restricted.
Note – If you do not want to do this and prefer to add the countries directly in the CSV file, you can consult this list of countries and states.
Go to Products in wp-admin and open one of the products to edit it.
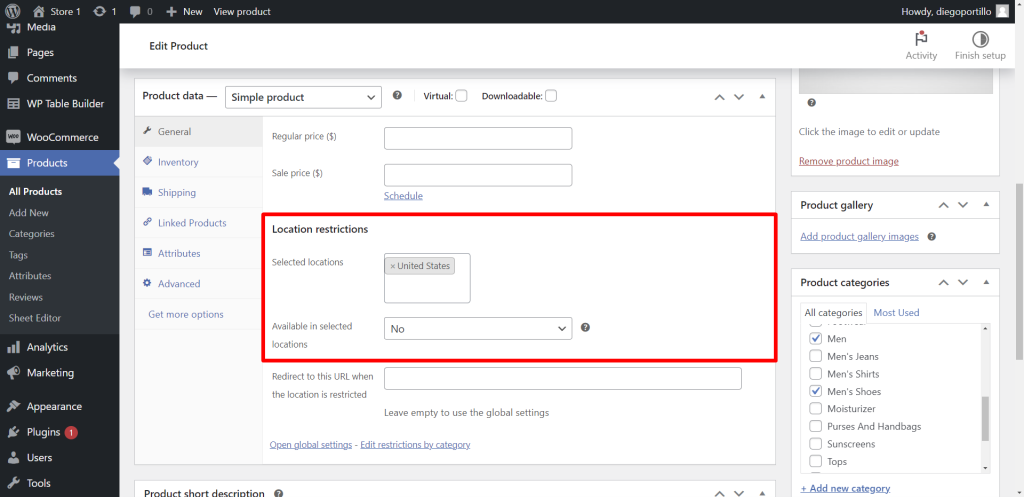
Once you open the product, you need to go to Product data > General > Location Restrictions.
Once there, you need to select these values to hide that product in a specific country.
- Selected locations: United States, for example
- Available in selected locations: No
- Update the product.
2- Export your products and edit them in a CSV file
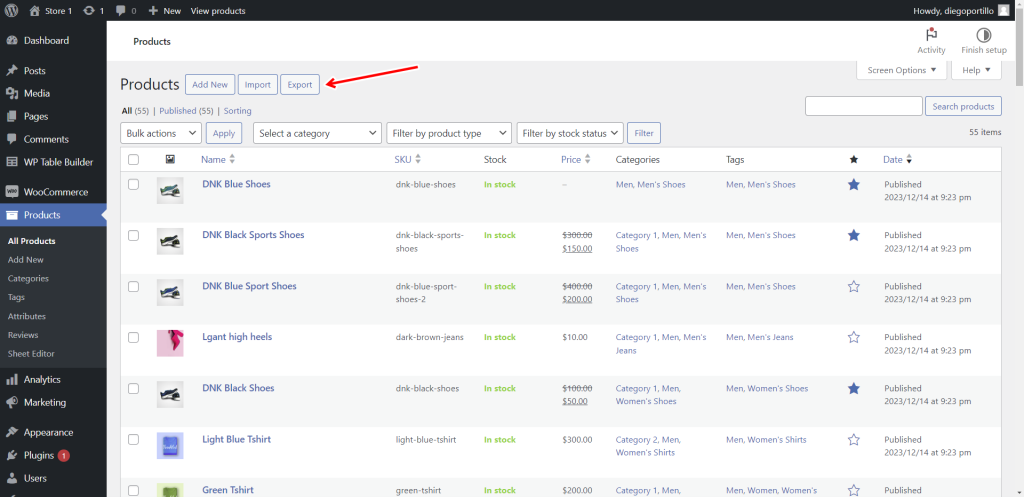
After setting the product’s country restrictions, you need to go to Products and click on Export to download a CSV file with your products.
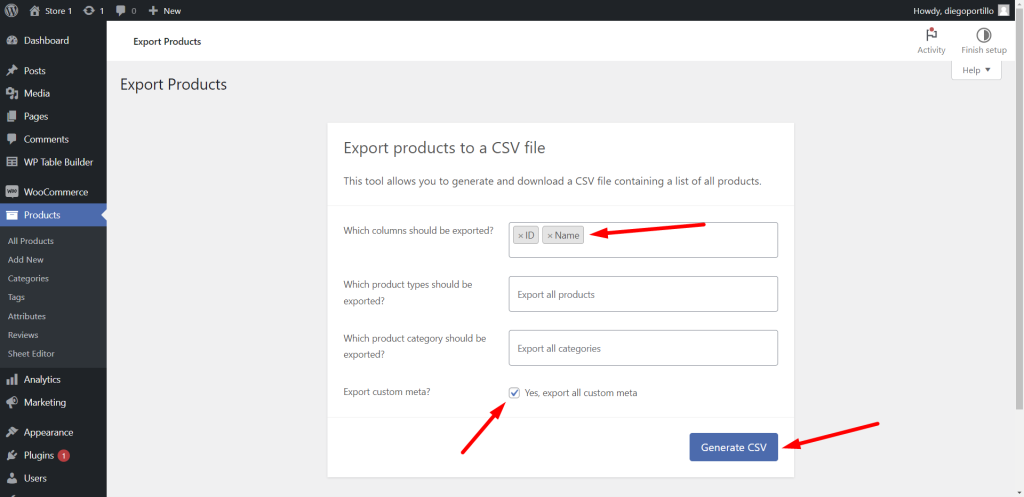
Since you do not need all the columns (fields) of your products to edit the restrictions by location, we recommend selecting only the ID and Name columns.
You need to tick the Yes, export all custom meta checkbox.
Click on Generate CSV.
Once you’ve downloaded the CSV file, you need to edit it with Excel or with Google Sheets.
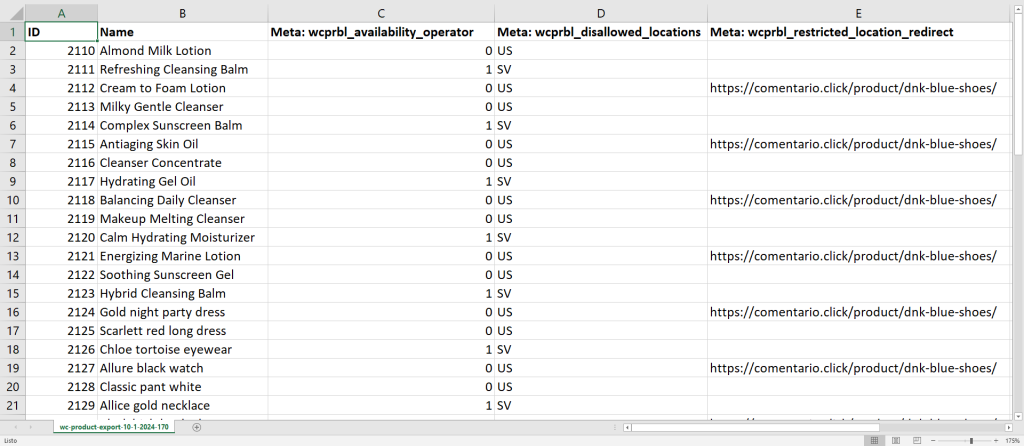
Your CSV will have these columns:
- ID – This is the product ID from the database.
- Name – This is the product title/name.
- Meta: wcprbl_availability_operator – This column indicates if the product is available or not in the selected countries.
- 0 = unavailable/restricted
- 1 = available
- Meta: wcprbl_disallowed_locations – Add the codes of the countries where your products will be restricted/available. You can consult this list of country and state codes.
- Meta: wcprbl_restricted_location_redirect – You can redirect your products to other pages or other products by adding the URL here.
Once you’re done editing your products in the CSV, you’re ready to import country restrictions into WooCommerce.
3- Import the CSV file to WooCommerce
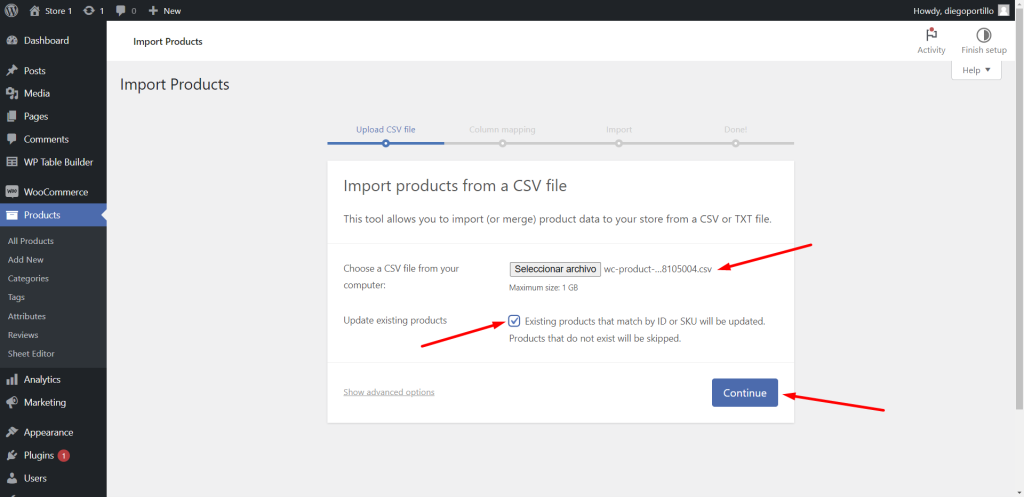
To import the CSV file to WooCommerce, you need to go to Products and click on Import.

After that, you need to do the following:
- Select the CSV file from your computer.
- Tick the Existing products that match by ID or SKU will be updated checkbox.
- Click on Continue.
Finally, you need to match the CSV columns to the WooCommerce fields. For that, you just need to select these values:
- ID: ID
- Name: Name
- Meta: wcprbl_availability_operator: Import as meta data
- Meta: wcprbl_disallowed_locations: Import as meta data
- Meta: wcprbl_restricted_location_redirect: Import as meta data
- Click on Run the importer

That’s it. Your import process will start and be completed depending on how many products you’re updating:

Edit your WooCommerce product country restrictions in a CSV file
This is how you can update location restrictions in WooCommerce using a CSV file in Excel, Google Sheets or any other CSV editor.
You can download the plugin here: Download WooCommerce Product Restrictions by Store Location Plugin - or - Read more