Welcome 🙂 This is a complete guide on how to sell Vape with WooCommerce, respecting the legal restrictions of countries, provinces and states.

Vaping is an industry that is growing a lot in the last months, and we believe it represents a great opportunity for online business. In short, Vaping is an electronic cigarette industry (e-cigarettes) with different flavors and aromas. You can find e-cigarettes with tobacco or without tobacco.
Unfortunately, the Vaping industry goes through some inconveniences due to certain legal restrictions that are imposed on it in different countries, provinces or states.
It is important to clarify that here we are not going to discuss the health effects of Vaping since we have enough information about that on Google. Rather, we will use that important information, along with the legal information to be able to build a WooCommerce store that has no legal problems at all when selling vape or e-cigarettes online to different countries, states, or provinces.
Before making your vape shop with WooCommerce
Before following this guide on how to sell Vaping with WooCommerce respecting the legal restrictions of countries, provinces or states, it is important that you have taken the following steps:
- Obtain your permission to sell vape products, according to the laws of your country
- Get your EIN number (If you are from the United States)
- Research the legal restrictions of the countries, provinces or states where you will sell your products
- Create your website and your WooCommerce store with WordPress
- Add the products you will sell, using clear categories such as “With tobacco” and “Without tobacco“. This is important for the restrictions that we will apply later.
Once you complete those steps, you can now follow the steps in this guide to sell your e-cigarettes with WooCommerce:
Step 1. Install the “WooCommerce Product Restrictions by Location” plugin
With the WooCommerce Product Restrictions by Location plugin, you can create different product catalogs for each continent, country, state, or province. You can completely hide the WooCommerce products in the catalog for a certain country, hide only the prices of the products, or show different prices and products.
These are the restrictions you can apply to your products:
- Products by continent/country/state/province
- Variations by continent/country/state/province
- Categories by continent/country/state/province
- WooCommerce coupons by continent/country/state/province
You can download the plugin here:
Download WooCommerce Product Restrictions by Store Location Plugin - or - Read more
Step 2. Sell Vape with WooCommerce
The restrictions you need to apply to your Vaping WooCommerce store depend on the laws of the country, state or province you want to sell to. So, here we show you several options with the WooCommerce Product Restrictions by Location plugin.
Option 1 – Restrict all your WooCommerce Vape products by country
One of the options you have is to restrict or block the sale of vape products in specific countries. For example, let’s say you can sell your vaping products in all countries except the United States and Canada. In this case, you need to restrict sales in these two countries.
To do this, go to WooCommerce > Settings > Restrictions by Location.
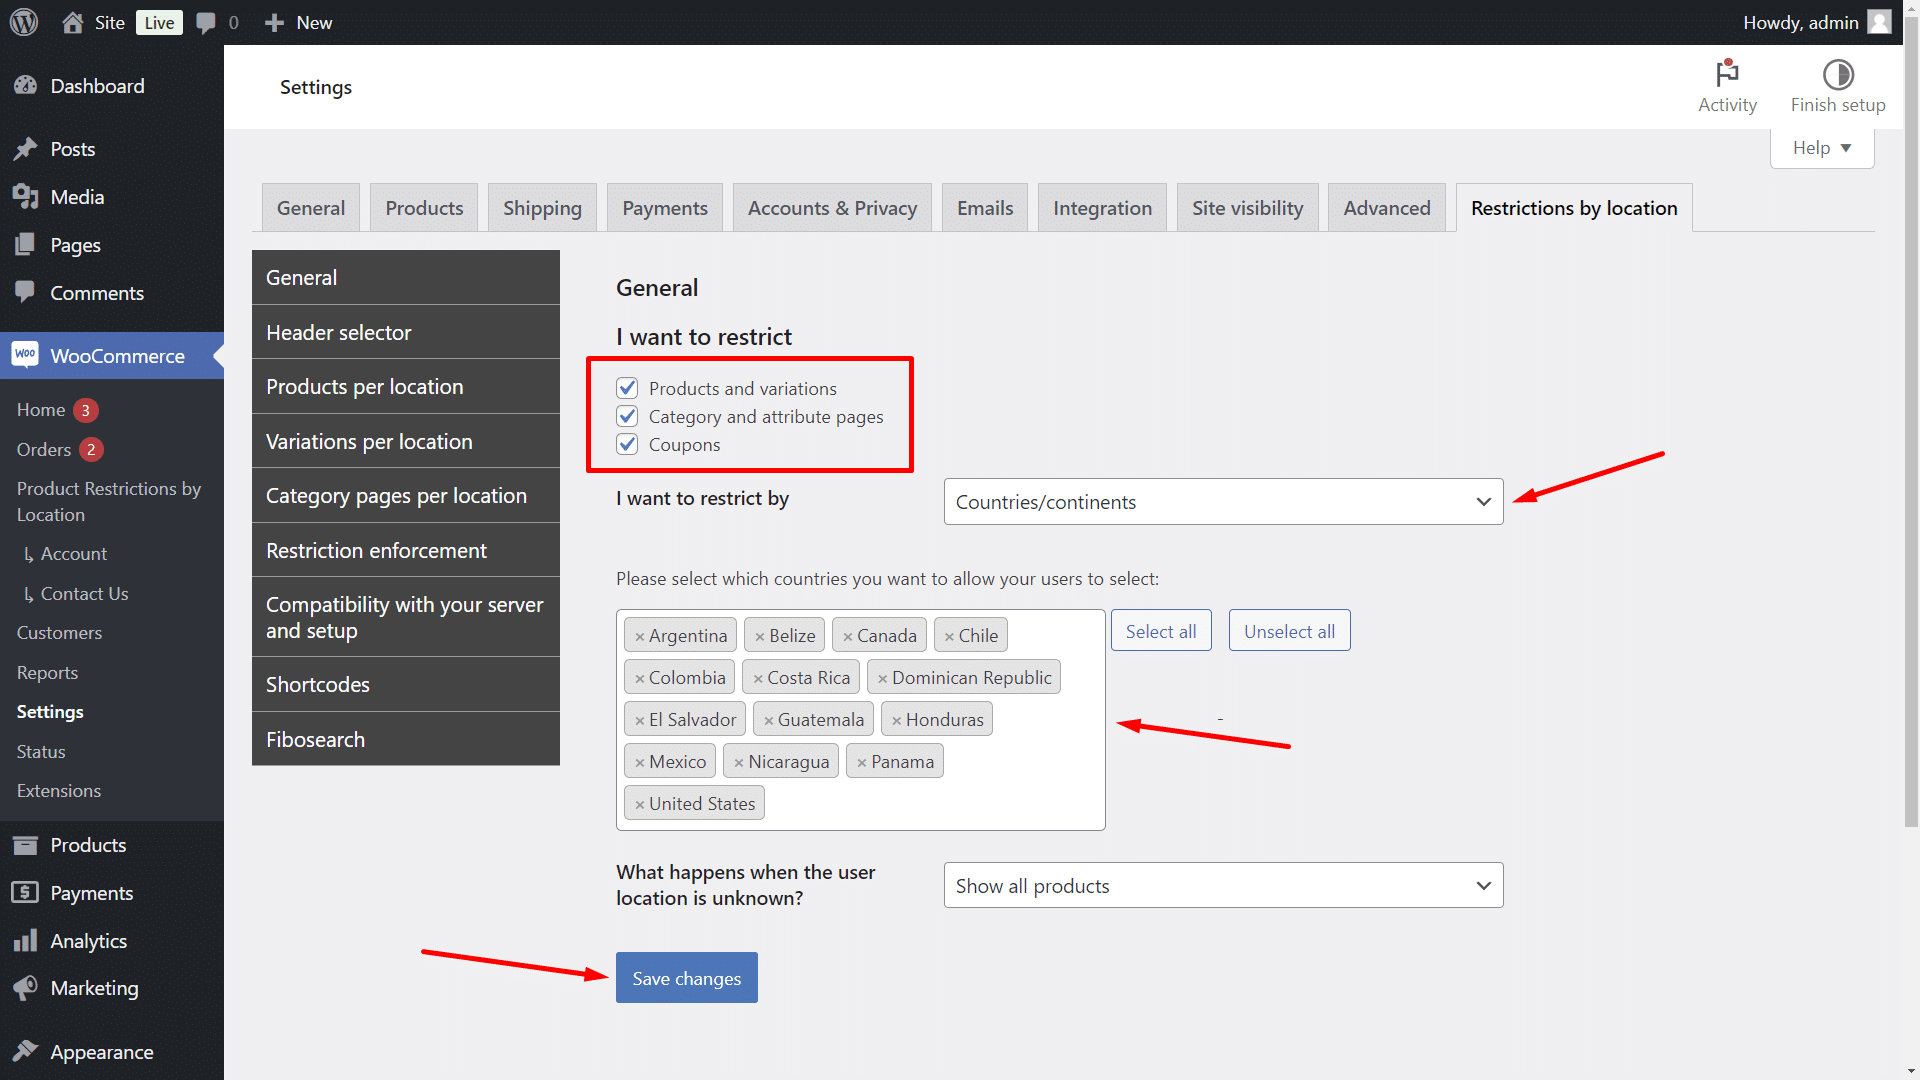
Once there, select these values in the General tab:
- I want to restrict: Select what you want to restrict. In this case, we will select everything:
- Products and variations
- Category and attribute pages
- Coupons
- I want to restrict by: Country/Continents
- Please select which countries you want to allow your users to select: Here you must enter the countries that your users will be able to select on the site. These are NOT the countries in which you will NOT sell, although you must include the countries in which you will not sell, as well as those in which you WILL sell your products.
- Click on Save changes.
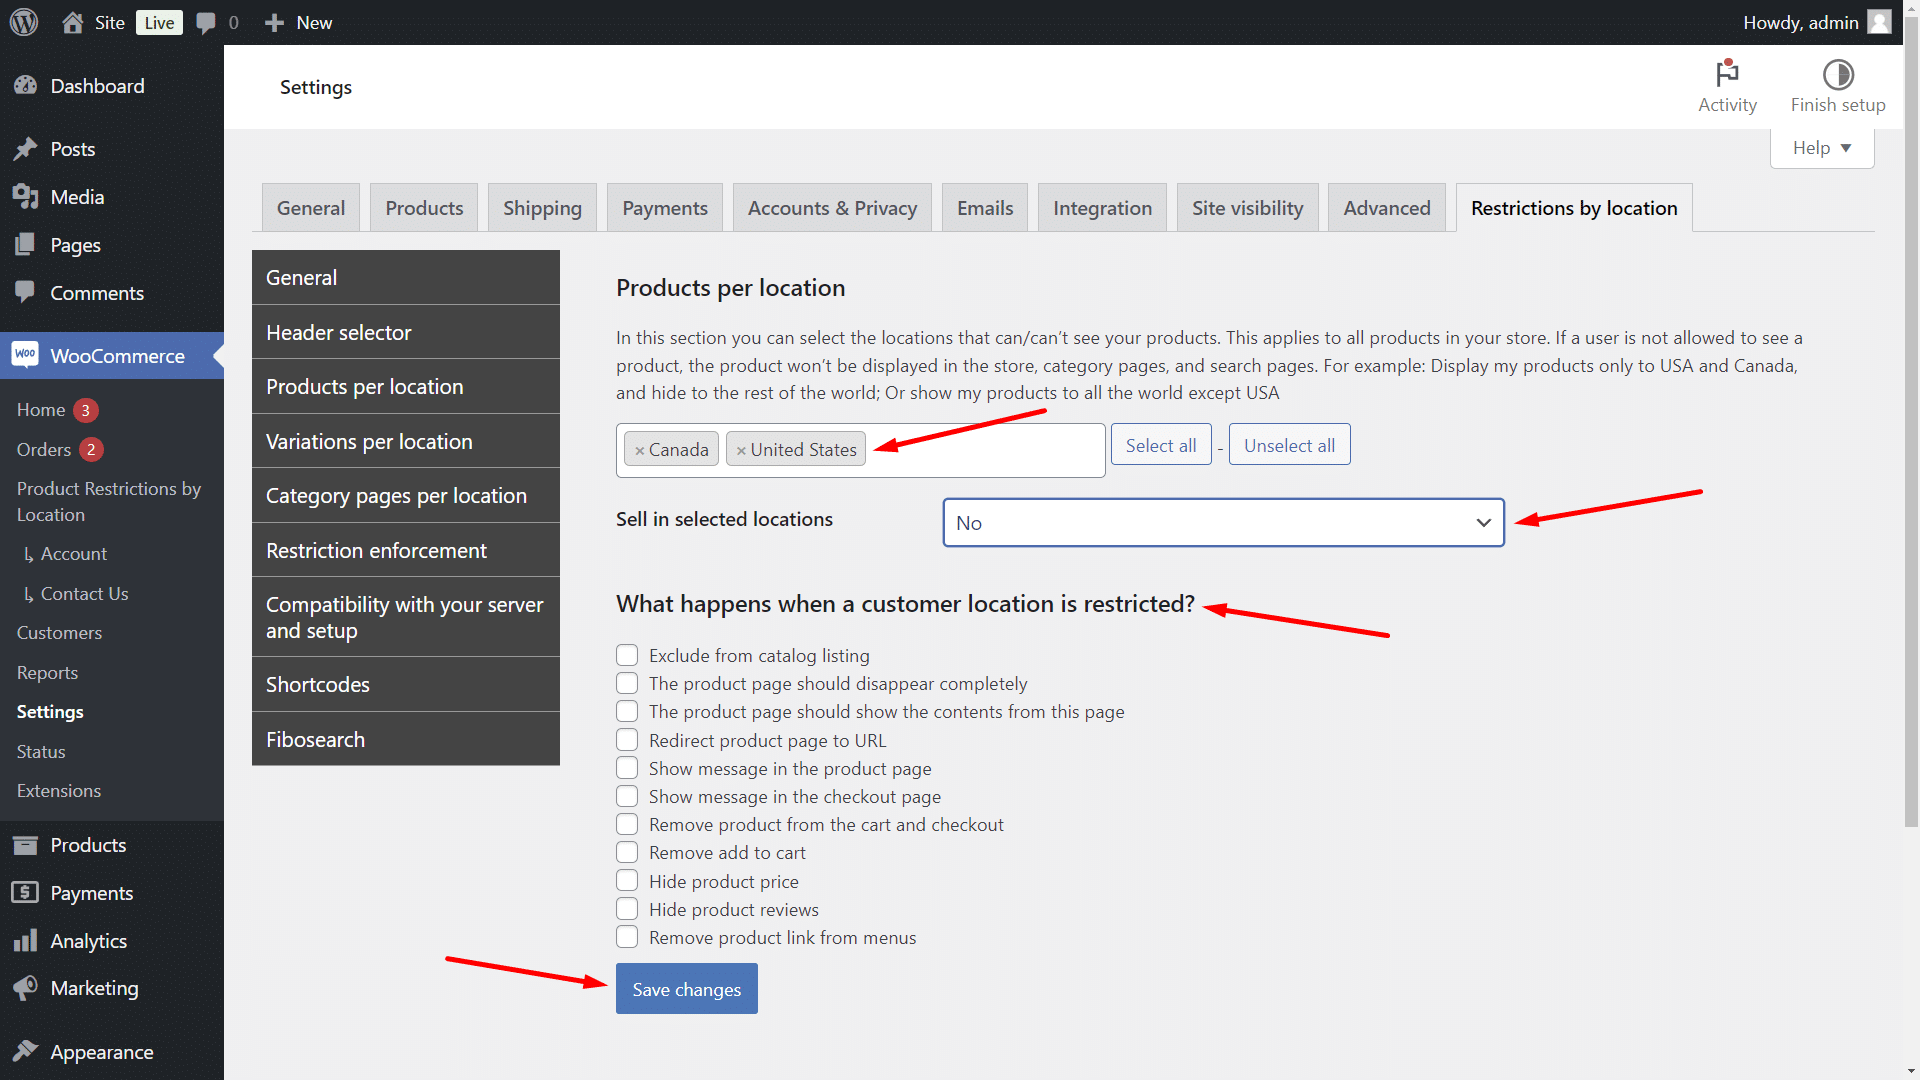
Now it’s time to select the countries where your products won’t be sold. Move to the Products per location tab and select these values:
- Products per location: Here you need to select the countries that won’t be able to see and buy your products. In this case, we will select United States and Canada.
- Sell in selected locations: No
- What happens when a customer location is restricted: You can select any option here:
- Exclude from catalog listing
- The product page should disappear completely
- The product page should show the contents from this page
- Redirect product page to URL
- Show message in the product page
- Show message in the checkout page
- Remove product from the cart and checkout
- Remove add to cart
- Hide product price
- Hide product reviews
- Remove product link from menus
- Once you’ve selected the values you want, click on Save changes.
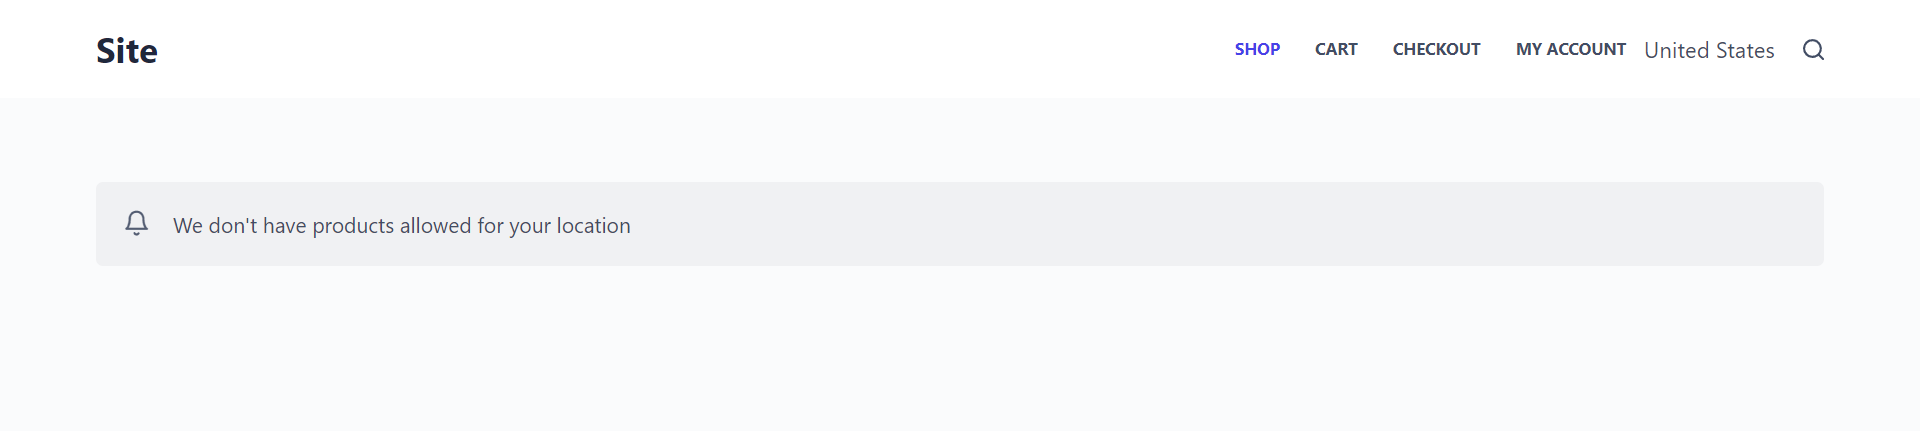
When customers visit the store, they will see a popup that will show them the countries available for selection and ask them to select their location (you can select the popup options in the Header Selector tab).
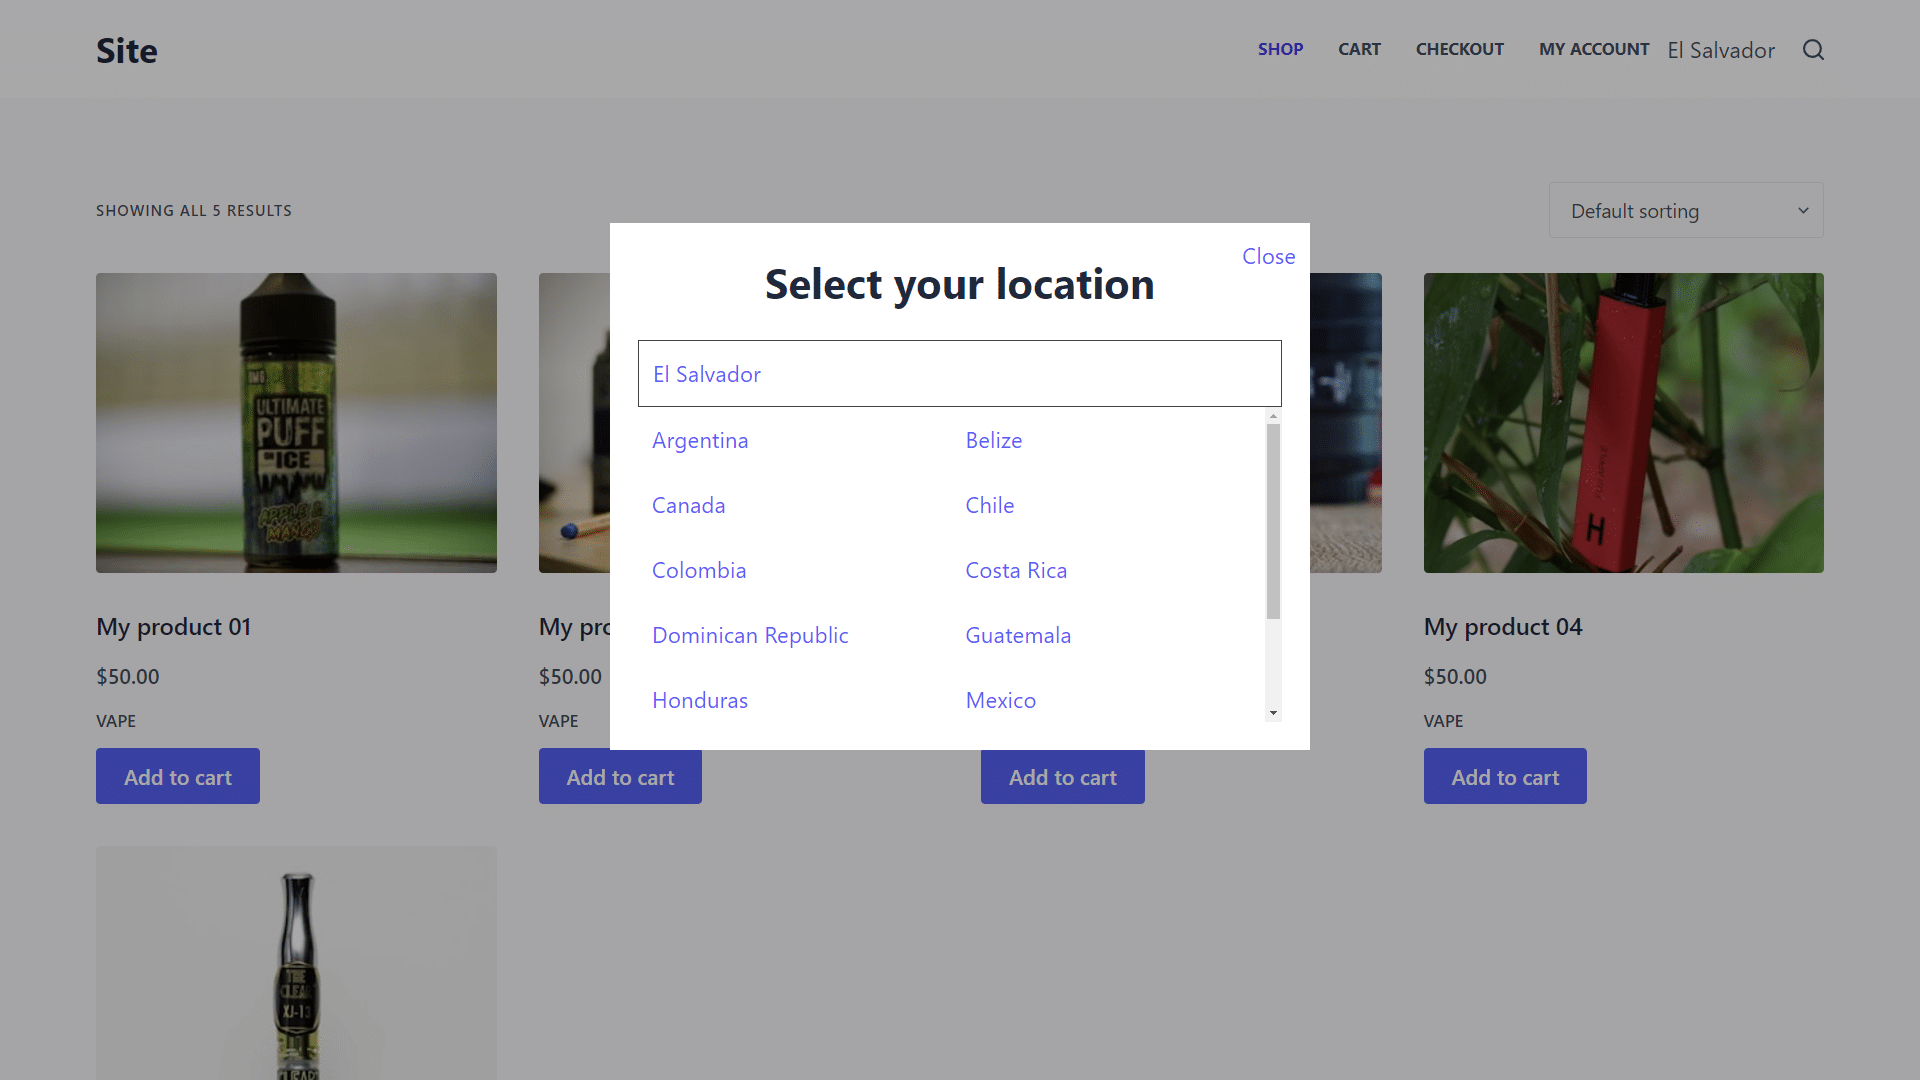
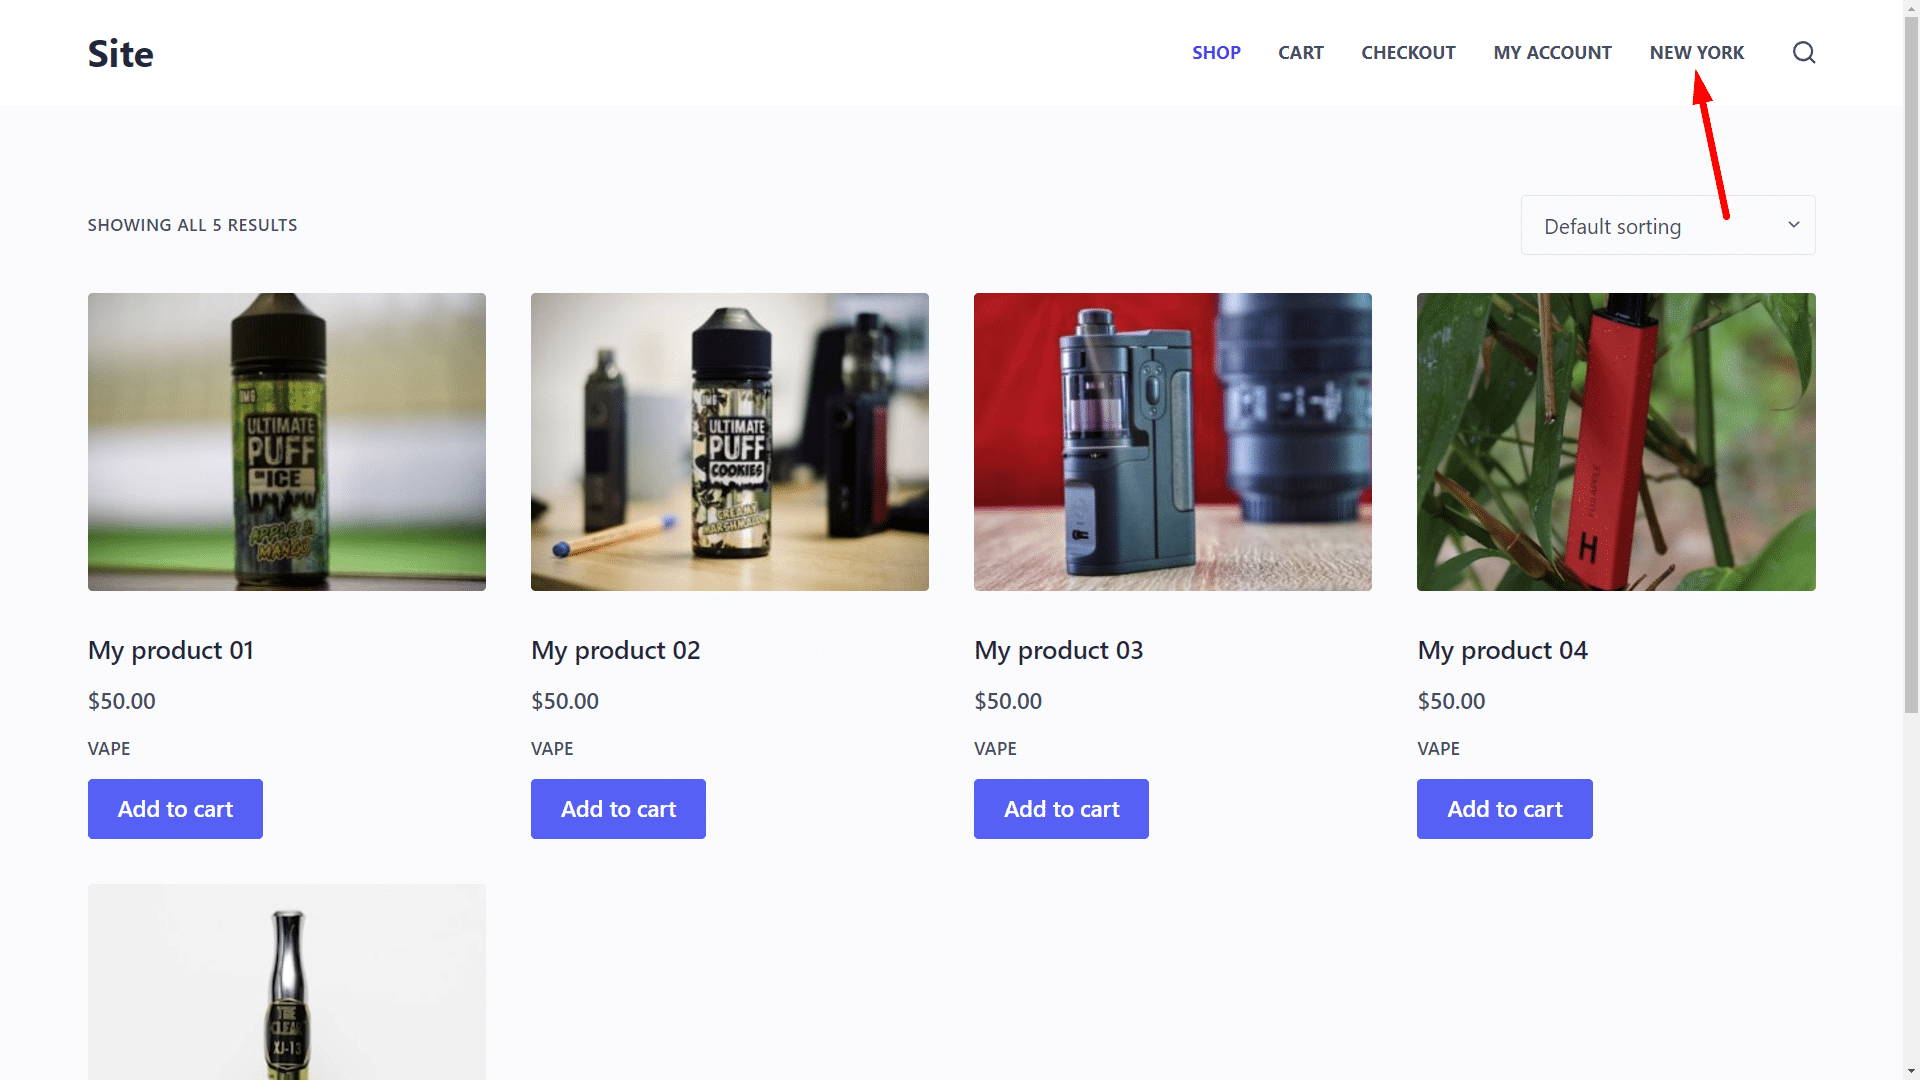
If customers select a country where your products are not restricted, they will see the products without any problems.
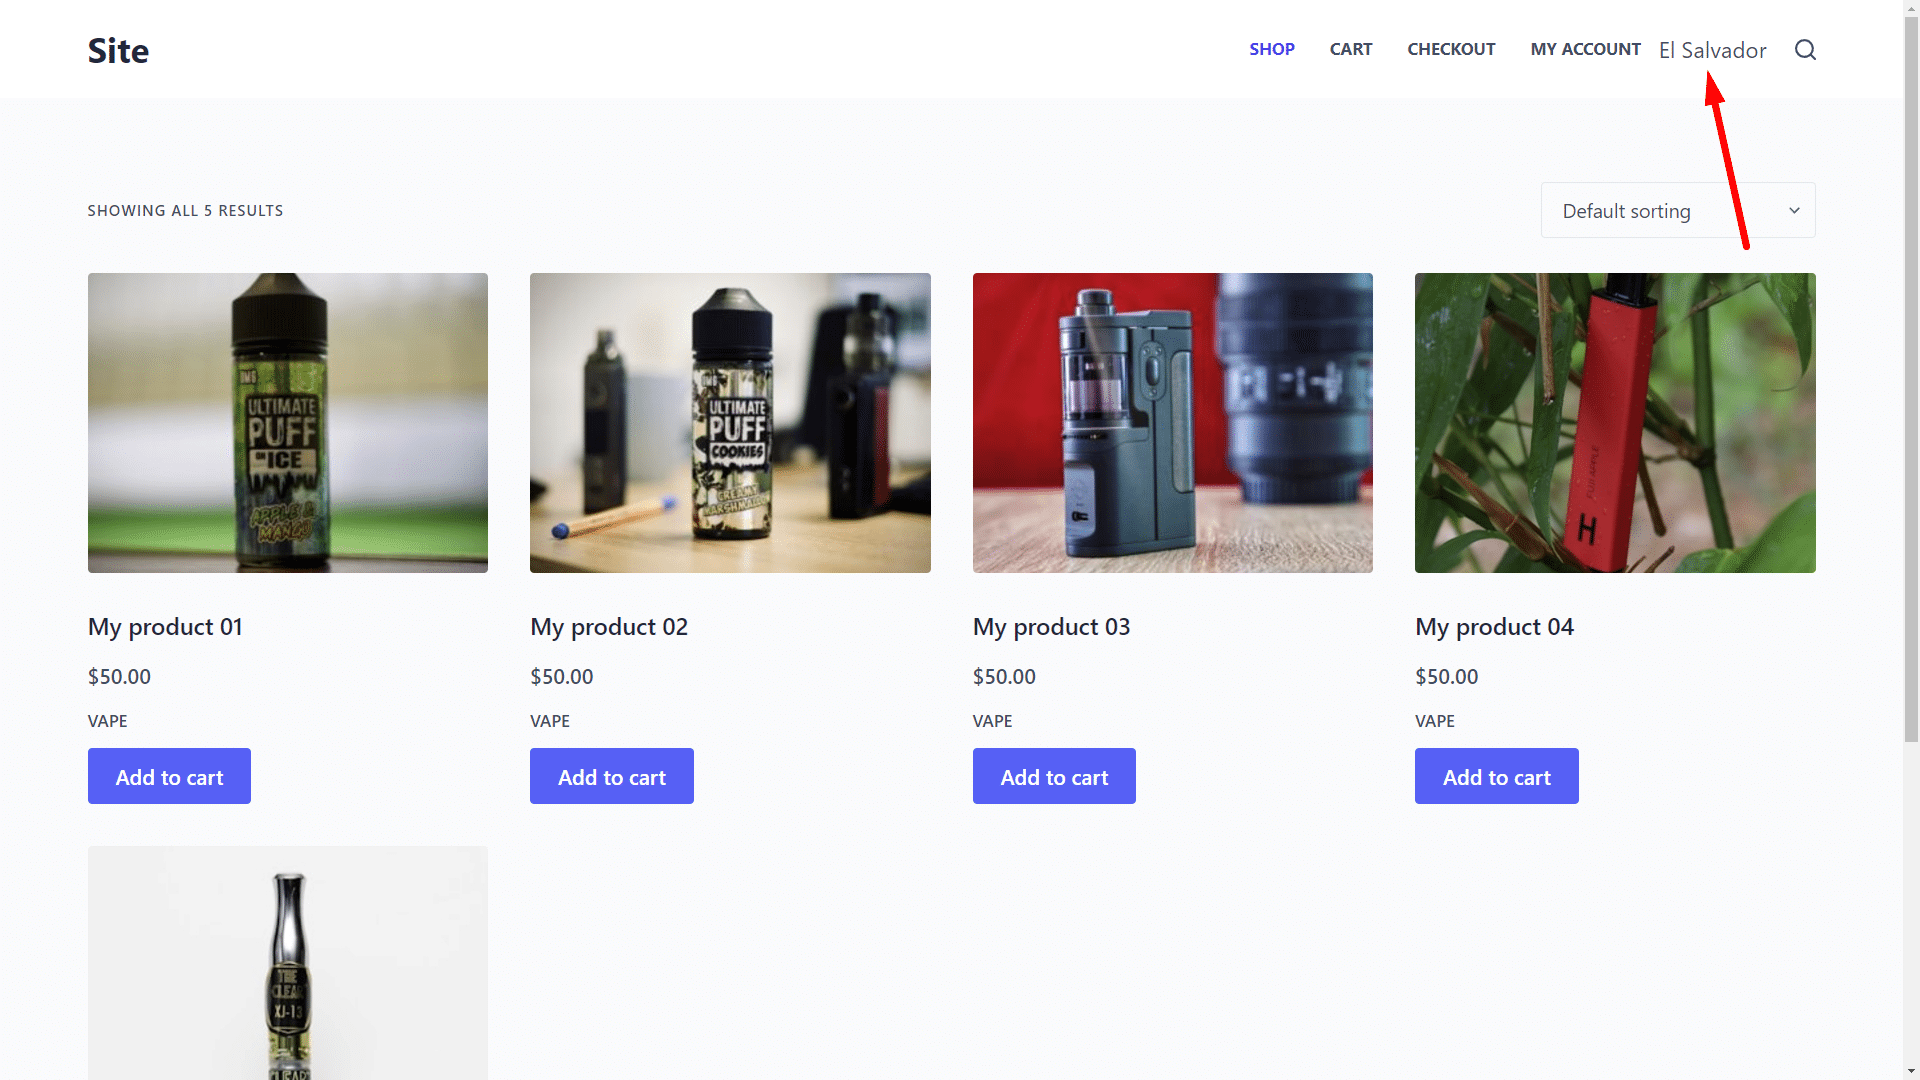
Customers will see a dropdown selector in the navigation menu of your site, where they can select and change their country.

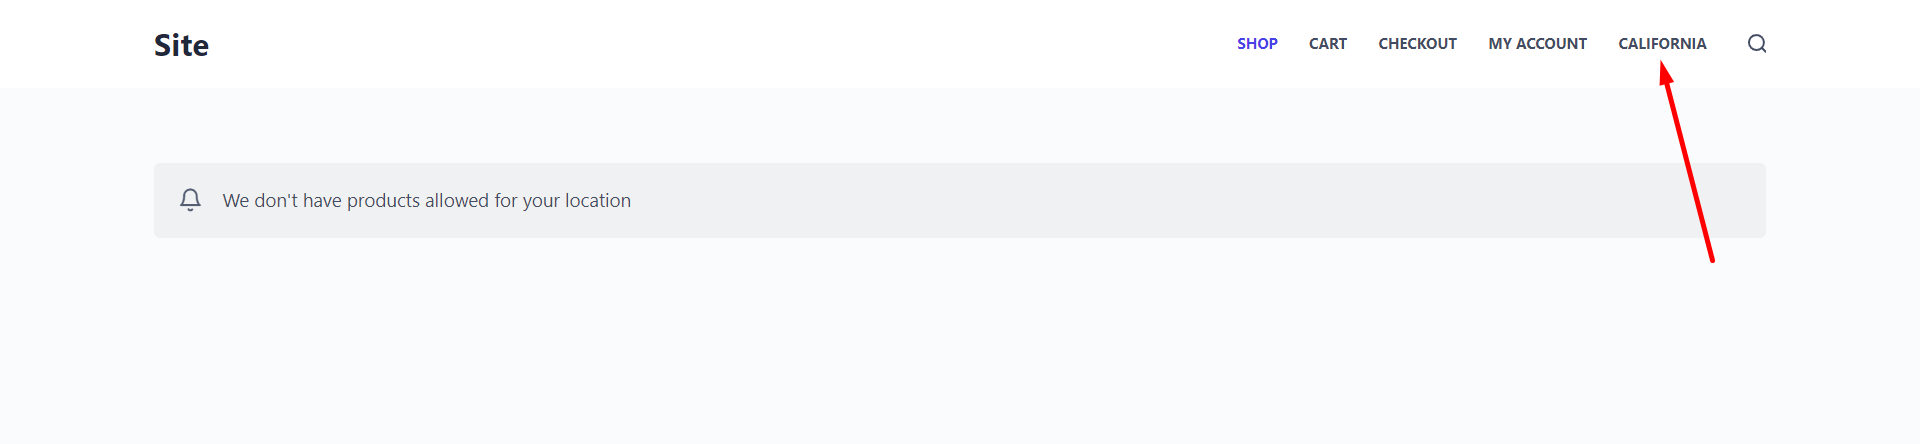
But if they select a country they don’t sell to, they might not see the products, or see them without being able to add them to the cart, etc. It all depends on what you have selected to happen when a customer’s location is restricted.
This is how you can restrict your vape products by country.
Option 2 – Restrict all your WooCommerce Vape products by state or province
Another option is to restrict vaping products by state or province of a specific country. This is really useful if you only sell your products in one country, but in that country there are state restrictions that prohibit certain types of products.
To restrict all your products by state or province, go to WooCommerce > Settings > Restrictions by Location.
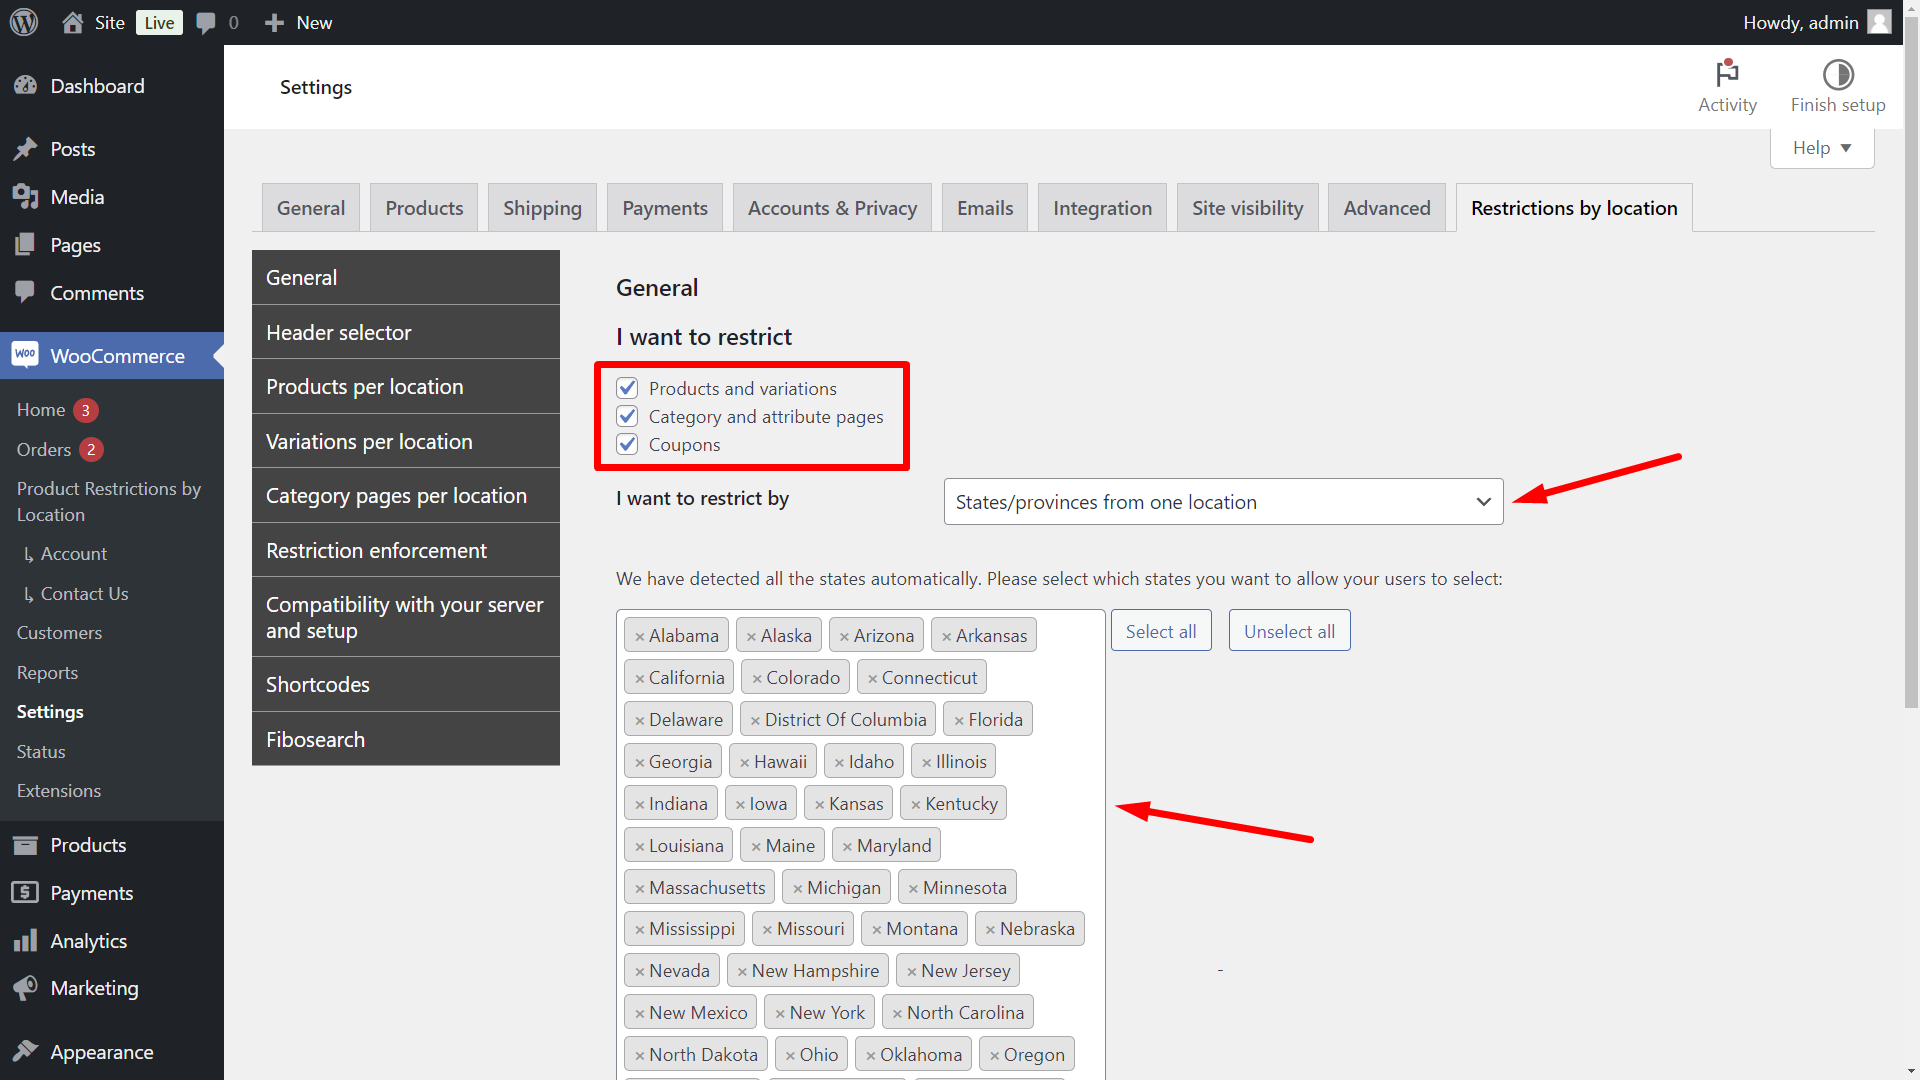
Once there, go to the General tab and select the following values:
- I want to restrict: Select what you want to restrict. In this case, we will select:
- Products and variations
- Category and attribute pages
- Coupons
- I want to restrict by: States/provinces from one location
- Please select which states you want to allow your users to select: Here you must select all the statuses that your users will be able to choose. In this case, we are going to select all states in the United States. Keep in mind that these are not yet the states in which your products are restricted, which comes in the next step.
- Now you need to click on Save changes.
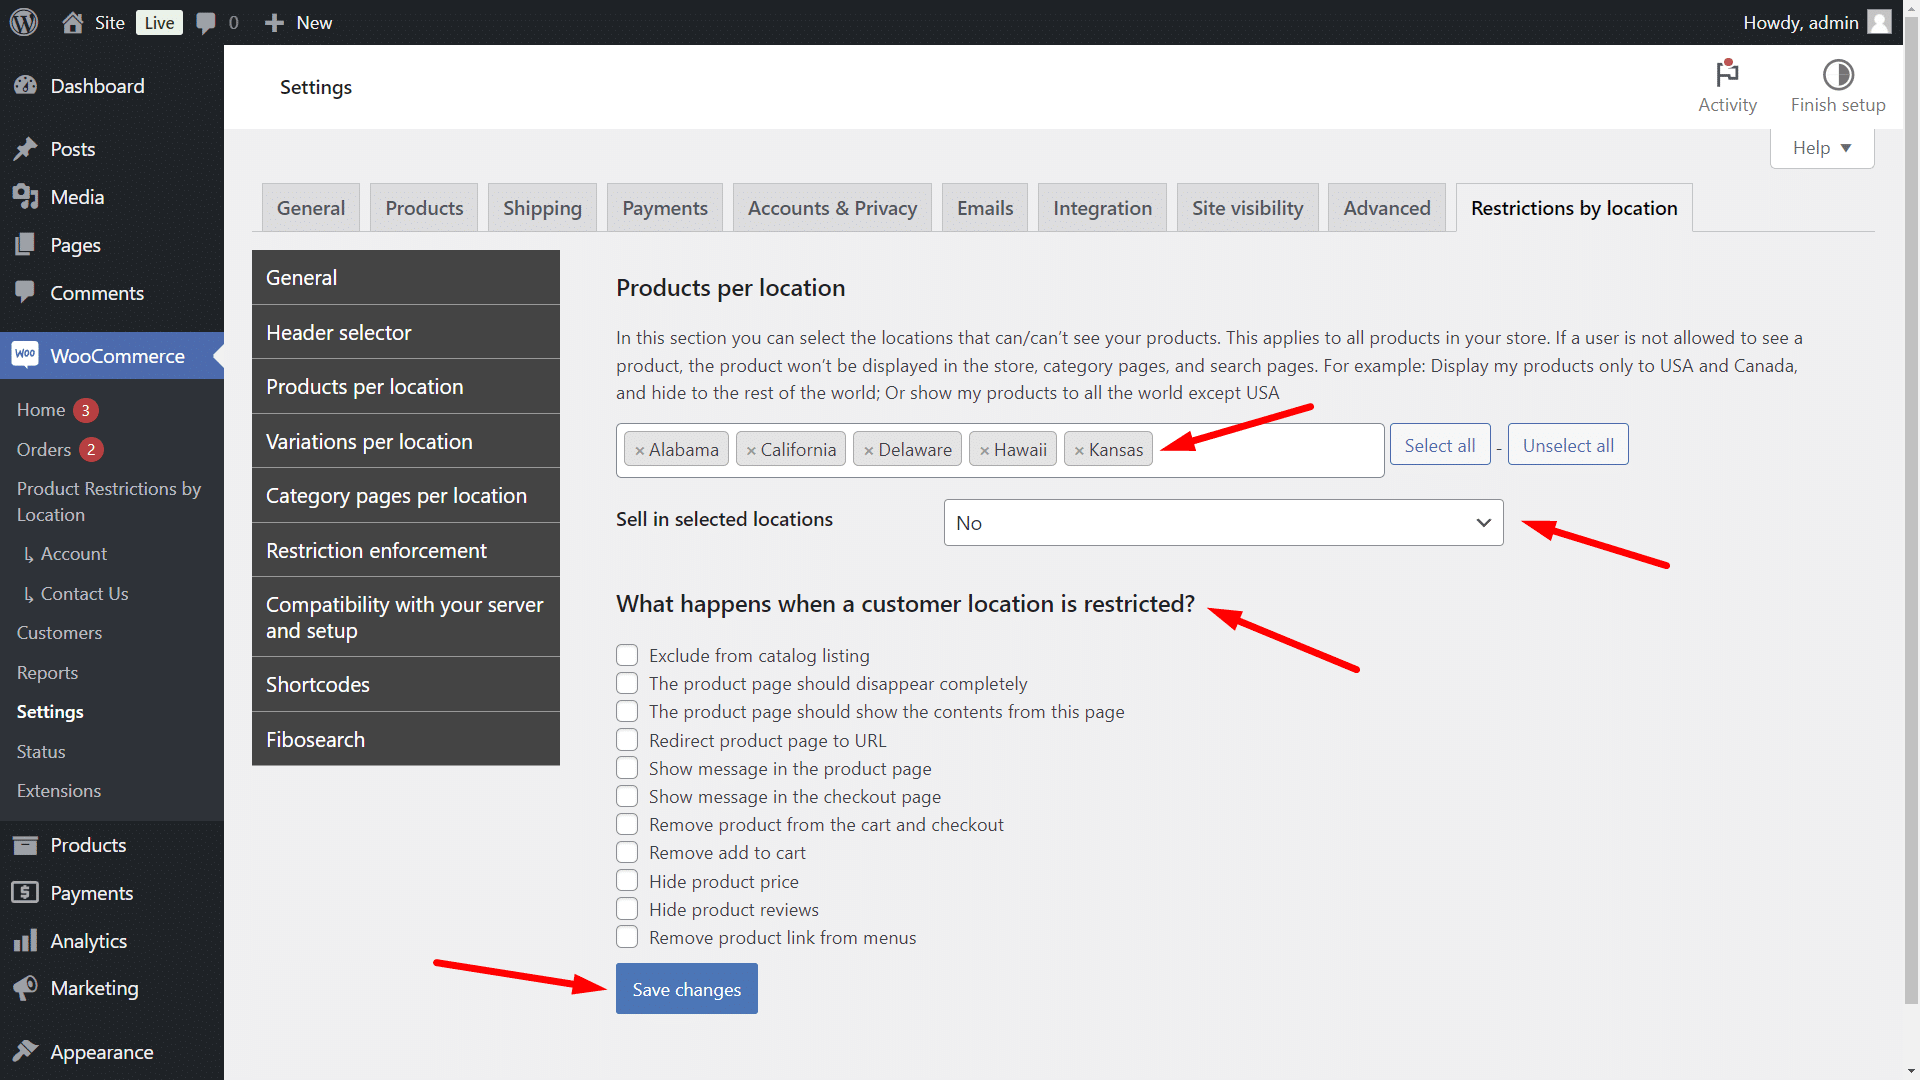
Now it’s time to select the states or provinces where your products won’t be sold. Move to the Products per location tab and select these values:
- Products per location: Here you must select all the states/provinces in which you will not sell your products. In this example, we will select Alabama, California, Delaware, Hawaii, Kansas.
- Sell in selected locations: No
- What happens when a customer location is restricted: You can select any option here:
- Exclude from catalog listing
- The product page should disappear completely
- The product page should show the contents from this page
- Redirect product page to URL
- Show message in the product page
- Show message in the checkout page
- Remove product from the cart and checkout
- Remove add to cart
- Hide product price
- Hide product reviews
- Remove product link from menus
- Once you’ve selected the values you want, click on Save changes.
When customers visit your WooCommerce vape store, they will see a popup that will show them the list of states or provinces and ask them to select their state/province.
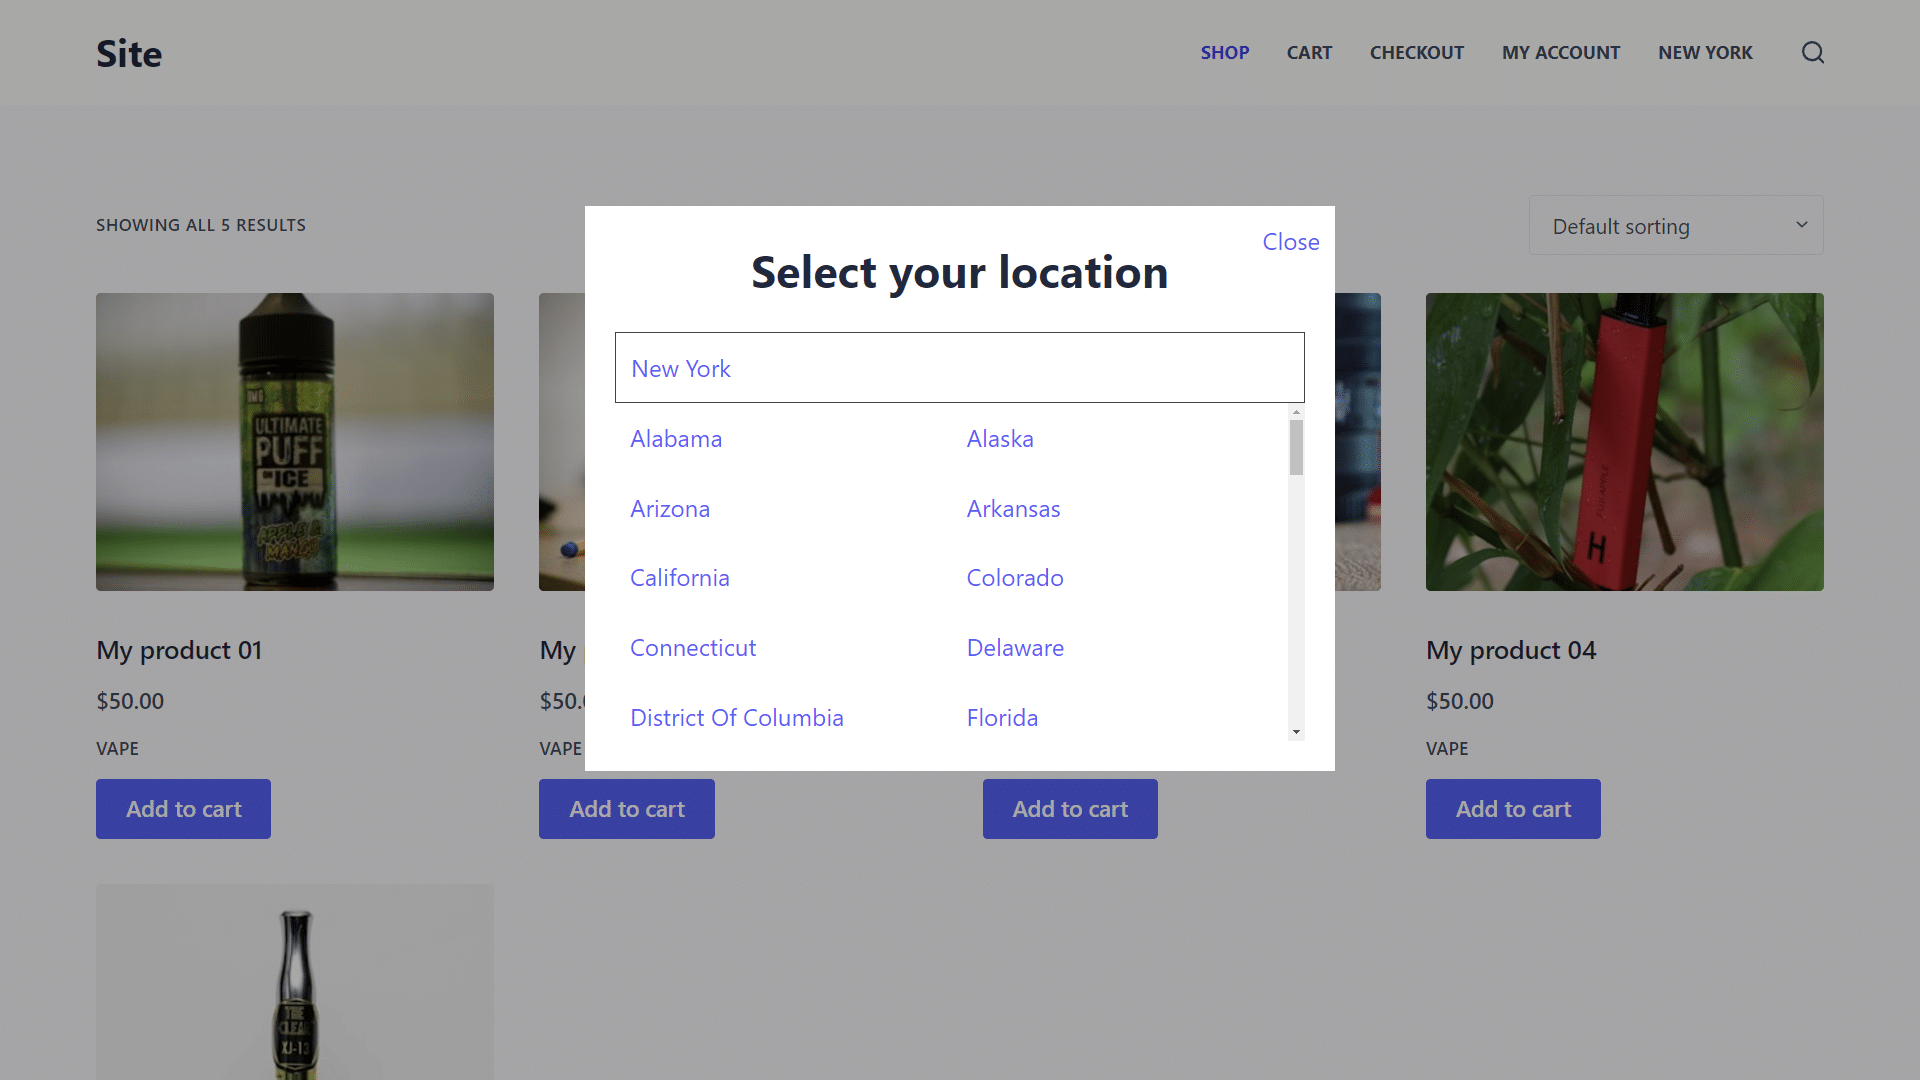
If they select a state where your products are not banned, they will see the products without a problem.
But if they select states or provinces where your products are not available, they might not see the products, see them without the add to cart button, etc., depending on what you have selected to happen when the user’s location is restricted.
Option 3 – Restrict specific categories by country, state, province, etc.
If it is not the entire store that you want to restrict, you can restrict specific categories of products from being sold in specific countries, states or provinces. For example, you may have a vaping store that sells both nicotine and non-nicotine products, and want to restrict only nicotine products, in order to comply with country or state specific restrictions.
In this case, it may be useful to create two WooCommerce categories, one for nicotine products and one for non-nicotine products.
After selecting the country or state/province restriction method in WooCommerce > Settings > Restrictions by location, you need to do the following:
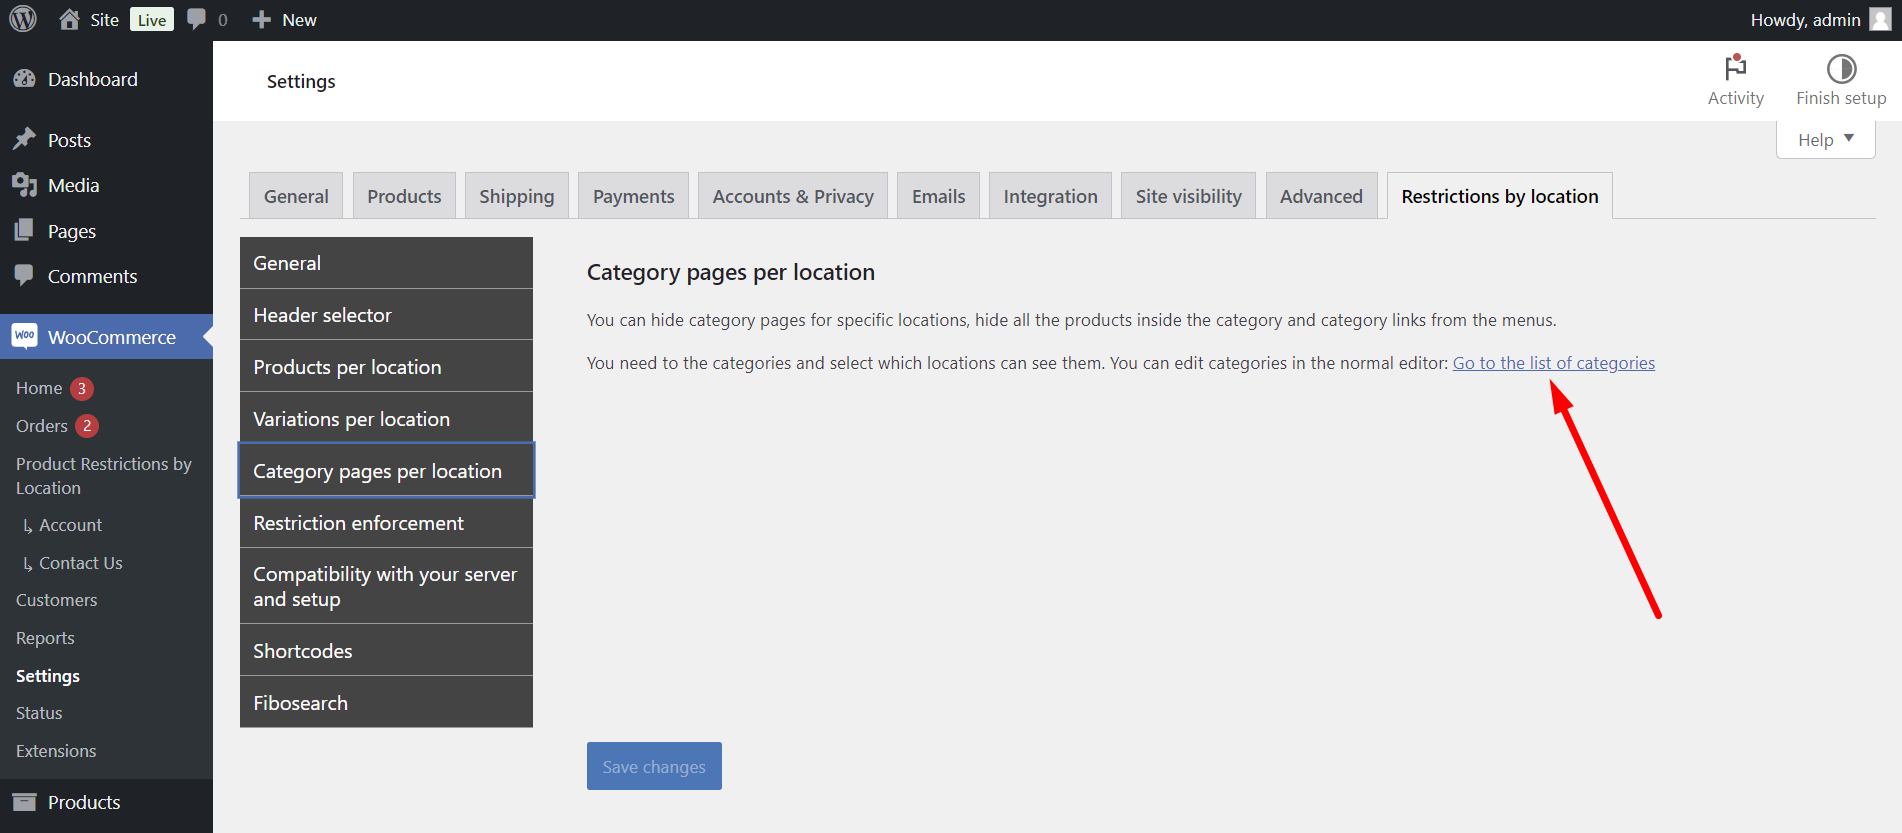
Go to the Category pages per location tab and click on Go to the list of categories.
Once you’re in the Product categories page, you need to open the category you want to restrict.

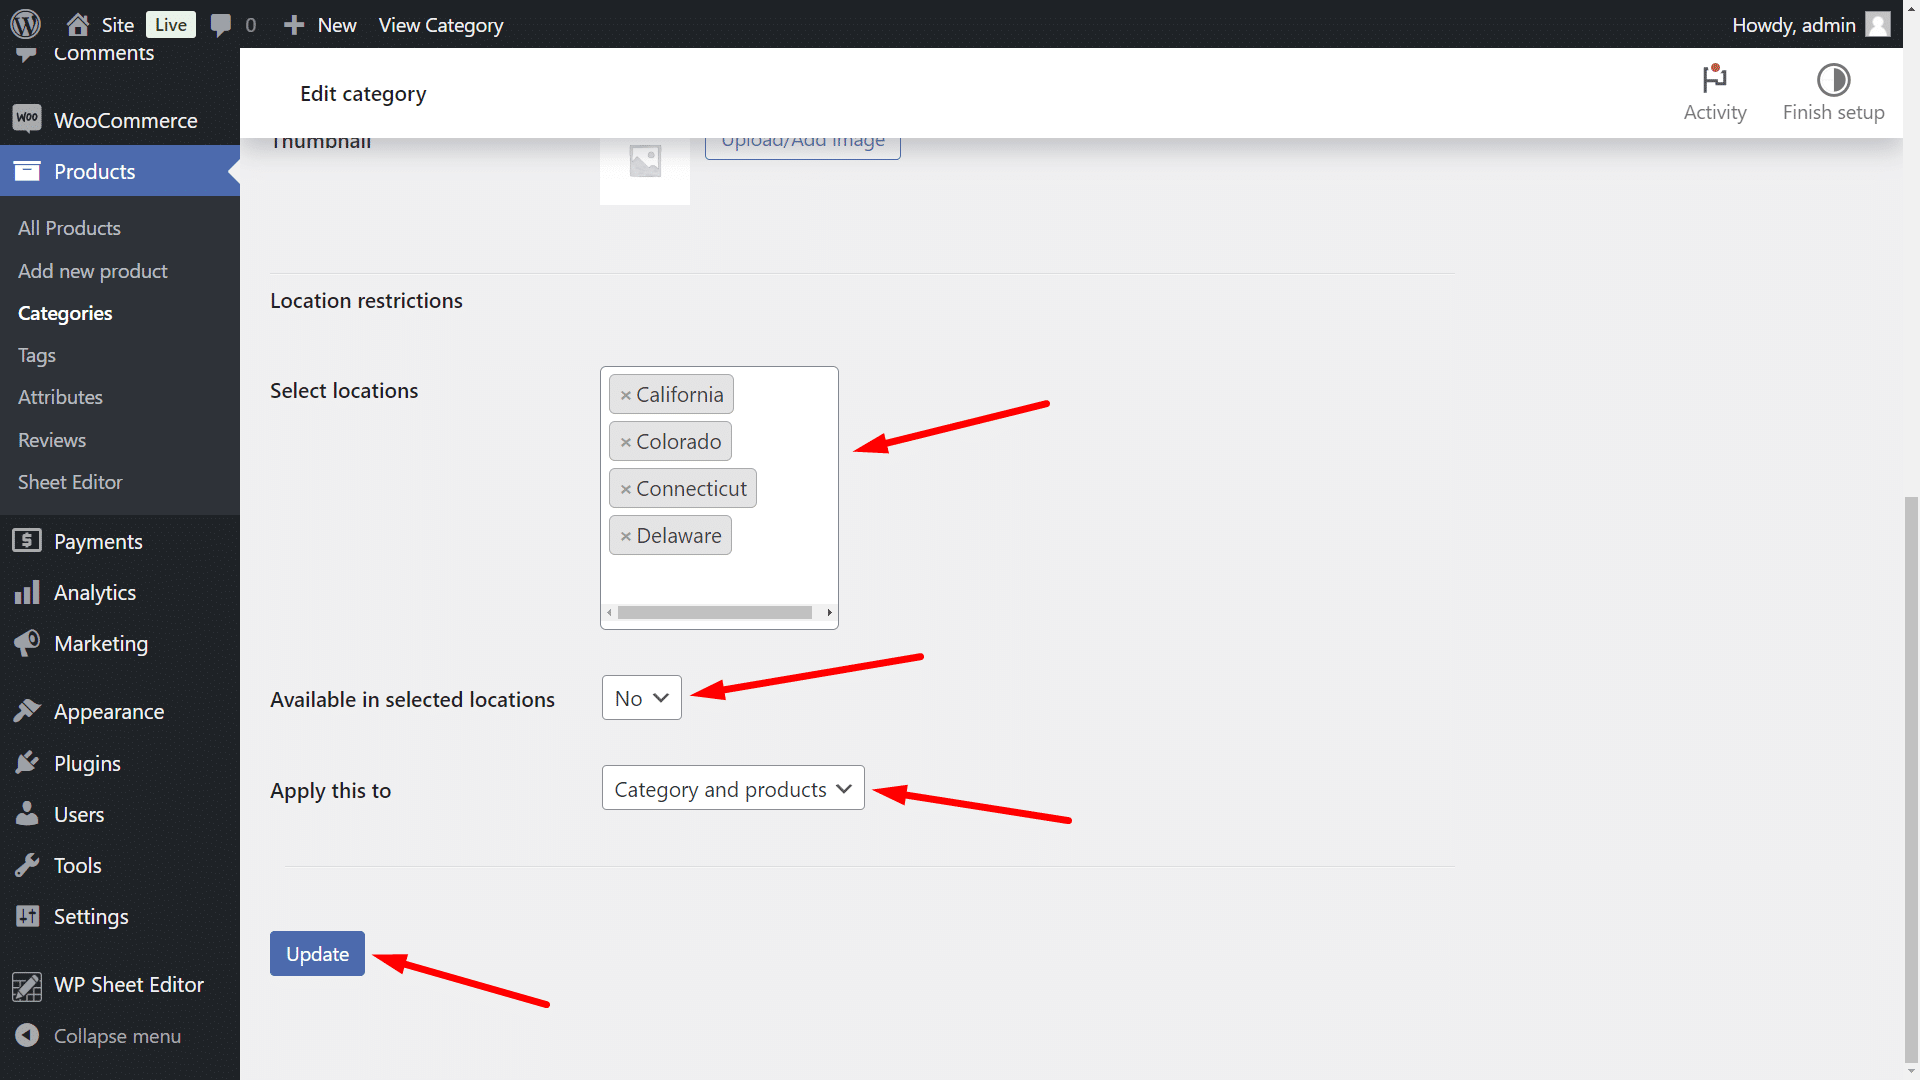
Then, select these values in the edit category form:
- Select locations: Select the countries/states/provinces where you don’t want to sell the products within this category.
- Available in selected locations: No
- Apply this to: Select the option you want. In this example, we will select the Category and products option.
- Click on Update.
By doing so, the store categories will be available for all countries, states or provinces, except for the categories you have restricted, which will only be available for the countries, states or provinces where you have not applied restrictions.
Option 4 – Restrict vape products by customer age
WooCommerce Product Restrictions by Location allows you to create custom location lists, which also allows you to create a restriction by customer age. This is great because you can ask your store visitors to select their age and base the ability to buy or not on the age of the customer.
For example, we will create two age groups: 18+ and Under 18. We will sell vape products to customers who are 18+ years old, and not sell to users who are under 18.
To do this, you need to go to WooCommerce > Settings > Restrictions by location.
Once there, you need to select these values:
- I want to restrict: Select what you want to restrict. In this case, we will select:
- Products and variations
- Category and attribute pages
- Coupons
- I want to restrict by: Custom list of locations
- Please enter the list of locations that you will allow your users to select: In this example, we will enter two age groups: 18+ and Under 18.
- Now you need to click on Save changes.
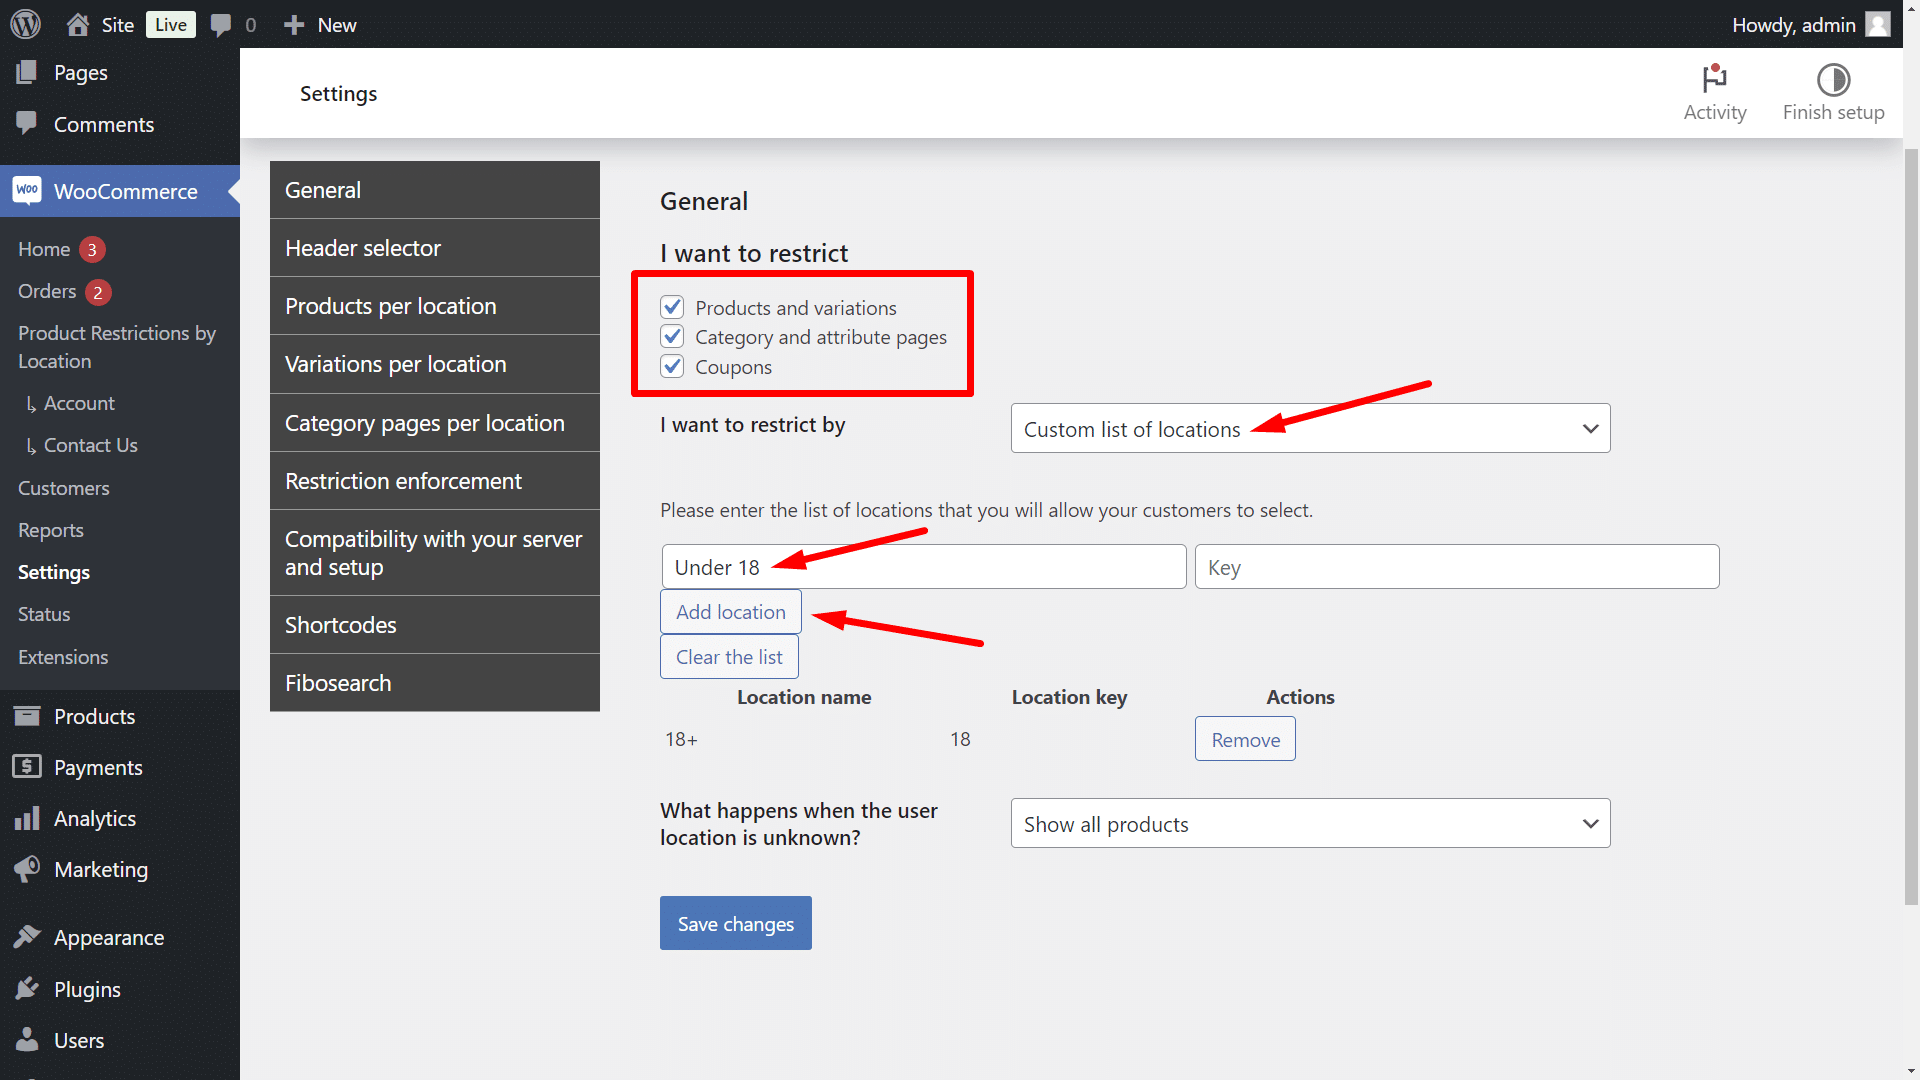
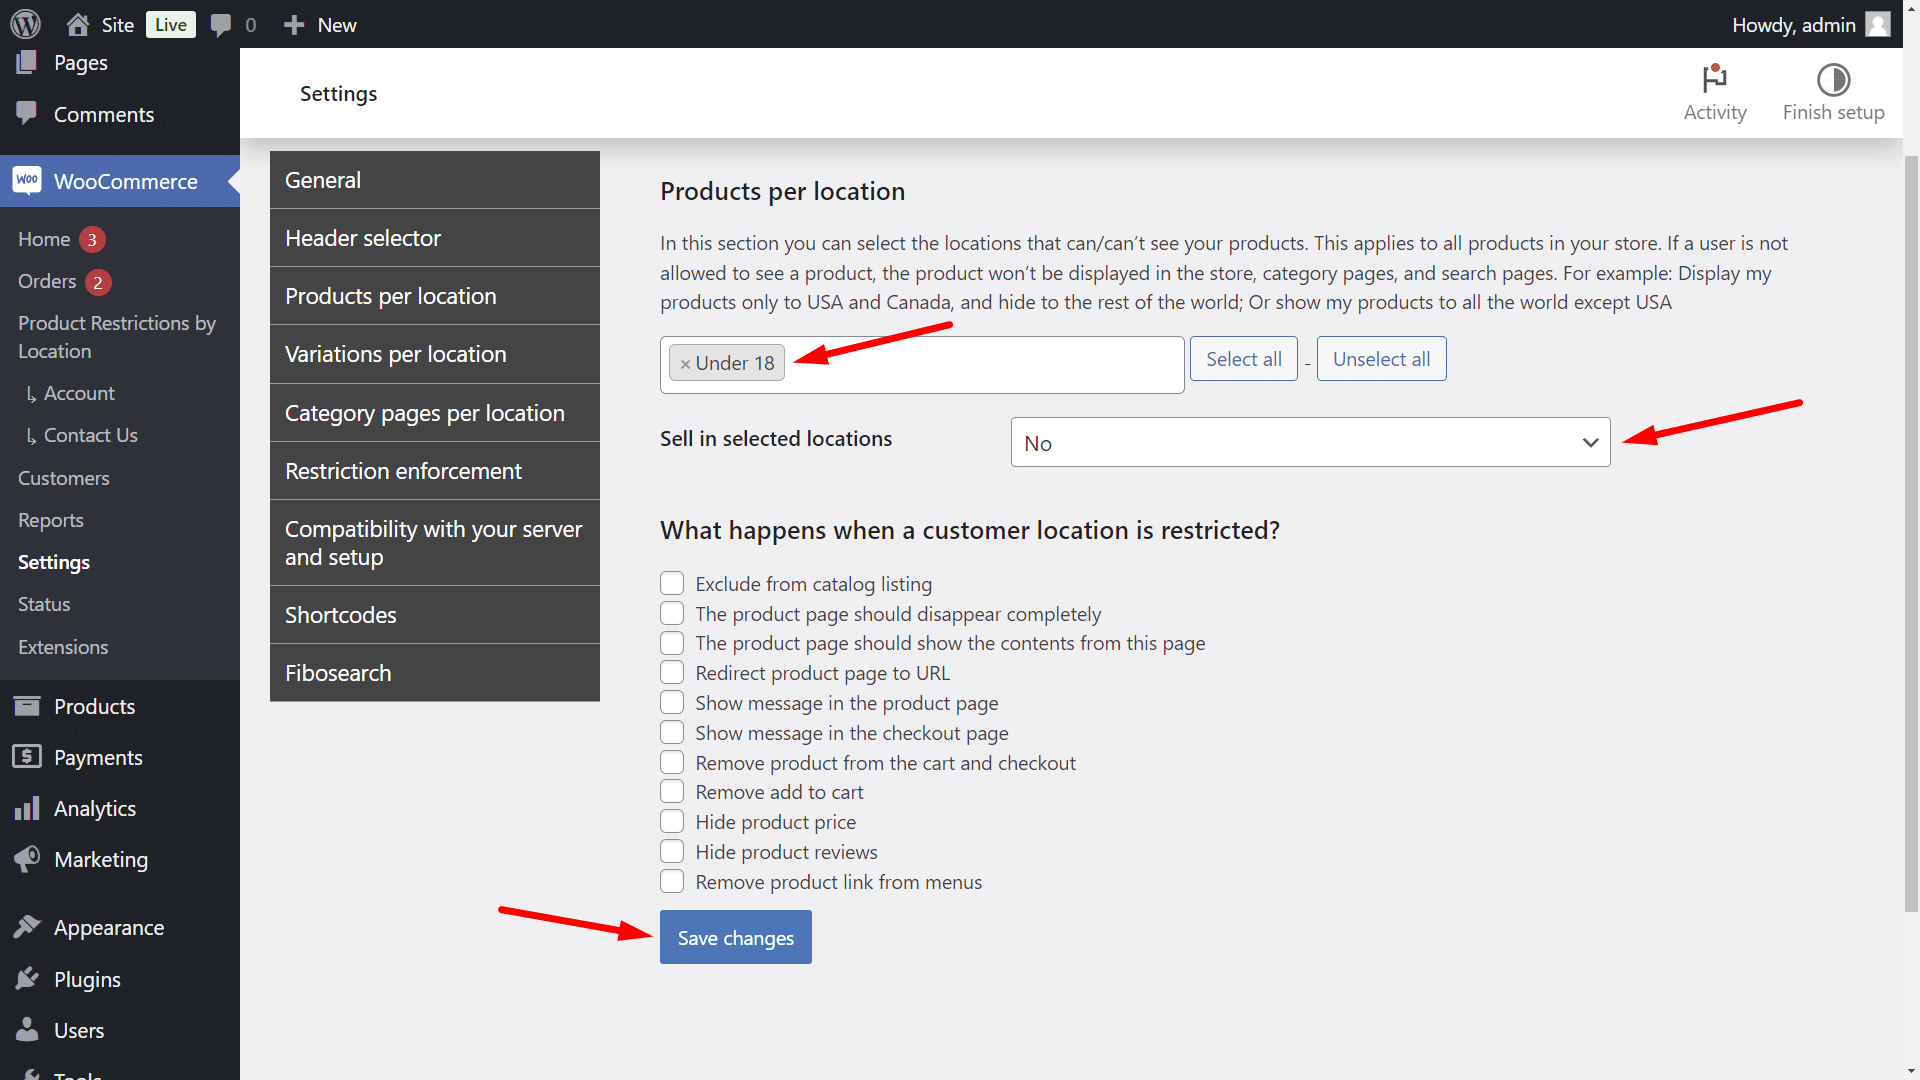
- Products per location: Here you need to enter the ages that won’t be able to buy your products. In this case, we will enter the “Under 18” group.
- Sell in selected locations: No
- What happens when a customer location is restricted: You can select any option here:
- Exclude from catalog listing
- The product page should disappear completely
- The product page should show the contents from this page
- Redirect product page to URL
- Show message in the product page
- Show message in the checkout page
- Remove product from the cart and checkout
- Remove add to cart
- Hide product price
- Hide product reviews
- Remove product link from menus
- Once you’ve selected the values you want, click on Save changes.
When customers visit your store, they will see a popup that will show them the two age groups they can select.
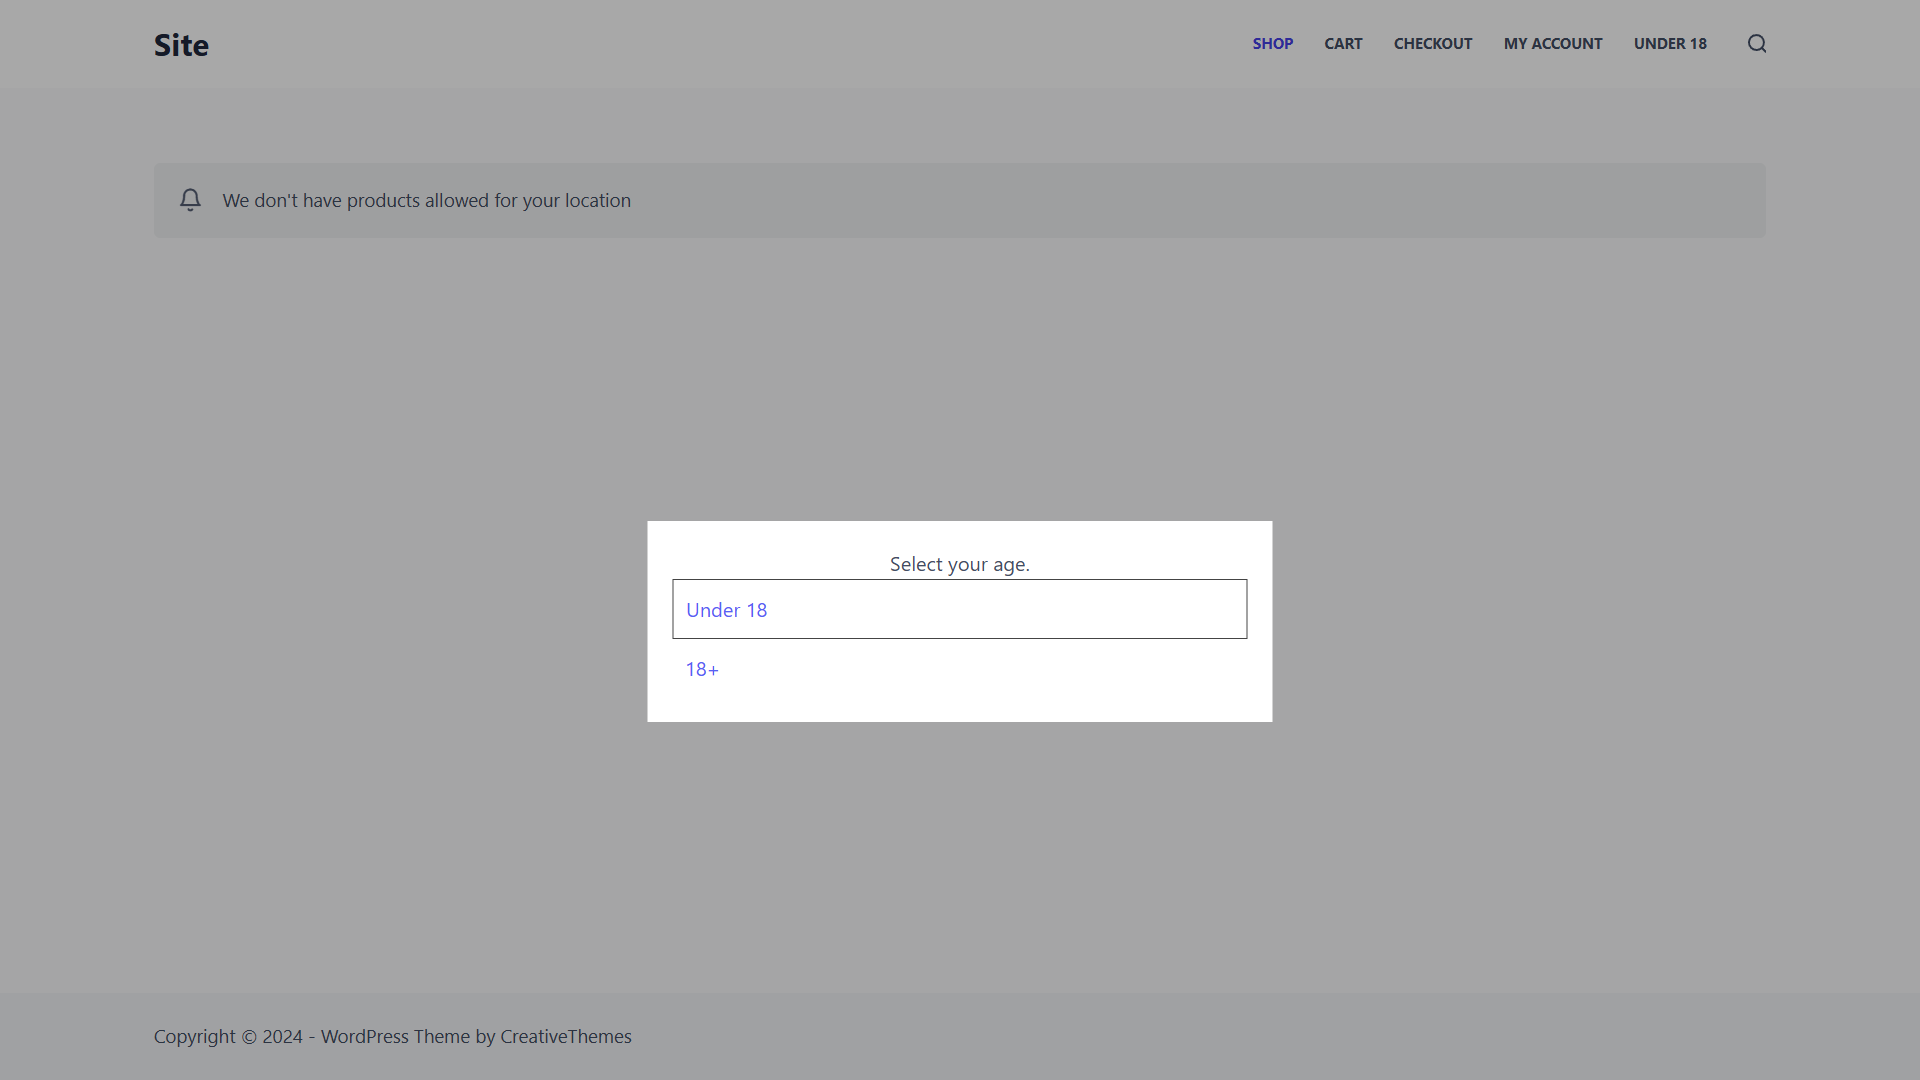
If they select “Under 18”, they will not see products in the store, which means they cannot buy your vape products. They could see the products but not be able to add them to the cart. It all depends on what you select to happen when a customer location is restricted.
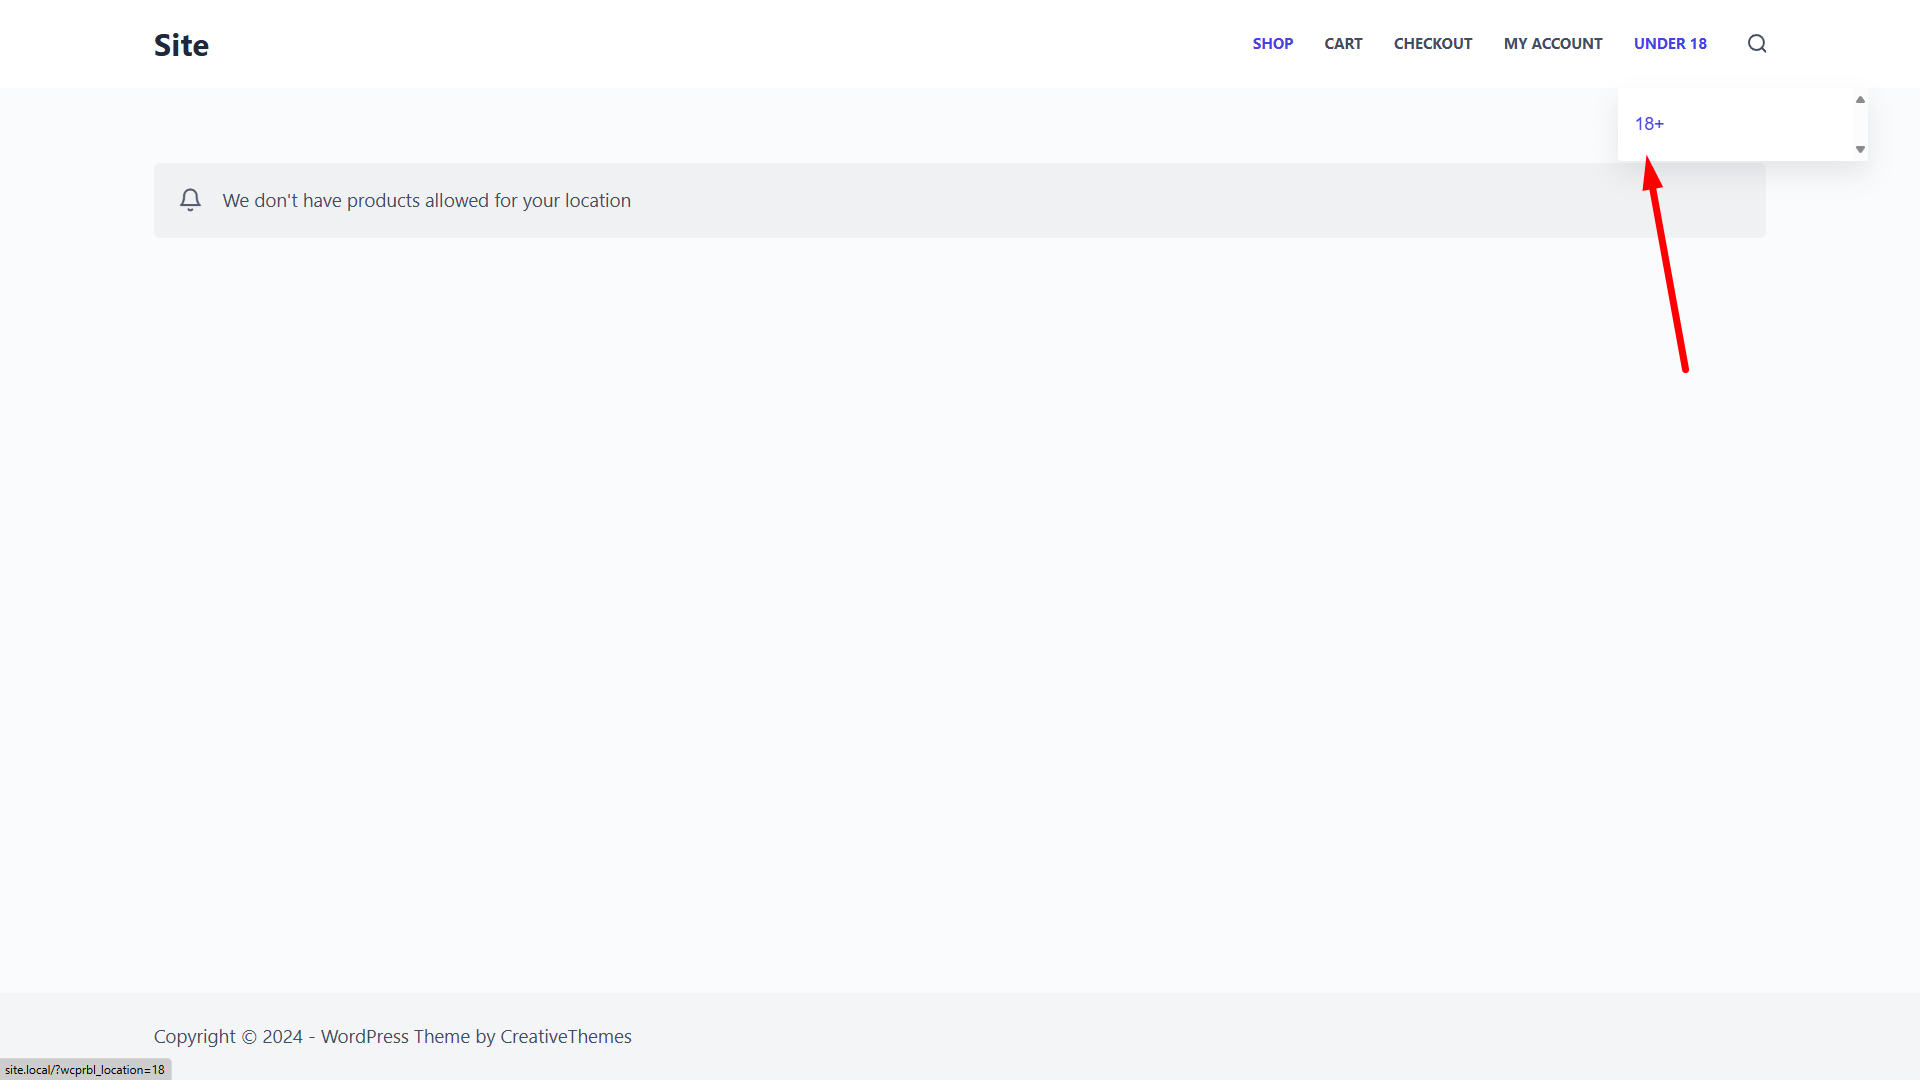
But if they select “18+”, they will see the products and will be able to purchase them.

As you can see, selling vaping products with WooCommerce is possible, respecting country, state or province restrictions. You can also do it respecting age restrictions and avoid selling products to non-allowed age groups.
- You can also read: WooCommerce – Hide Payment Gateways Based on User Age
Make a WooCommerce vape shop easily!
There are few things as satisfying as running your business without legal problems that will eventually cost you large amounts of money.
We are sure that the Vaping industry will continue to grow, and we want you to be ready to sell your vaping products with WooCommerce without legal problems.
It is also very important to mention that you can apply these and other restrictions on your products. Visit our blog to find more ways to manage your country restrictions with WooCommerce Product Restrictions by Location.
You can download the plugin here:
Download WooCommerce Product Restrictions by Store Location Plugin - or - Read more