In this tutorial, we show you how to publish courses for your employees only. This is really useful when you want to have training with your company’s team. You can have employee training courses and programs without having to necessarily meet them in a physical place. At the same time, you need to restrict access to the courses that you’ll publish for your employees.
To create the courses, you need any WordPress plugin that allows you to create and manage courses. Here are some of them:
- LearnDash
- LearnPress
- Tutor LMS
- Lifter LMS
- Teachable
You can use any of these options, or you can even use any other plugin for courses.
To restrict the courses, we’ll use the WordPress Conditional Post Restrictions plugin. It allows you to create conditional restrictions for your posts, pages, courses, events, donations, downloads, recipes, files, etc.
To identify your company’s employees, we’ll use the email account as a restriction parameter. For example, the institutional email can be something like [email protected]. Since the username is different for every user, we need to use the part of the email address that is common to every employee. In this case, that part is the @company part. Therefore, we’ll allow access to our courses to the users whose email address contains the @company value.
You can download the plugin here:
Download WordPress Conditional Post Restrictions Plugin - or - Read more
Once you install the WordPress Conditional Post Restrictions plugin, you need to follow these simple steps to publish courses for employees only.
1- Create or edit the course you want to publish for employees only
Depending on the plugin you’re using, you need to create or edit the courses you want to publish for employees only.
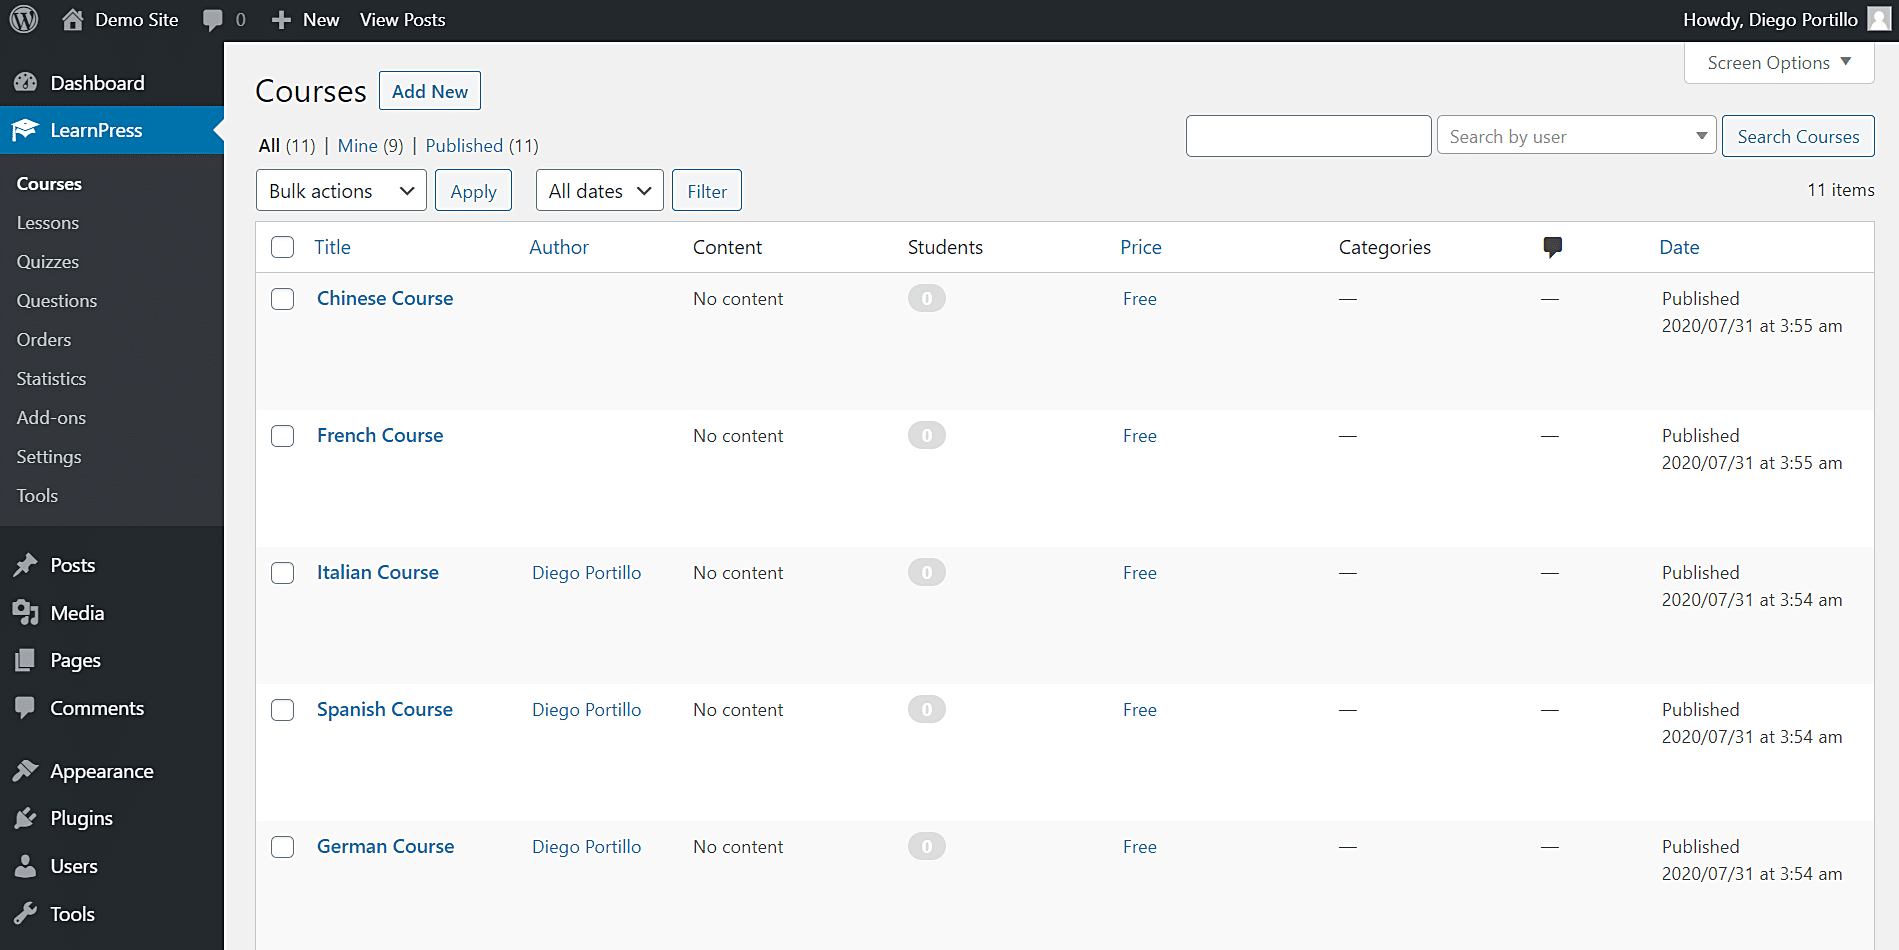
In this example, we’ll use the LearnPress plugin. We’ve already created the courses to publish for employees only. To see the list of courses, we just need to go to LearnPress > Courses.
We’ll edit the Chinese Course to be reserved for employees only.
2- Allow access to a course to employees only
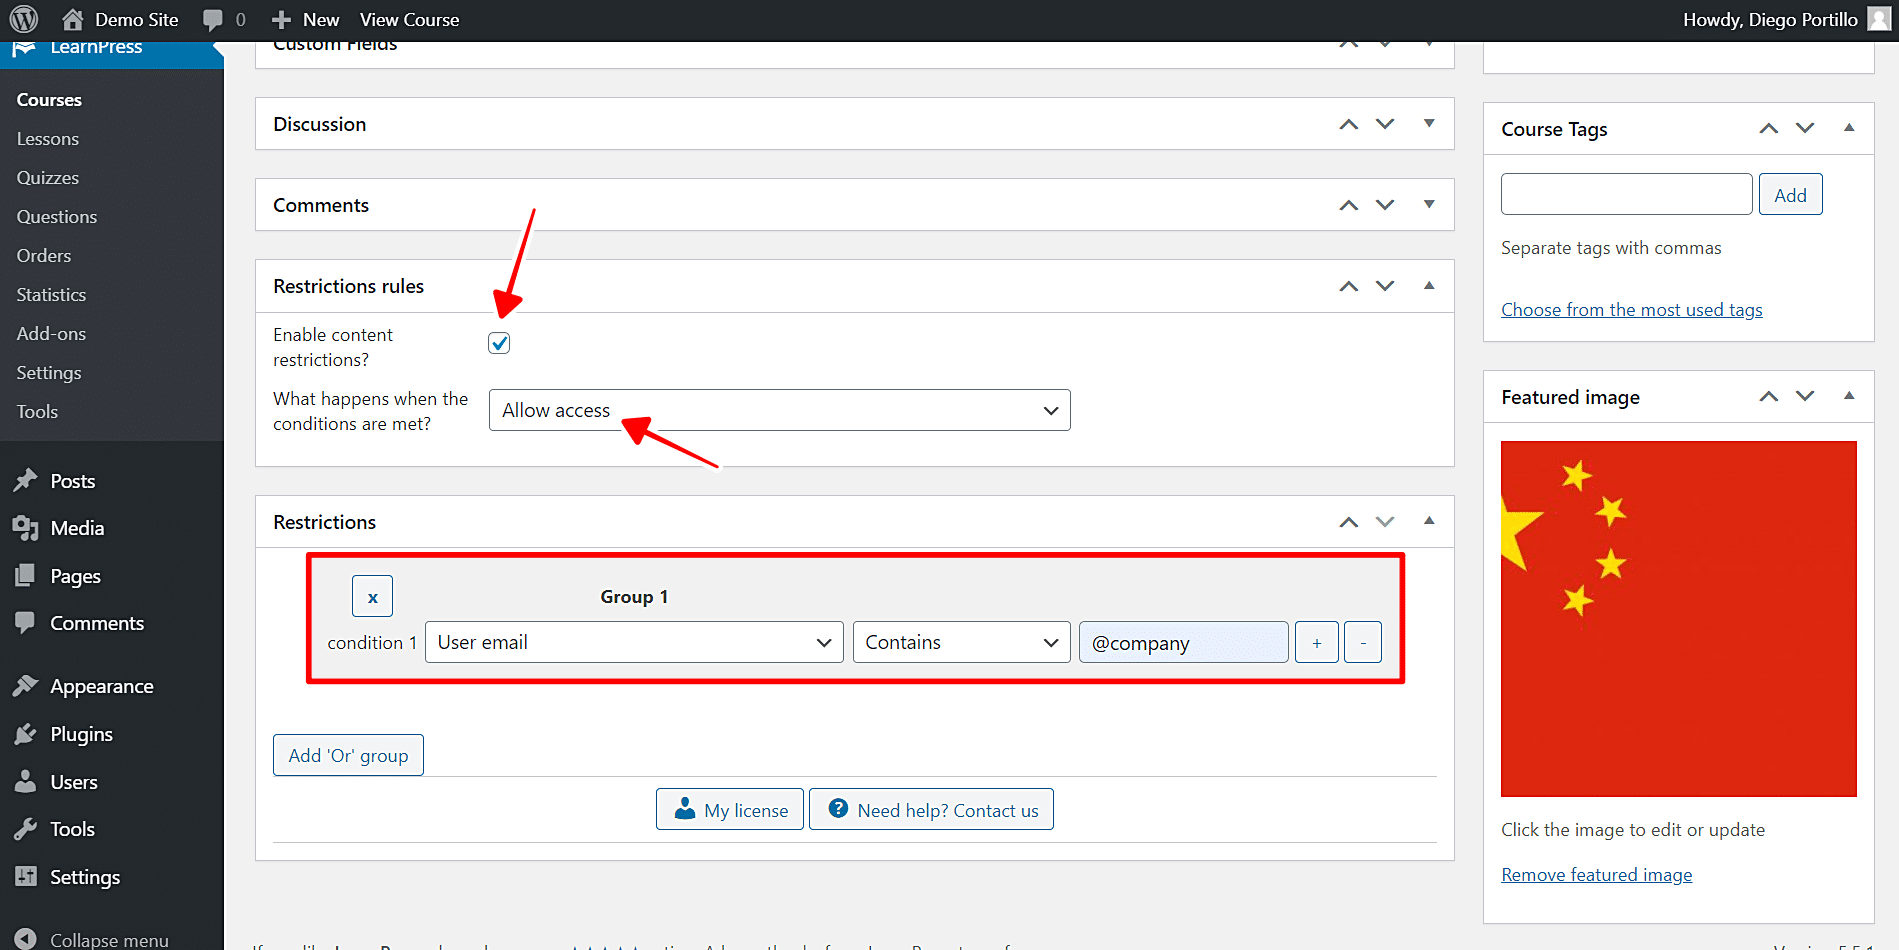
Once you open the course you’ll make available for employees only, scroll down to the Restriction rules section in the course editor, and select the following values:
- Enable content restrictions: Yes
- What happens when the conditions are met: Allow access
- Condition 1: User email | Contains | @company
- Update the course to save the changes.
With these values, you’ll allow access to this course to employees only. Keep in mind that @company is just a generic example. You need to replace that with your own email company name.
3- Restrict all courses for employees only
Maybe your website doesn’t sell courses, so you restrict all your courses for the rest of the users and allow access to your employees only. In that case, you need to apply a global restriction to all the courses.
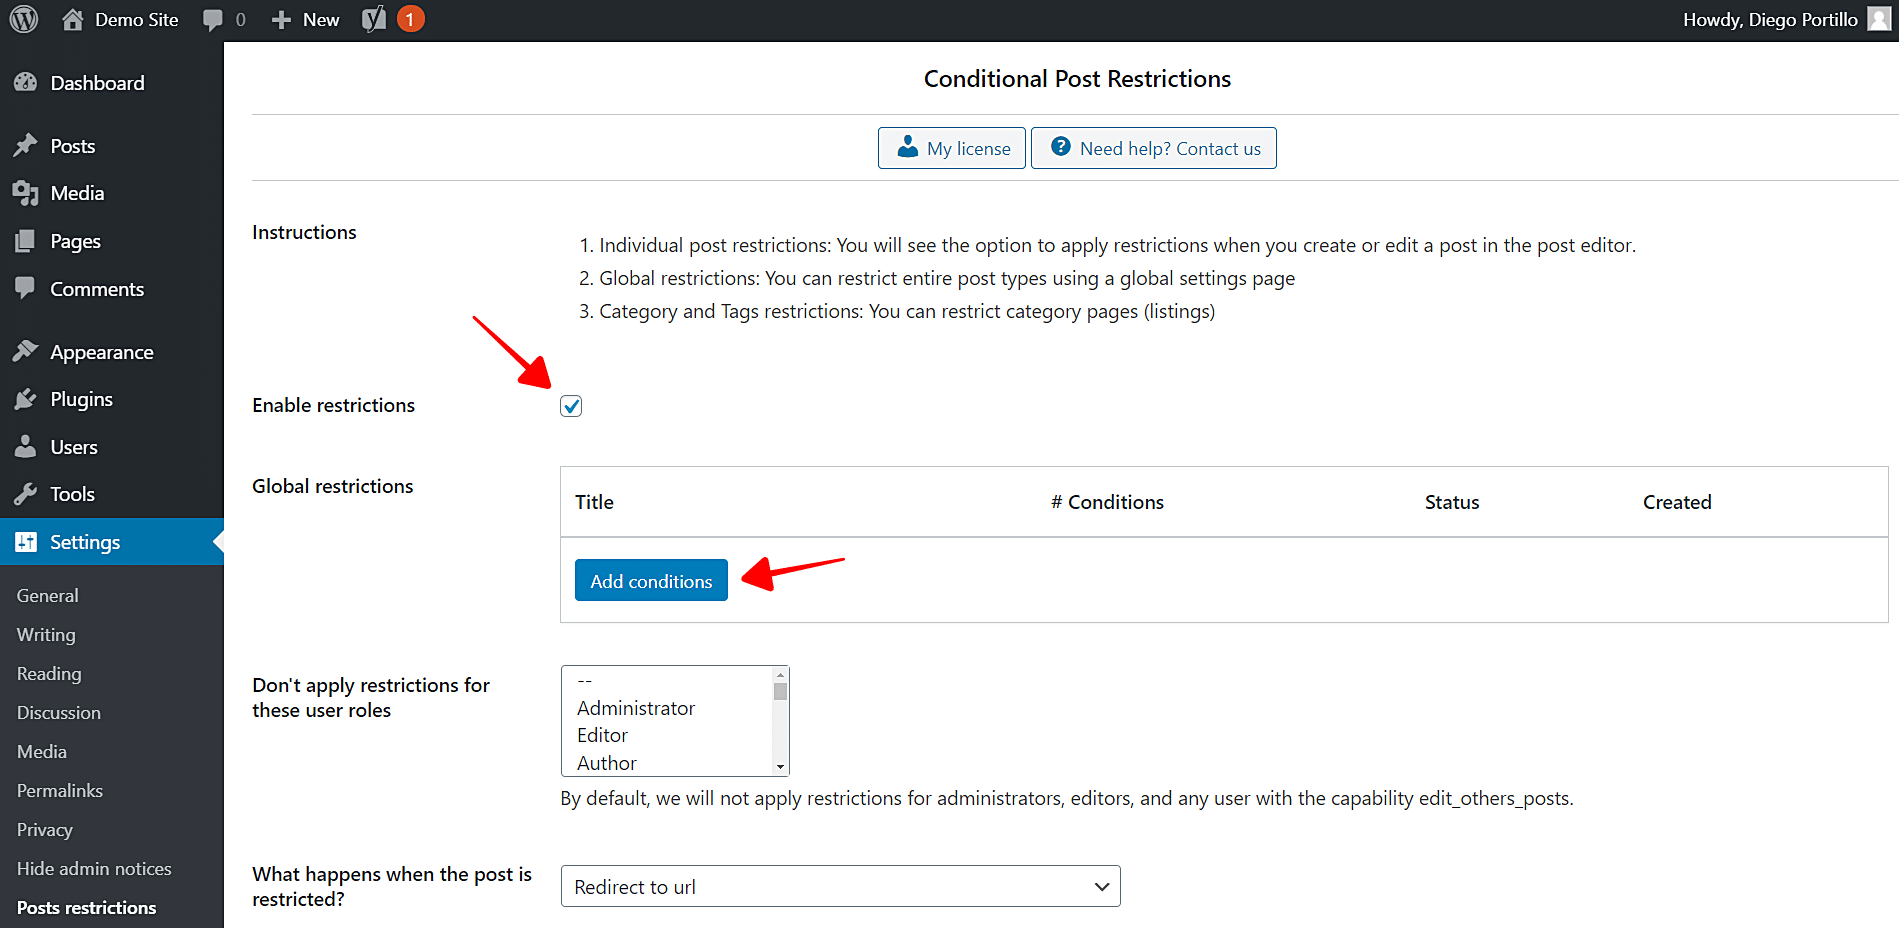
- Go to Settings > Post Restrictions to open the global settings of the plugin.
- Tick the Enable conditions checkbox.
- Click Add Conditions to create a new global condition.
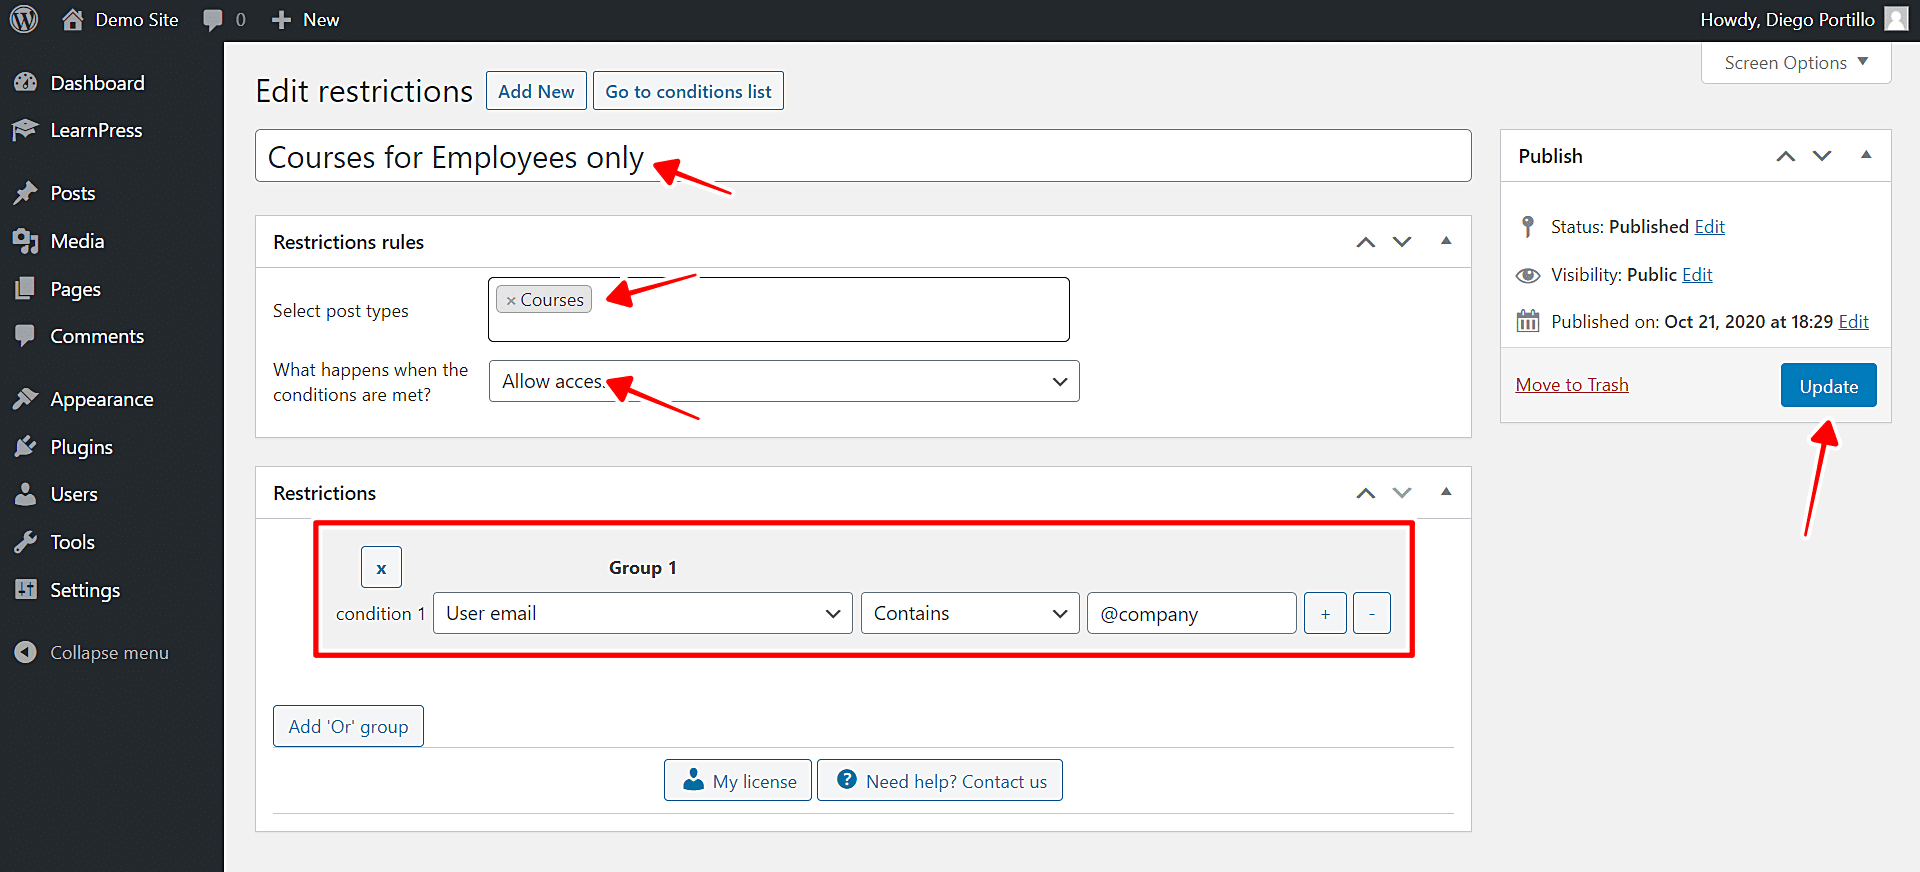
Now select the following values to allow access to courses to employees only:
- Enter the condition title
- Select post types: Courses
- Condition 1: User email | Contains | @company
- Publish the restriction to save the changes.
With these simple values, you’ll restrict access to the rest of the users and allow it to employees only. It’s really simple and you don’t have to program anything.
4- What happens when users don’t meet the conditions?
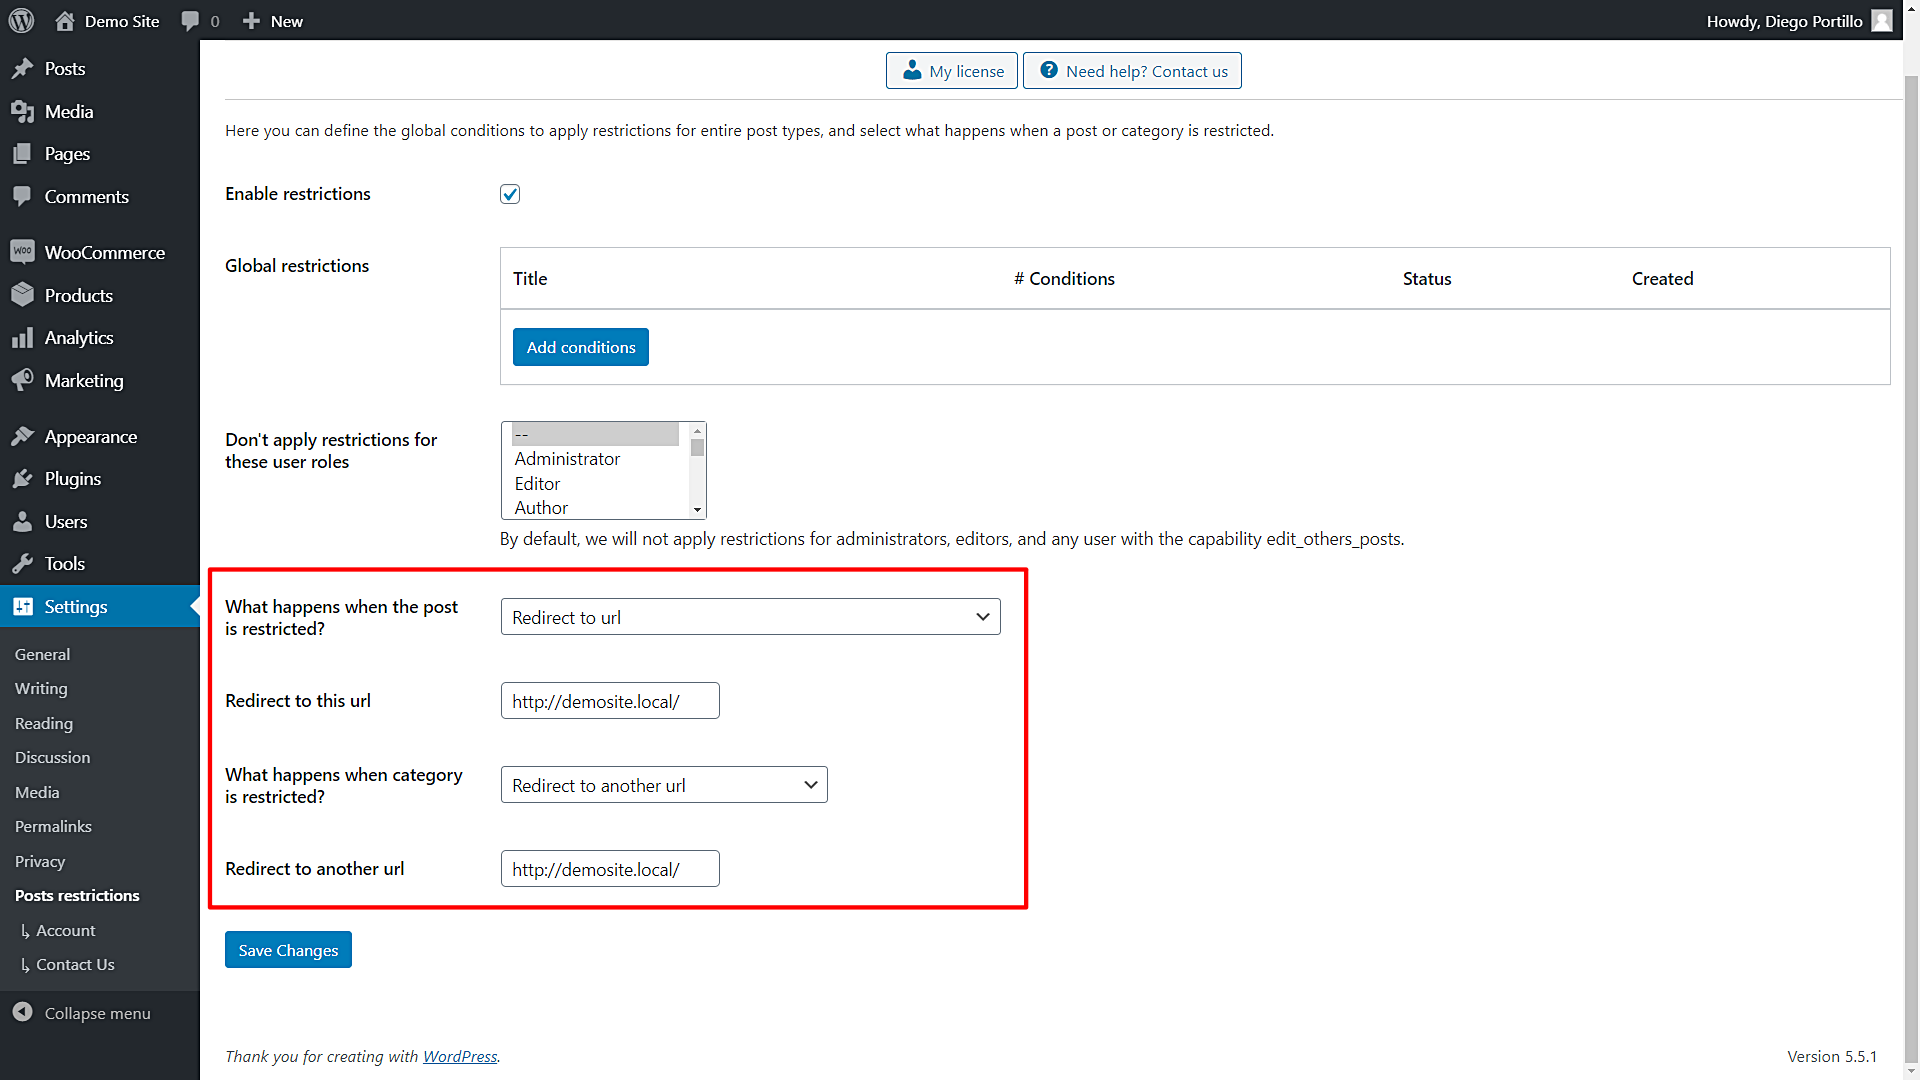
The WordPress Conditional Post Restrictions plugin allows you to select what happens when the users try to open a course that is restricted for them.
- Go to Settings > Post restrictions.
Once there, you’ll see these fields and options:
- Enable restrictions: Tick/untick this checkbox to enable/disable the global conditions.
- Don’t apply restrictions for these user roles: You’ll see a list of user roles for which the conditions won’t be applied. By default, we will not apply restrictions for administrators, editors, and any user with the capability edit_others_posts.
- What happens when the post is restricted? You have several options to select what happens when the post is restricted:
- Redirect to URL
- Remove the content and show a message
- Show fragment of the content and show message after fragment
- What happens when a category is restricted? You have several options to select what happens when the post is restricted:
- Show error 404
- Show the normal page without posts
- Show an error message
- Redirect to another URL
- Show the content of another page
Once you select the global settings, just save the changes.
That was really easy!
As you see, it’s really simple to publish courses for employees only. You don’t have to program anything nor hire a professional programmer. You can easily do it by yourself using the WordPress Conditional Post Restrictions plugin. You just need a few clicks to apply this and many other restrictions to your posts, pages, courses, recipes, products, downloads, donations, etc.
You can download the plugin here:
Download WordPress Conditional Post Restrictions Plugin - or - Read more

