In this tutorial, we will show you how to restrict access to WordPress posts from specific IP addresses.
This is a useful way to ban IP addresses from your WordPress site.
For example, users coming from the banned IP addresses will not be able to view WordPress posts or leave comments on posts, although they will be able to view the rest of the website.
Another important use you could make of this is that you could create WordPress posts that can only be accessed from specific IP addresses.
But here we will focus on how to restrict access to WordPress posts globally or on a post-by-post basis.
In order to restrict WordPress posts by IP address, we will use the WordPress Conditional Post Restrictions plugin.
This WordPress plugin allows you to restrict any WordPress post type: posts, pages, courses, events, recipes, downloads, products, donations, forums, and any other custom post type generated by any WordPress plugin.
You can download the plugin here:
Download WordPress Conditional Post Restrictions Plugin - or - Read more
Once installed and activated, follow these steps to restrict WordPress posts by IP address.
We’ll show you how to restrict all posts, a specific post category, or a single post.
1- Restrict all WordPress posts by IP address globally
If you want to definitely restrict all WordPress posts by IP address, you need to follow these simple steps:
- Go to Settings > Post restrictions in wp-admin.
- Tick the Enable conditions checkbox.
- Click Add Condition to create a new restriction.

Now you need to select these values to restrict posts by IP address:
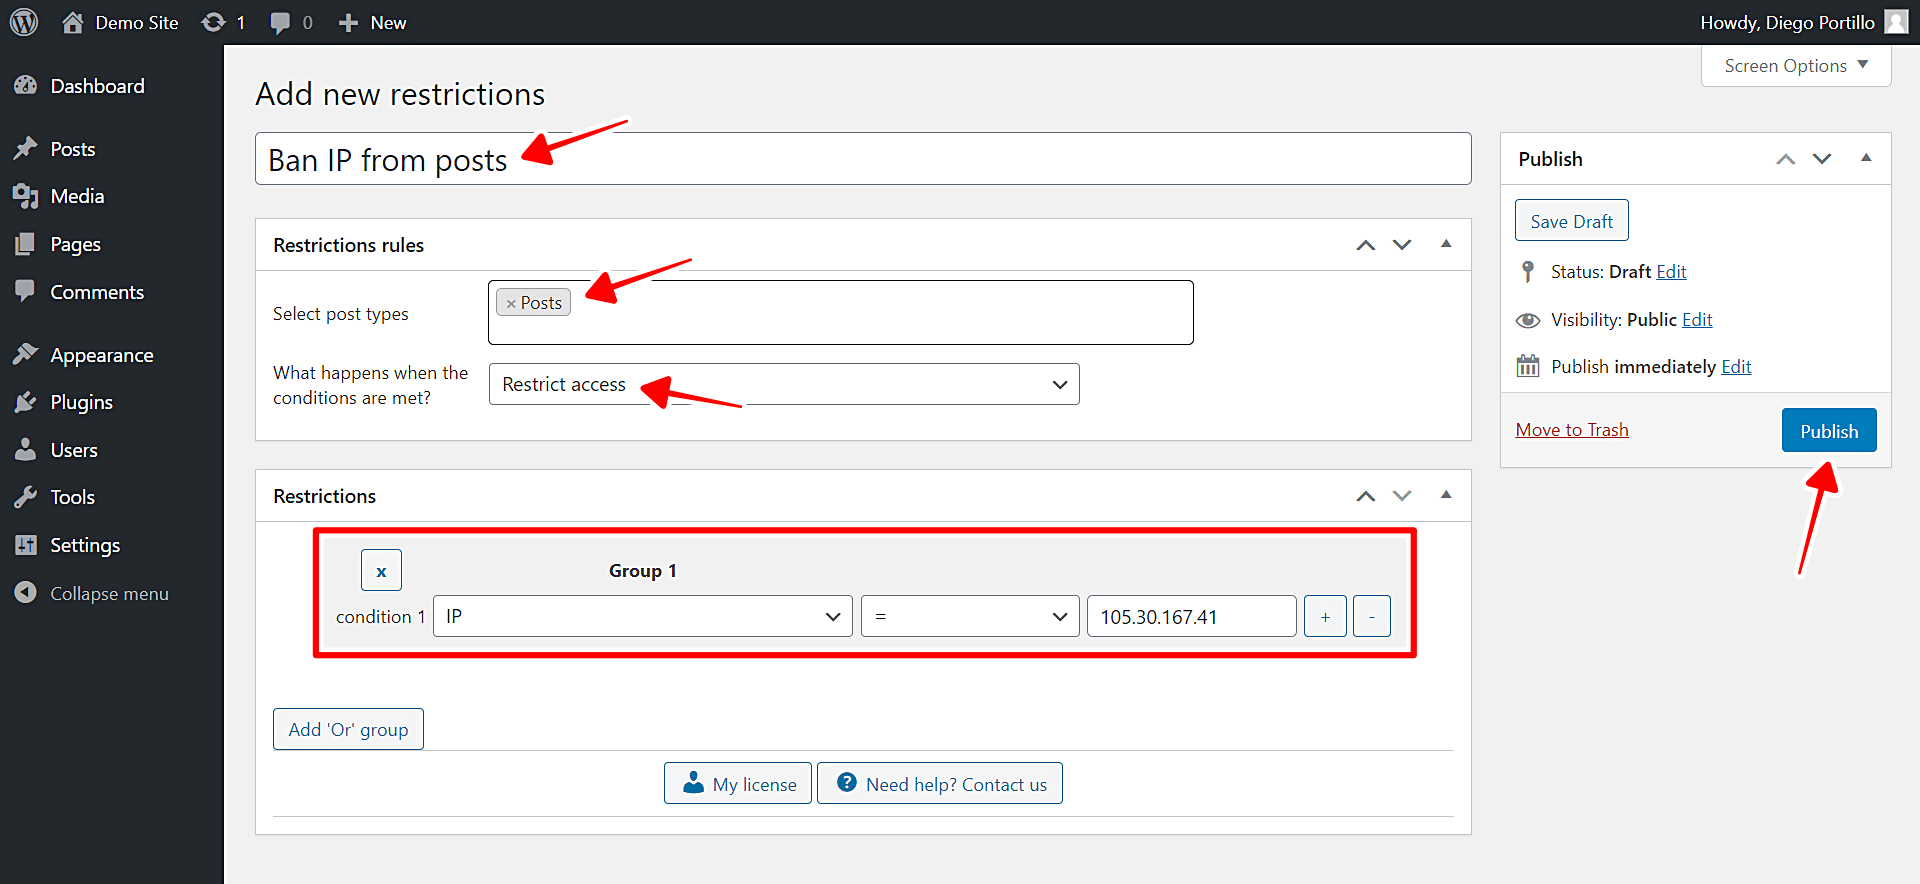
- Select post types: Posts
- What happens when the conditions are met: Restrict access or Allow Access
- Restrict access means users from this IP address won’t be granted access to your posts.
- Allow Access means only users from this IP address will be granted access to your posts.
- Condition 1: IP = Here you need to enter the IP address.
- If you want to add more IP addresses, click Add ‘Or’ group, and repeat the values, just changing the IP address.
- Publish the condition.
With this restriction, the selected IP address will be banned from your WordPress posts or granted exclusive access.
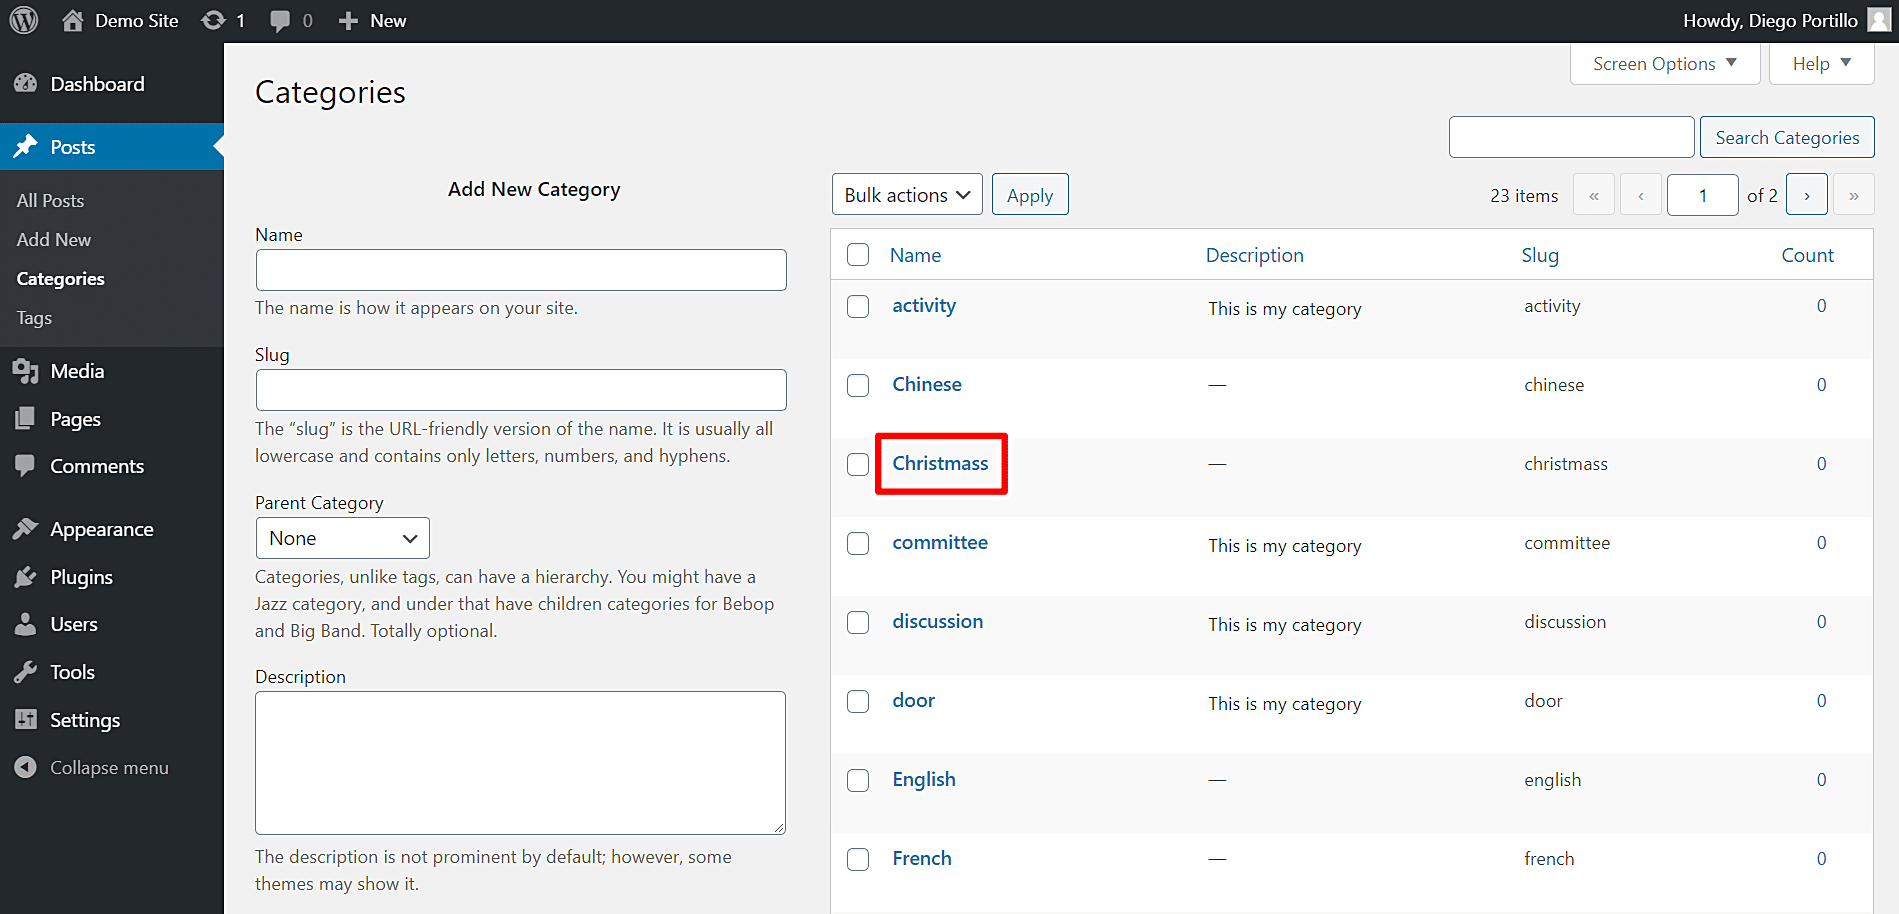
2- How to restrict an entire category by IP address
If you don’t want to globally restrict posts by IP address, you can partially restrict them by applying a conditional restriction to a post category.
Just follow these simple steps:
- Go to Posts > Categories in wp-admin.
- Open a category you want to edit.
Once you open the category you’ll edit, scroll down to the Restriction rules section and select these values:
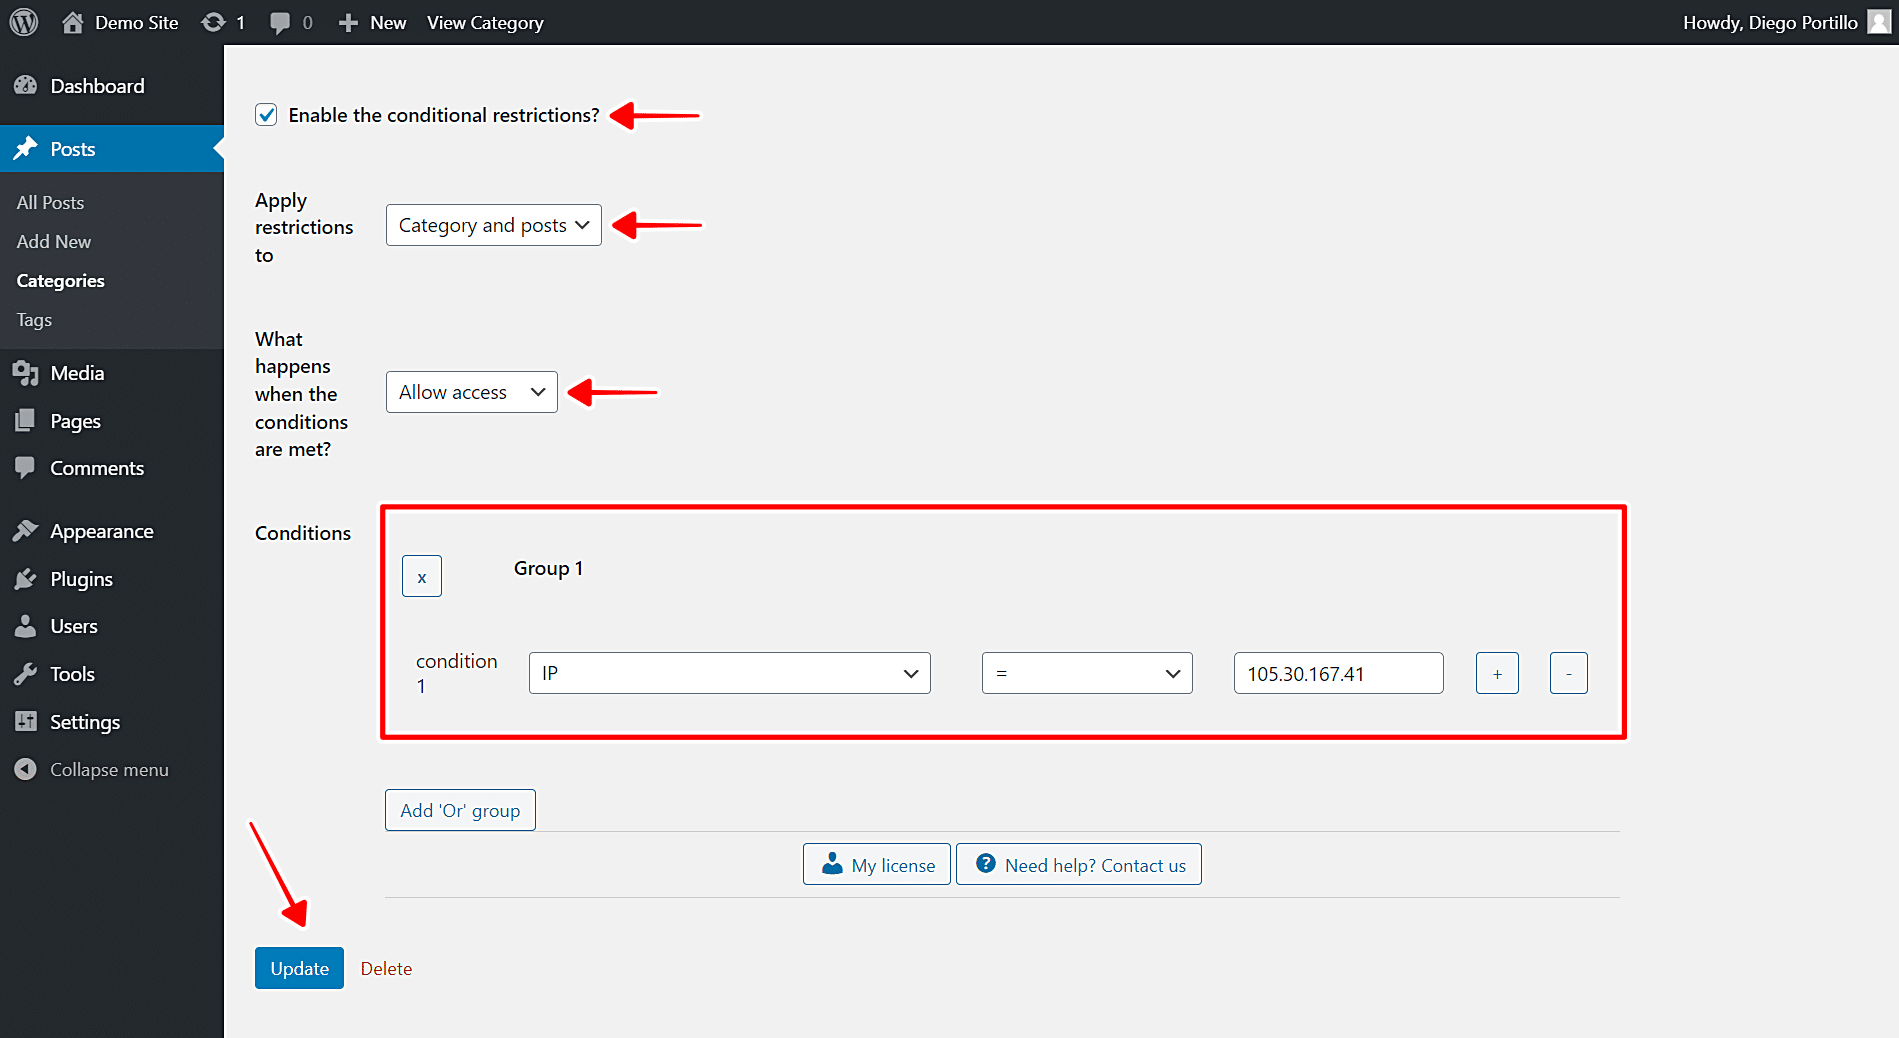
- Enable the conditional restrictions: Yes
- Apply restrictions to: Category and posts
- What happens when the conditions are met: Restrict access or Allow Access
- Restrict access means users from this IP address won’t be granted access to your posts.
- Allow Access means only users from this IP address will be granted access to your posts.
- Condition 1: IP = Here you need to enter the IP address you want to block/ban.
- If you want to add more IP addresses, click Add ‘Or’ group, and repeat the values, just changing the IP address.
- Update the category to save the changes.
Once you apply this restriction to the category, the selected IP address will be banned or granted exclusive access to your WordPress posts.
3- How to restrict WordPress posts by IP address individually
You can even restrict your posts by IP addresses individually.
You just need to follow these simple steps:
- Go to Posts in wp-admin.
- Open a post you want to restrict for the selected IP address.
- Scroll down to the Restriction rules section.
Once you open the post you’ll edit and are on the Restriction rules section, select the following values:
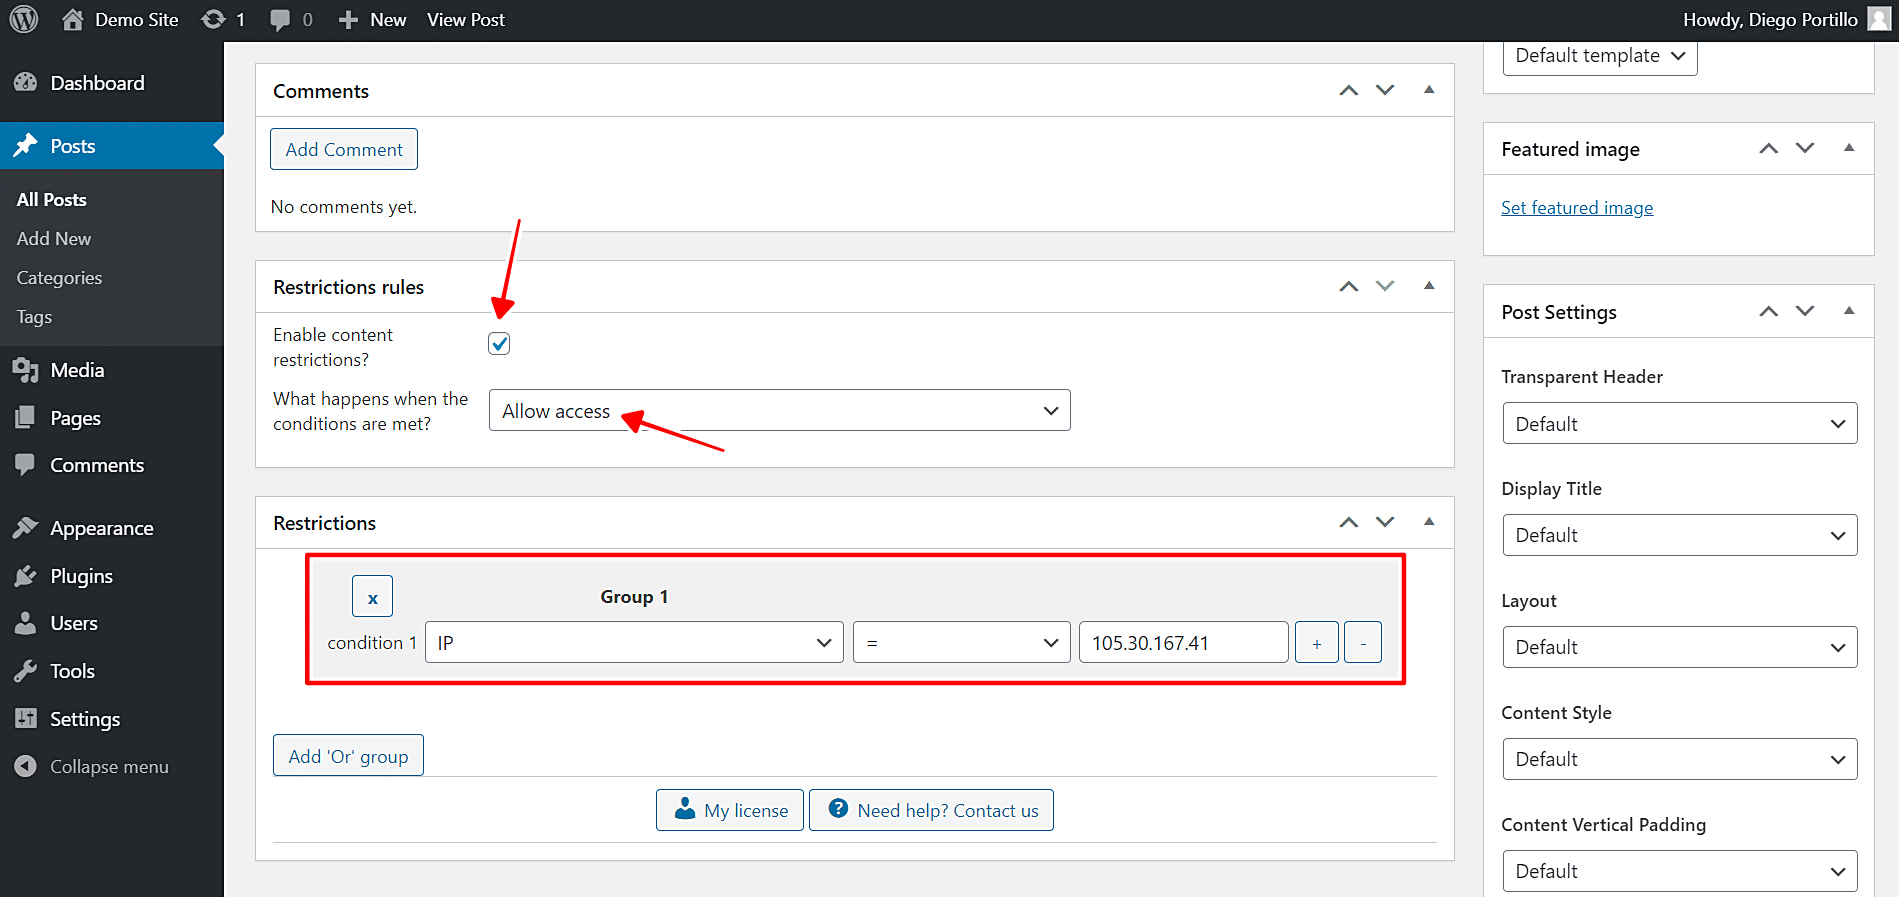
- Enable the content restrictions: Yes
- What happens when the conditions are met: Restrict access or Allow Access
- Restrict access means users from this IP address won’t be granted access to your posts.
- Allow Access means only users from this IP address will be granted access to your posts.
- Condition 1: IP = Enter the IP address you want to block here.
- If you want to add more IP addresses, click Add ‘Or’ group, and repeat the values, just changing the IP address.
- Publish the condition.
This is how you can easily ban or allow IP addresses from a specific post on WordPress.
To restrict other posts individually, repeat the same steps in this section on all the posts you want to restrict.
4- What will the user see when he’s banned from reading posts?
You have several options to decide what the users will see when their IP address is banned from reading posts.
Open the plugin’s global settings at Settings > Post Restrictions.
Once there, you’ll see these fields and options:
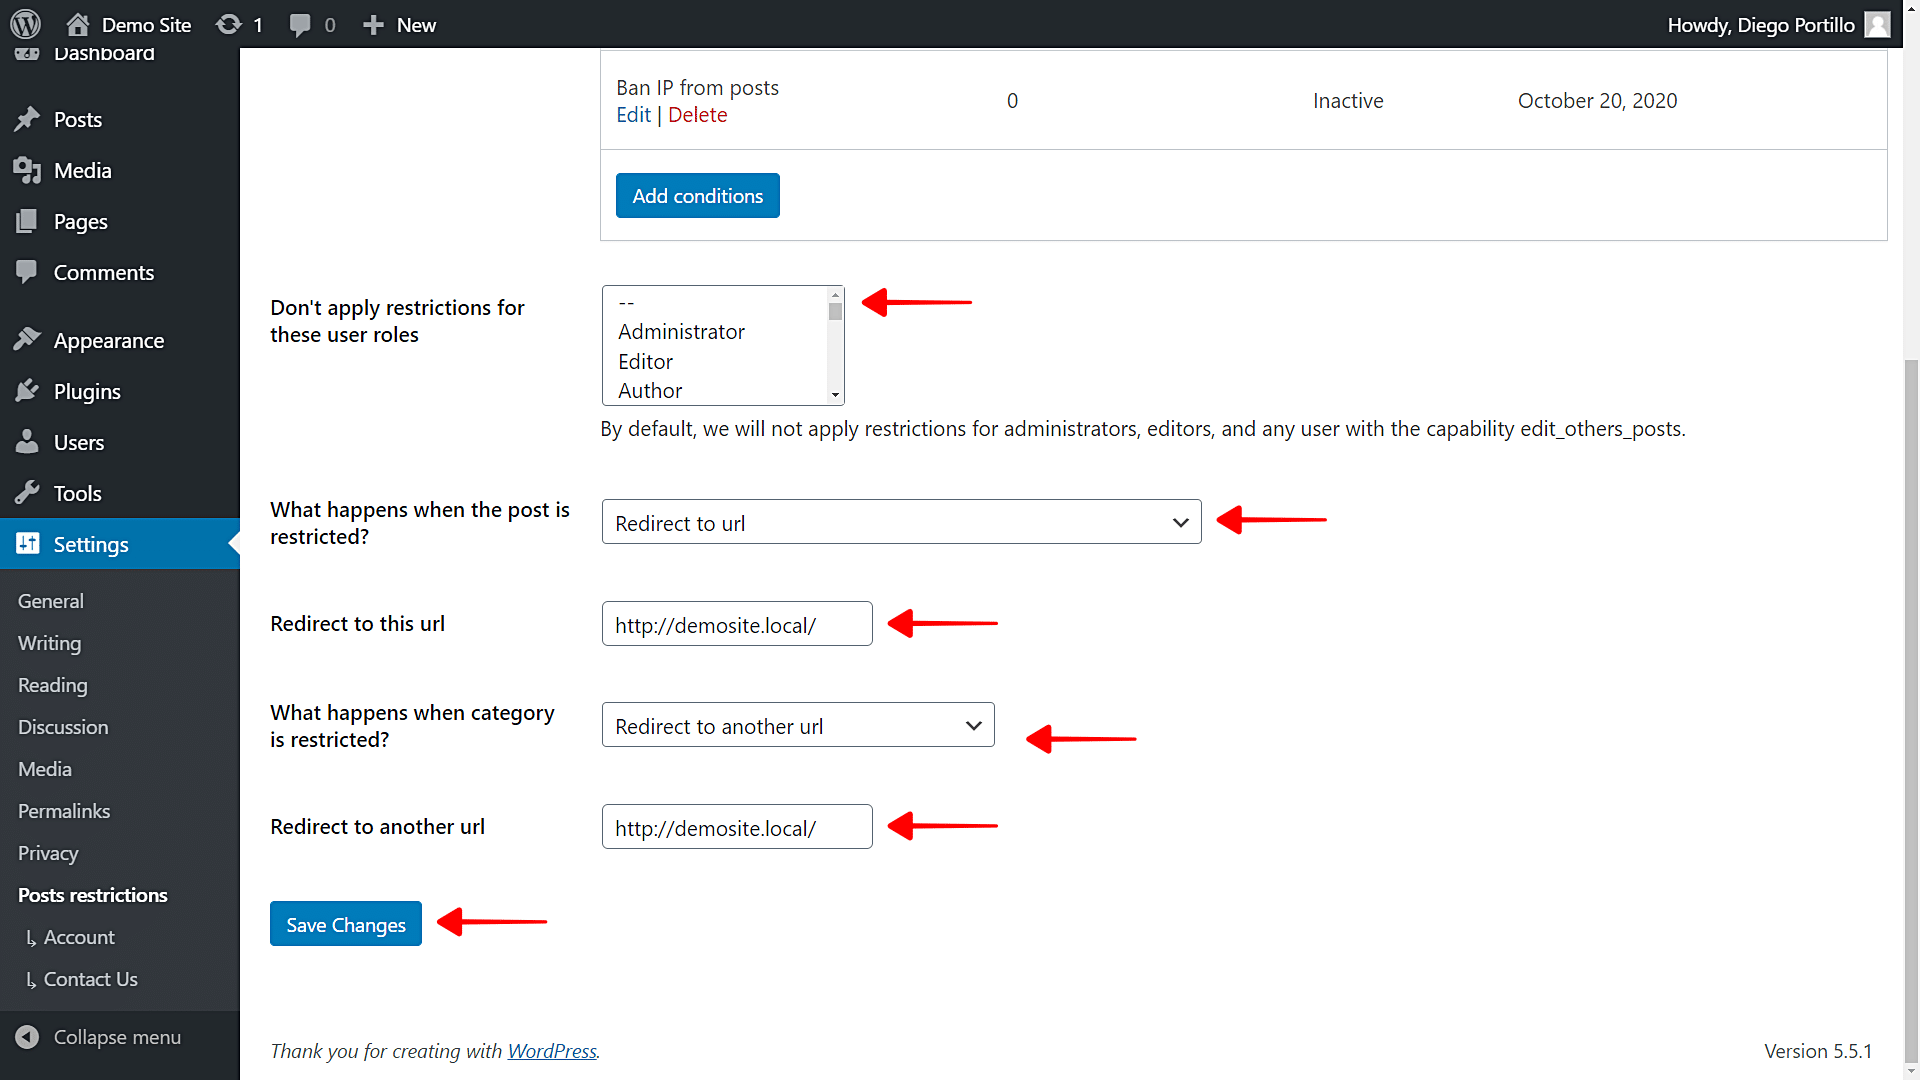
- Enable restrictions: Tick/untick this checkbox to enable/disable the global conditions.
- Don’t apply restrictions for these user roles: You’ll see a list of user roles for which the conditions won’t be applied. By default, we will not apply restrictions for administrators, editors, and any user with the capability edit_others_posts.
- What happens when the post is restricted? You have several options to select what happens when the post is restricted:
- Redirect to URL
- Remove the content and show a message
- Show fragment of the content and show message after fragment
- What happens when a category is restricted? You have several options to select what happens when the post is restricted:
- Show error 404
- Show the normal page without posts
- Show an error message
- Redirect to another URL
- Show the content of another page
Once you select the global settings, just save the changes.
Restrict posts by IP address now!
Restricting WordPress content by IP address is really simple!
You don’t need to program anything nor hire a professional programmer.
You can do it really quickly with the WordPress Conditional Post Restrictions plugin.
You can download the plugin here:
Download WordPress Conditional Post Restrictions Plugin - or - Read more