Hi. In this tutorial, we will show you how to restrict WooCommerce product categories by zip code. This will allow you to sell or stop selling products from specific categories to specific zip codes.
For this, we will use WooCommerce Product Restrictions by Zip Code plugin. With this plugin, you can restrict individual products, all products, categories, attributes, or variations by zip code, city, state, province, or custom locations.
You can download the plugin here:
Download WooCommerce Product Restrictions by Zip Code Plugin - or - Read more
Once you install and activate the plugin on your WordPress website, you can proceed to restrict your product categories by following these simple steps:
1- Set up the “zip code” restriction method
The first thing we need to do is decide what we are going to restrict and how we are going to restrict it. In this case, we are going to restrict categories and the products related to them, and we will restrict them by zip code.
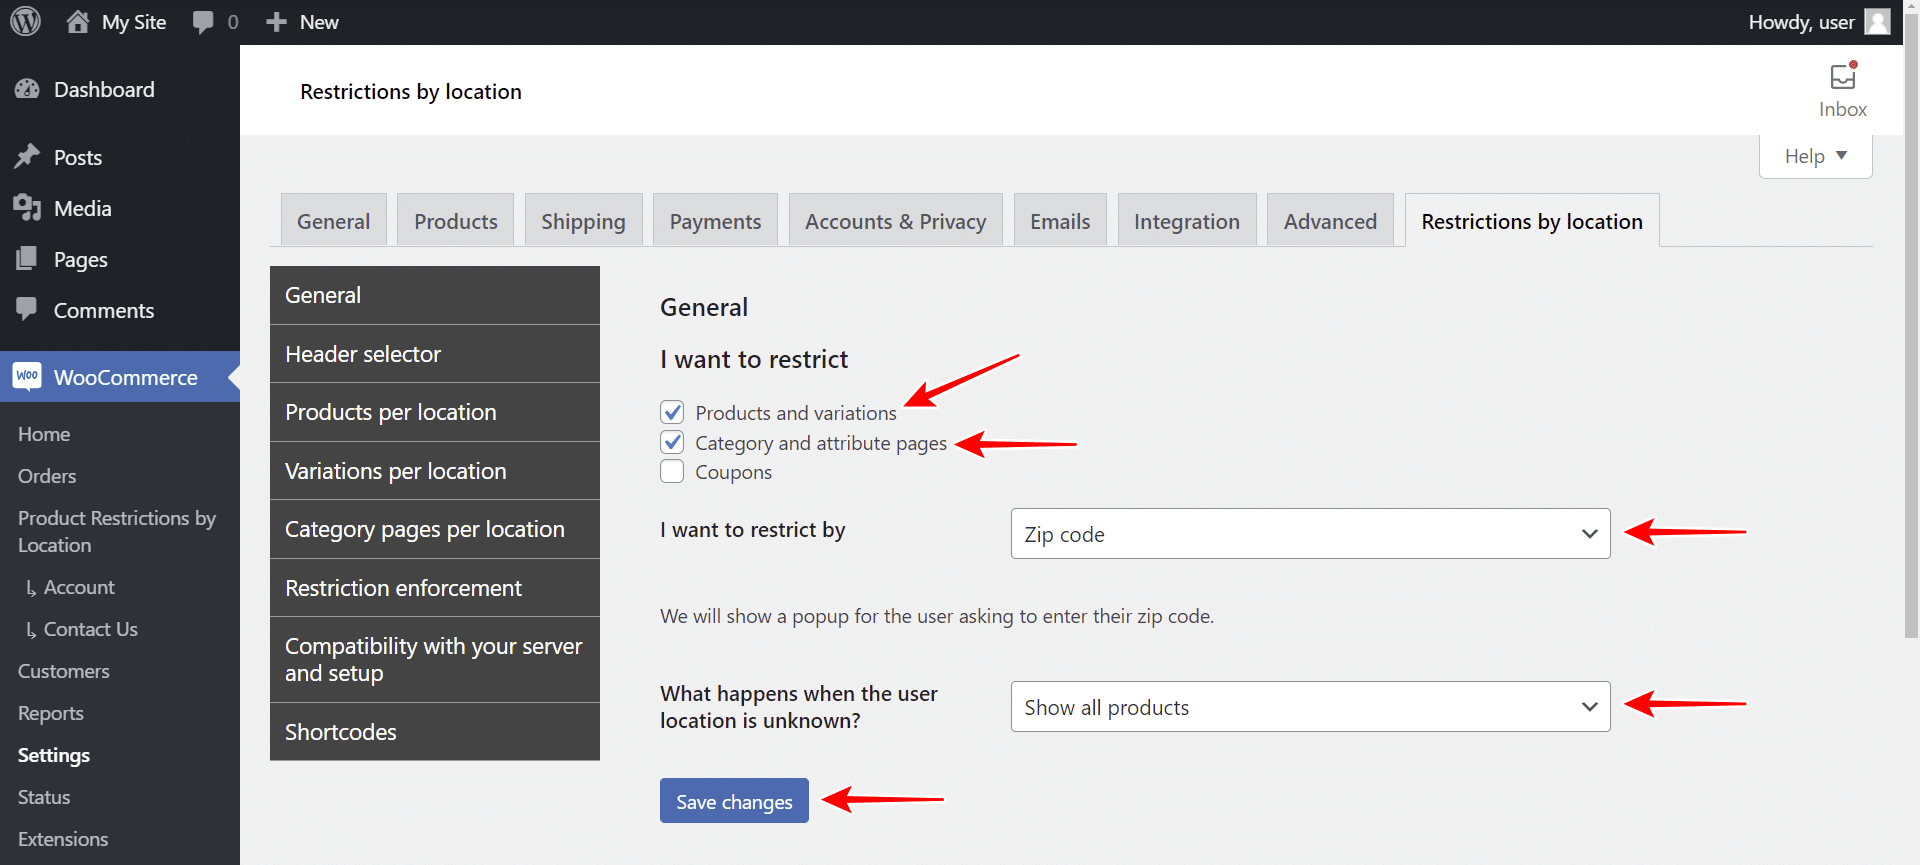
Go to WooCommerce > Settings > Restrictions by location > General, and select the following values:
- I want to restrict: Here we’ll select the following options:
- Products and variations
- Category and attribute pages
- I want to restrict by: Zip code
- What happens when the user location is unknown: You can hide or show the products.
- Hit Save changes.
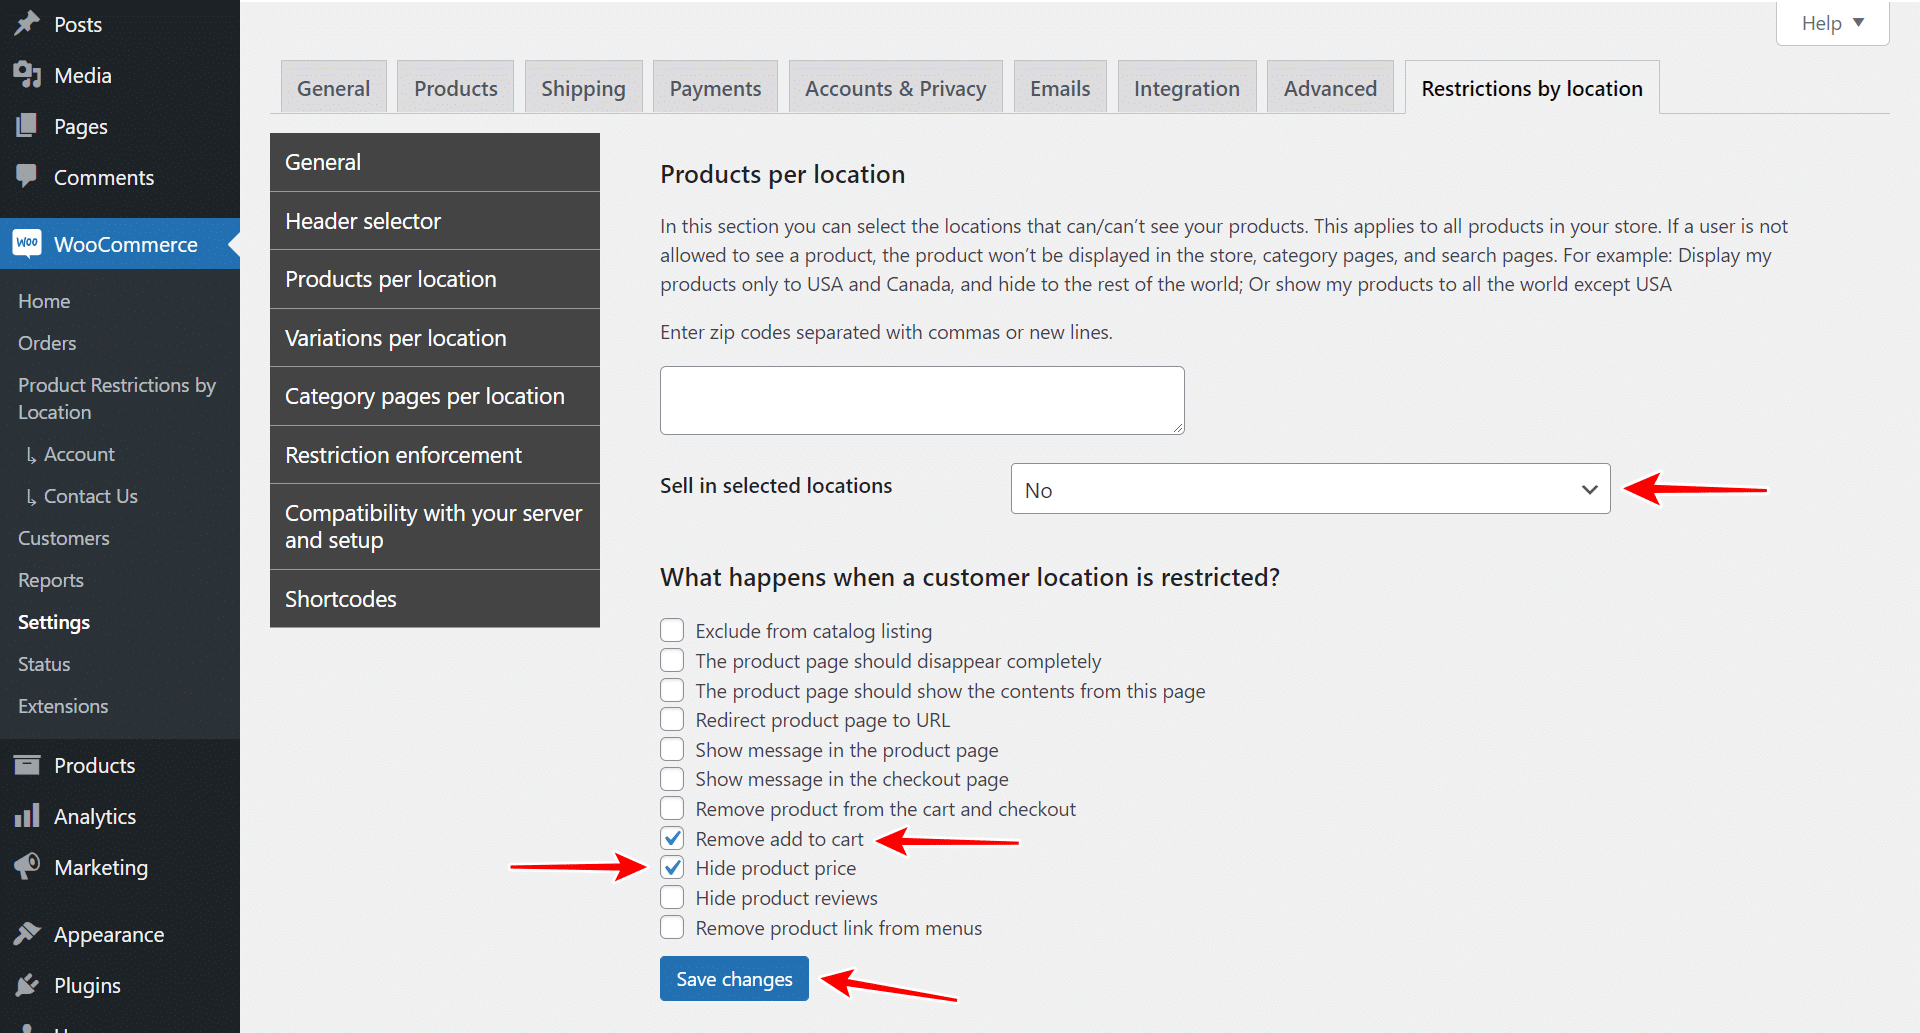
Now move to the Products per location tab.
Normally, this section is for restricting all products in your store. However, we will use it to define what will happen when customers open a product that belongs to a specific restricted category. In this case, we will hide the “Add to cart” button and the product price. This is necessary if you want to apply the restriction to the category and the products within it.
- Sell in selected products: No
- What happens when a customer location is restricted: You have the following options:
- Exclude from catalog listing
- The product page should disappear completely
- The product page should show the contents from this page
- Redirect product page to URL
- Show message in the product page
- Show message in the checkout page
- Remove product from the cart and checkout
- Remove add to cart
- Hide product price
- Hide product reviews
- Remove product link from menus
- Hit Save changes.
2- Restrict your WooCommerce categories by zip code
You are now ready to restrict your categories by zip code.
Go to Products > Categories to see the list of categories.
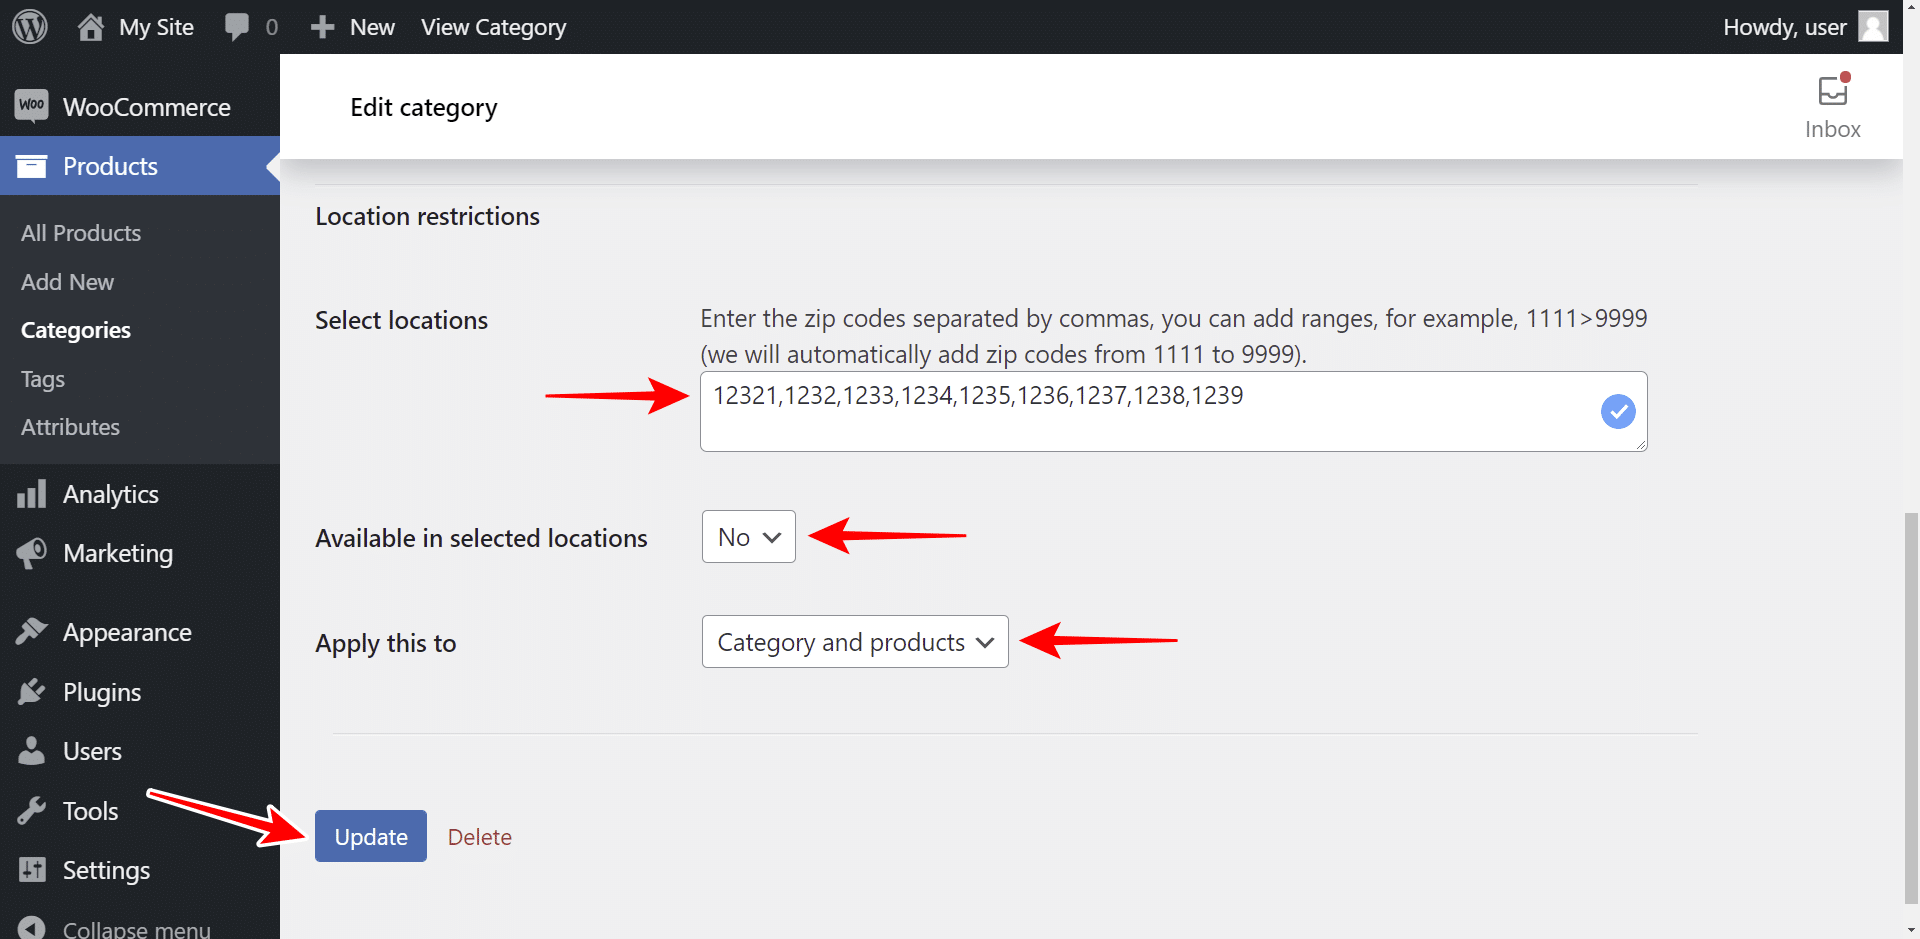
Once there, open the category you want to restrict and select the following values:
- Select locations: Enter the zip codes separated by commas, or add a zip code in each line.
- Available in selected locations: No
- Apply this to: You have the following three options:
- Category only
- Products only
- Category and products
- Once done, hit Update to apply the changes.
3- See the restricted categories in the frontend
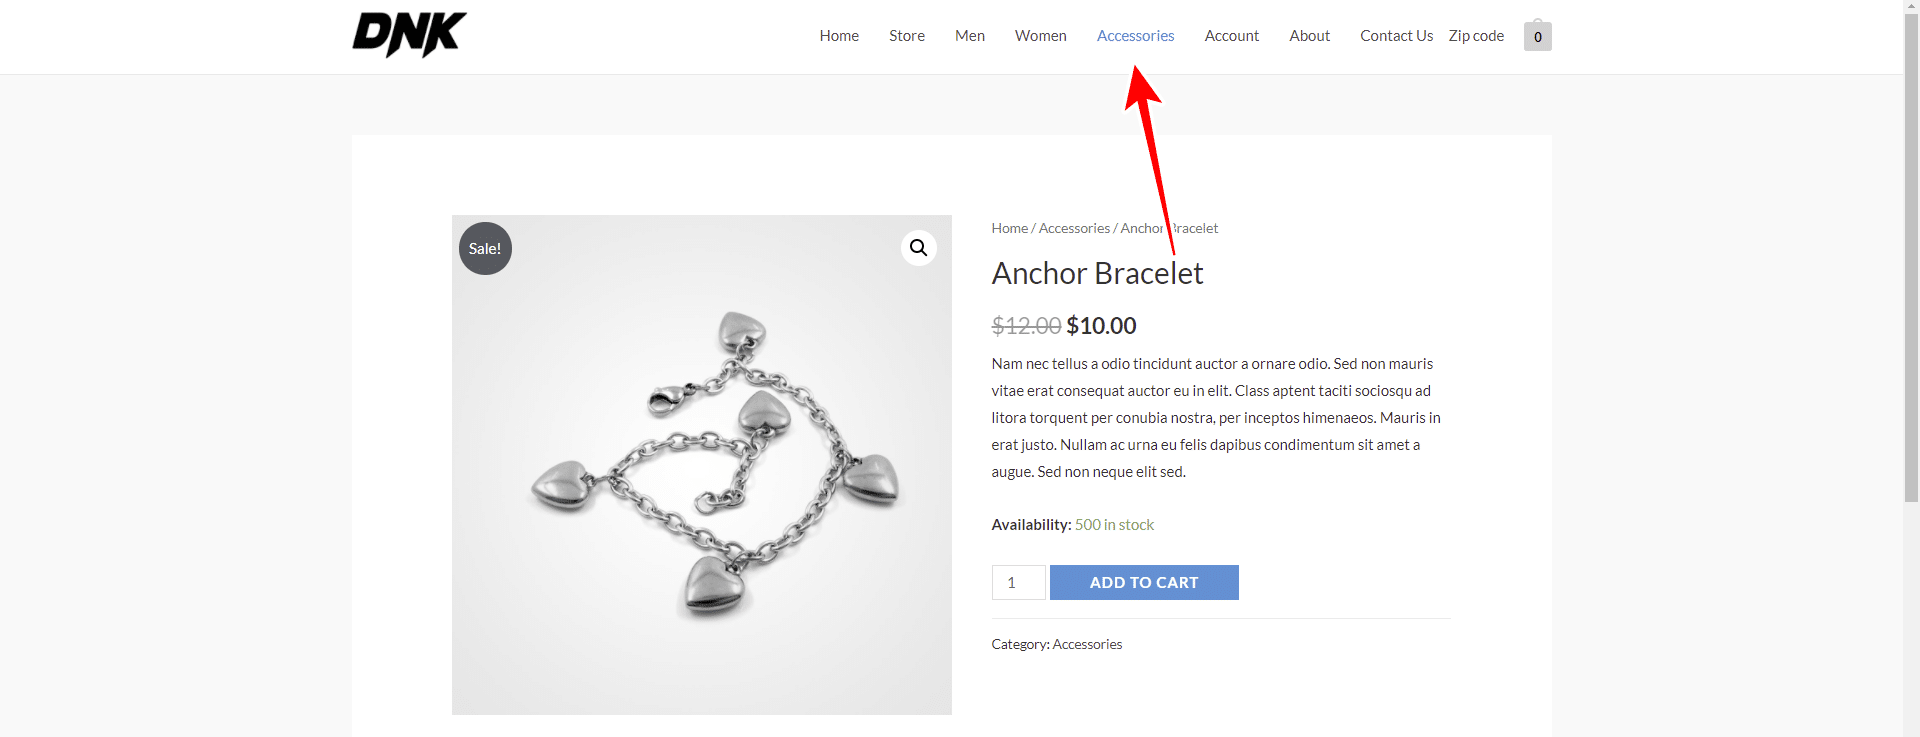
Before applying the restriction, you will see the category link anywhere. For example, we have restricted the “Accessories” category for selected zip codes. However, in the screenshot below you can see that the category link appears in the store menu.
You can also see that the product page shows the “Add to cart” button and the price.
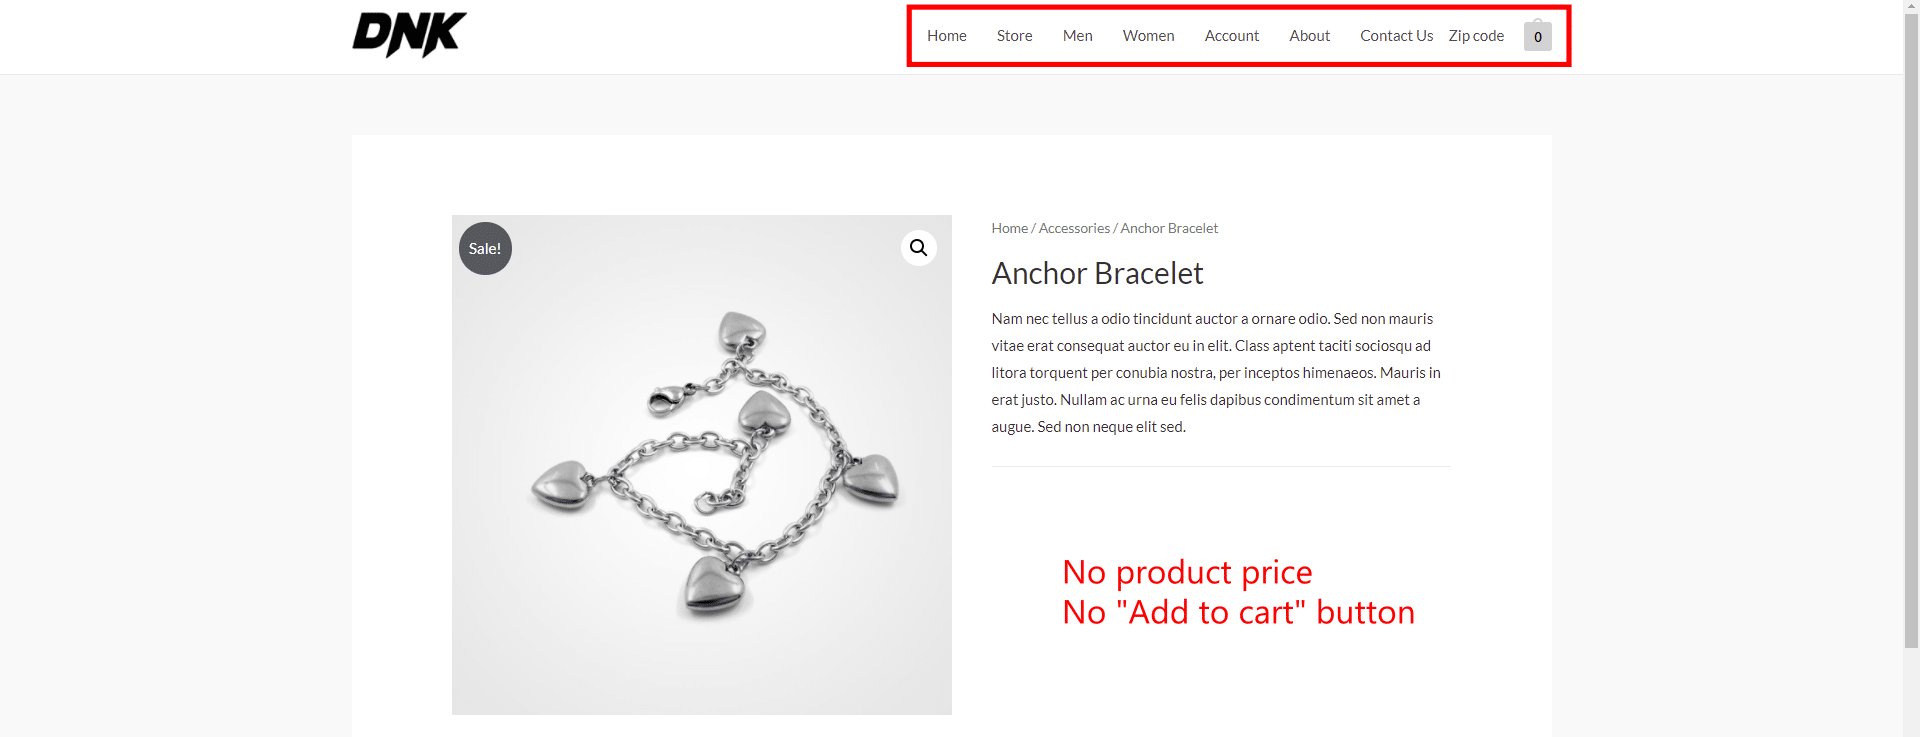
Once we have applied the restriction, you will see that the link has disappeared from the store menu, and the product no longer displays the “Add to cart” button or the price.
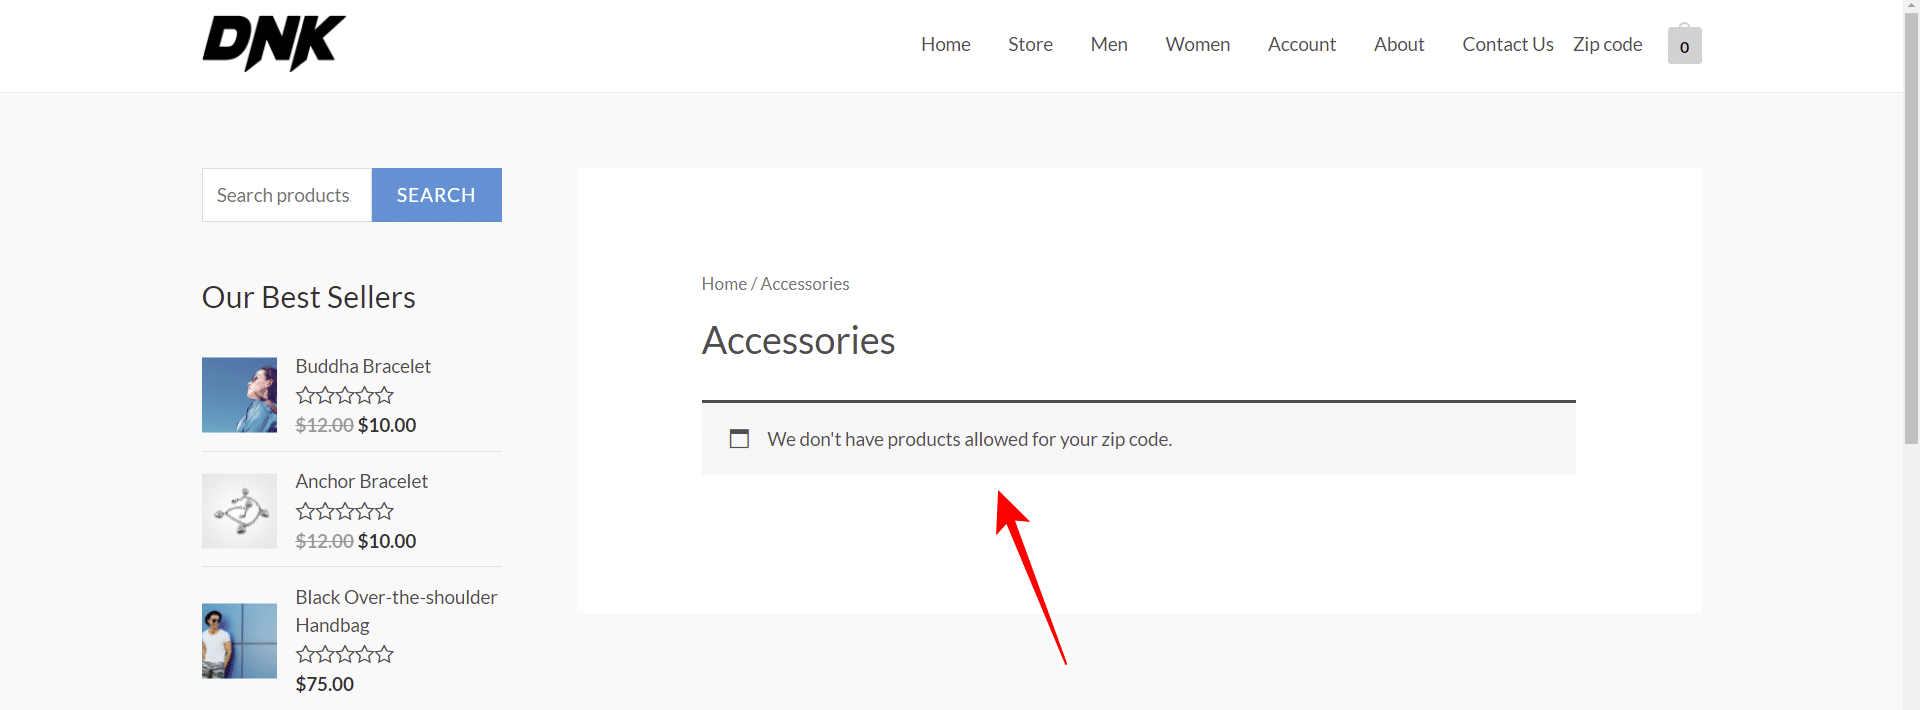
Also, when users open the restricted category page, they will see a message indicating that there are no products available for their zip code.
Start restricting your product categories by zip code!
As you can see, WooCommerce Product Restrictions by Zip Code allows you to apply restrictions to your categories and related products easily.
You can also restrict all products, individual products, variations, coupons, etc.
You can download the plugin here:
Download WooCommerce Product Restrictions by Zip Code Plugin - or - Read more

