In this post, you’ll learn how to restrict posts or pages based on WP Ultimo site plan. This can be very useful when, for example, you create pages or posts with tutorials and instructions for your users to manage their multi-site platforms. It can also be very useful when you create forum pages or support pages.
We will do this very easily using the WordPress Conditional Post Restrictions plugin, which allows you to easily create conditional restrictions for any of the following post types:
- Posts
- Pages
- Products
- Courses
- Events
- Downloads
- Recipes
- Forums
- Support tickets
- And any other custom post type added by any WordPress plugin.
If you don’t use the WordPress Conditional Post Restrictions plugin, you have at least these options:
- You can program the conditional restriction by yourself, but you need vast programming knowledge.
- You can hire a professional programmer, but you’ll get one conditional restriction only, and are likely to pay a good amount of money.
Therefore, the WordPress Conditional Post Restrictions is your best option because you can easily apply any kind of conditional restriction without any programming knowledge. You just need a few clicks.
You can download the plugin here:
Download WordPress Conditional Post Restrictions Plugin - or - Read more
Once you install the plugin, you need to follow the steps in the sections below to restrict pages or posts based on the site plan.
1- How to restrict individual posts based on the site plan
First, we’ll show you how to restrict individual posts based on the site plan. This change must be applied to the multi-site network’s main site. Just follow these simple steps:
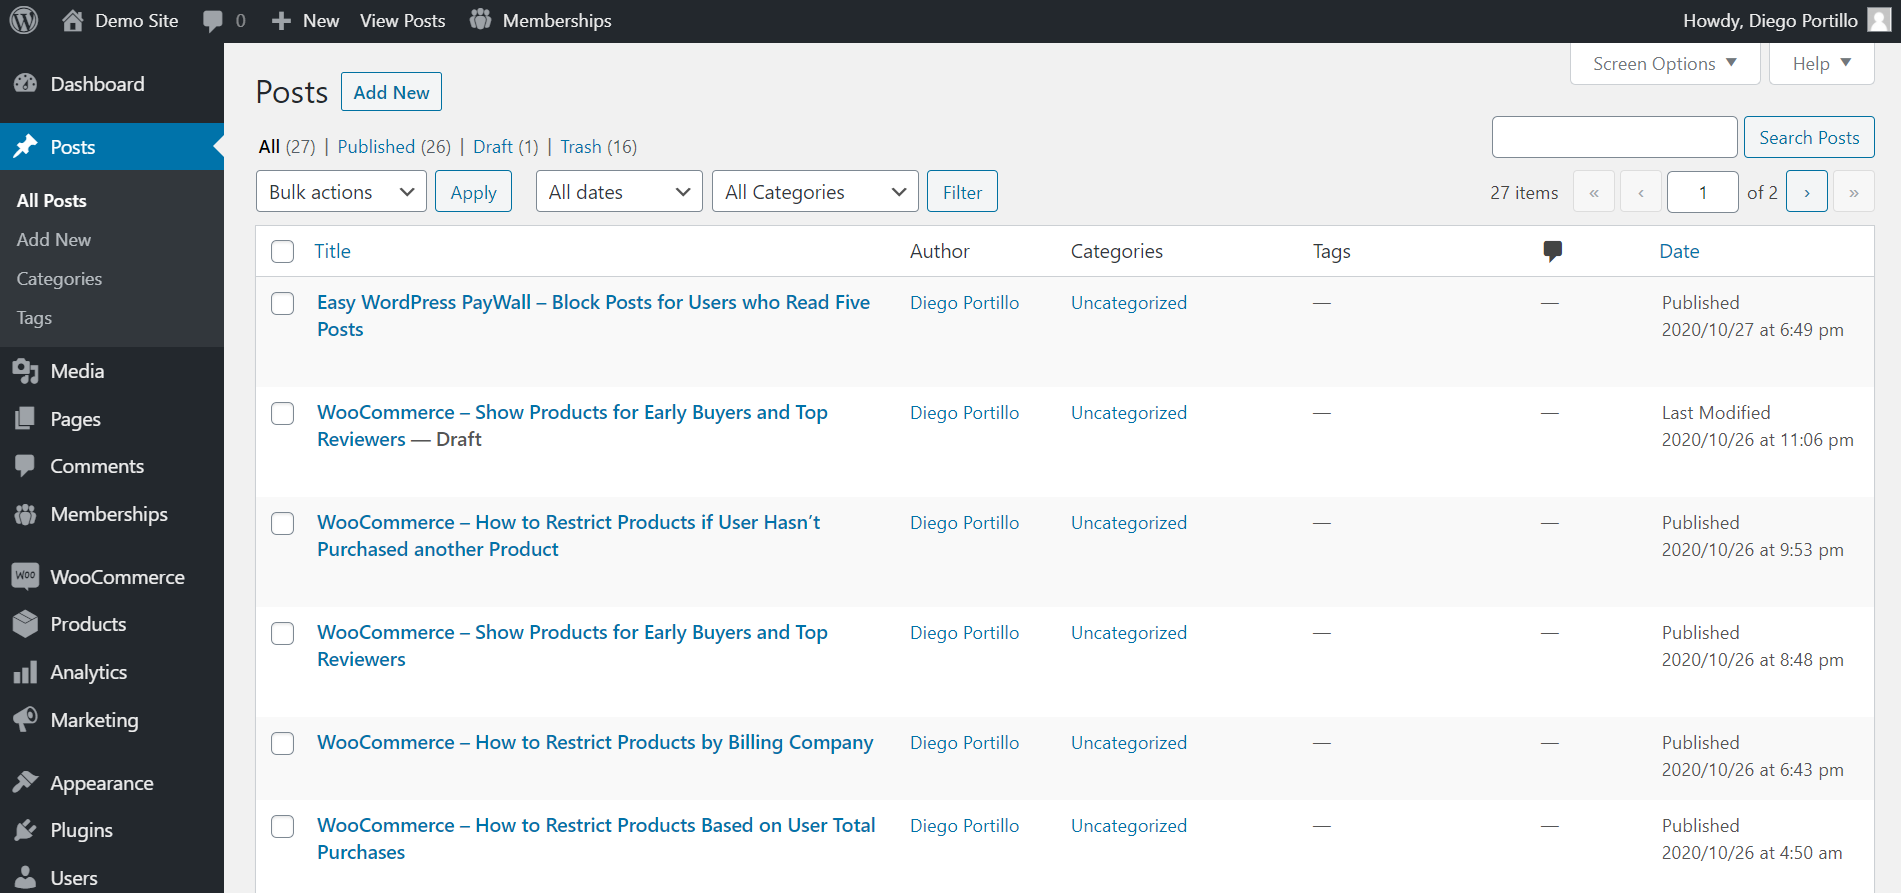
- Go to Posts > All Posts in wp-admin.
- Open the post you want to restrict based on the site plan.
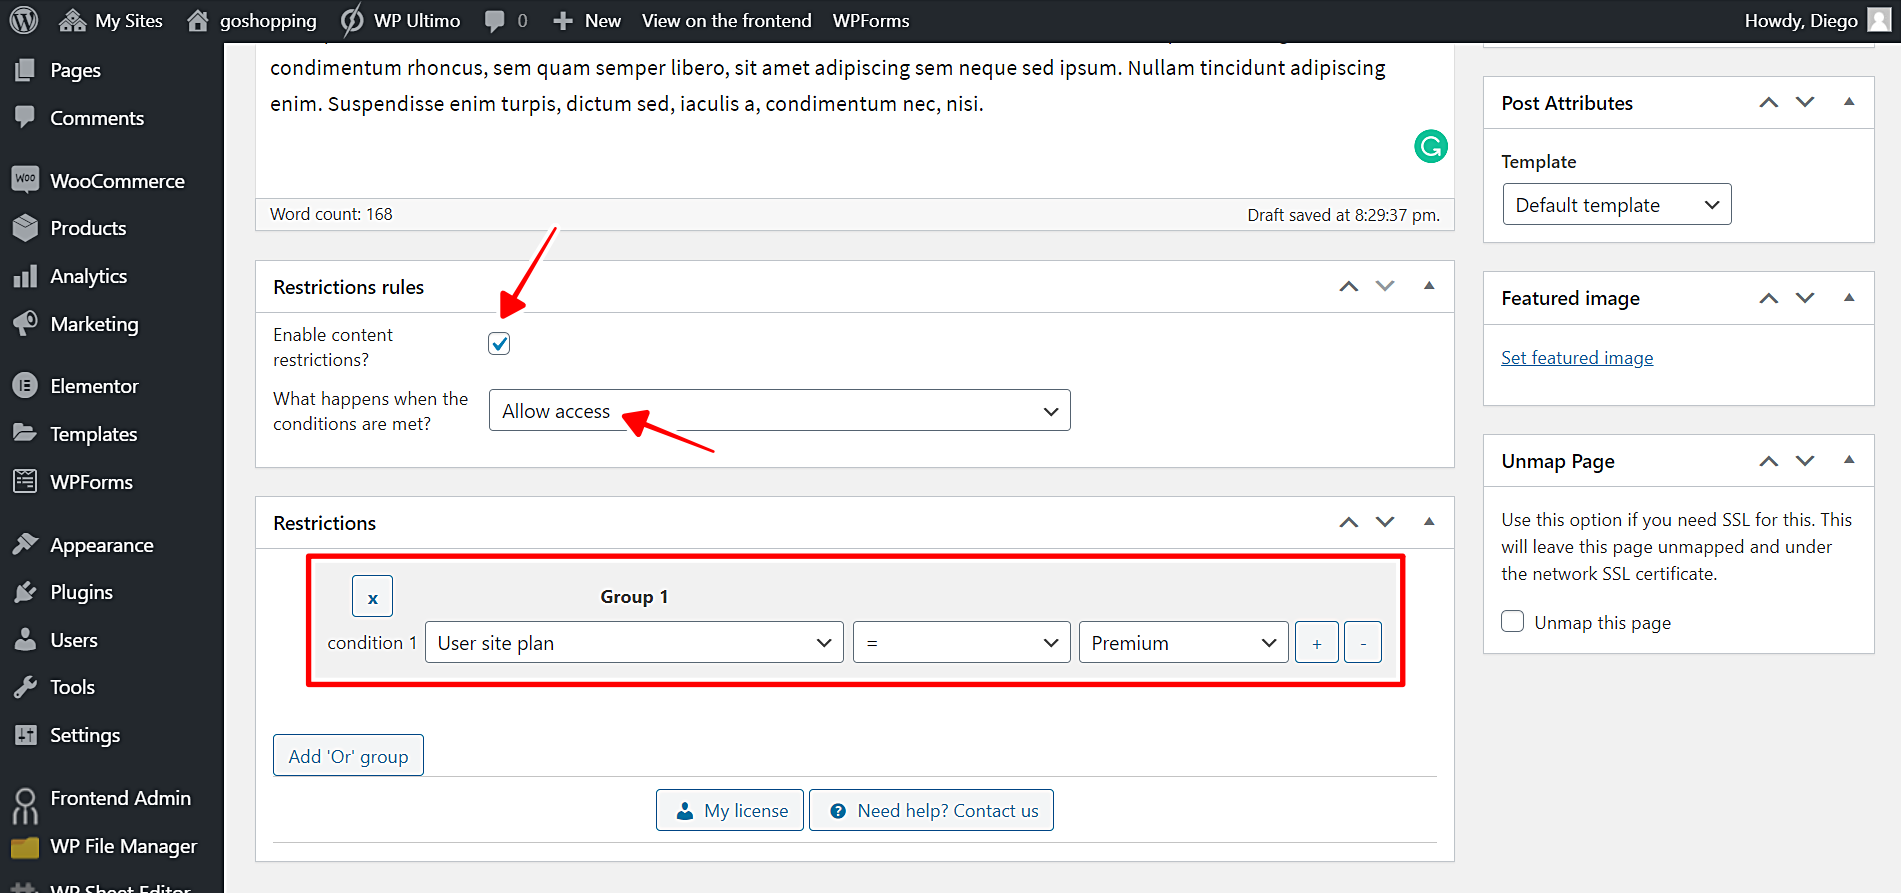
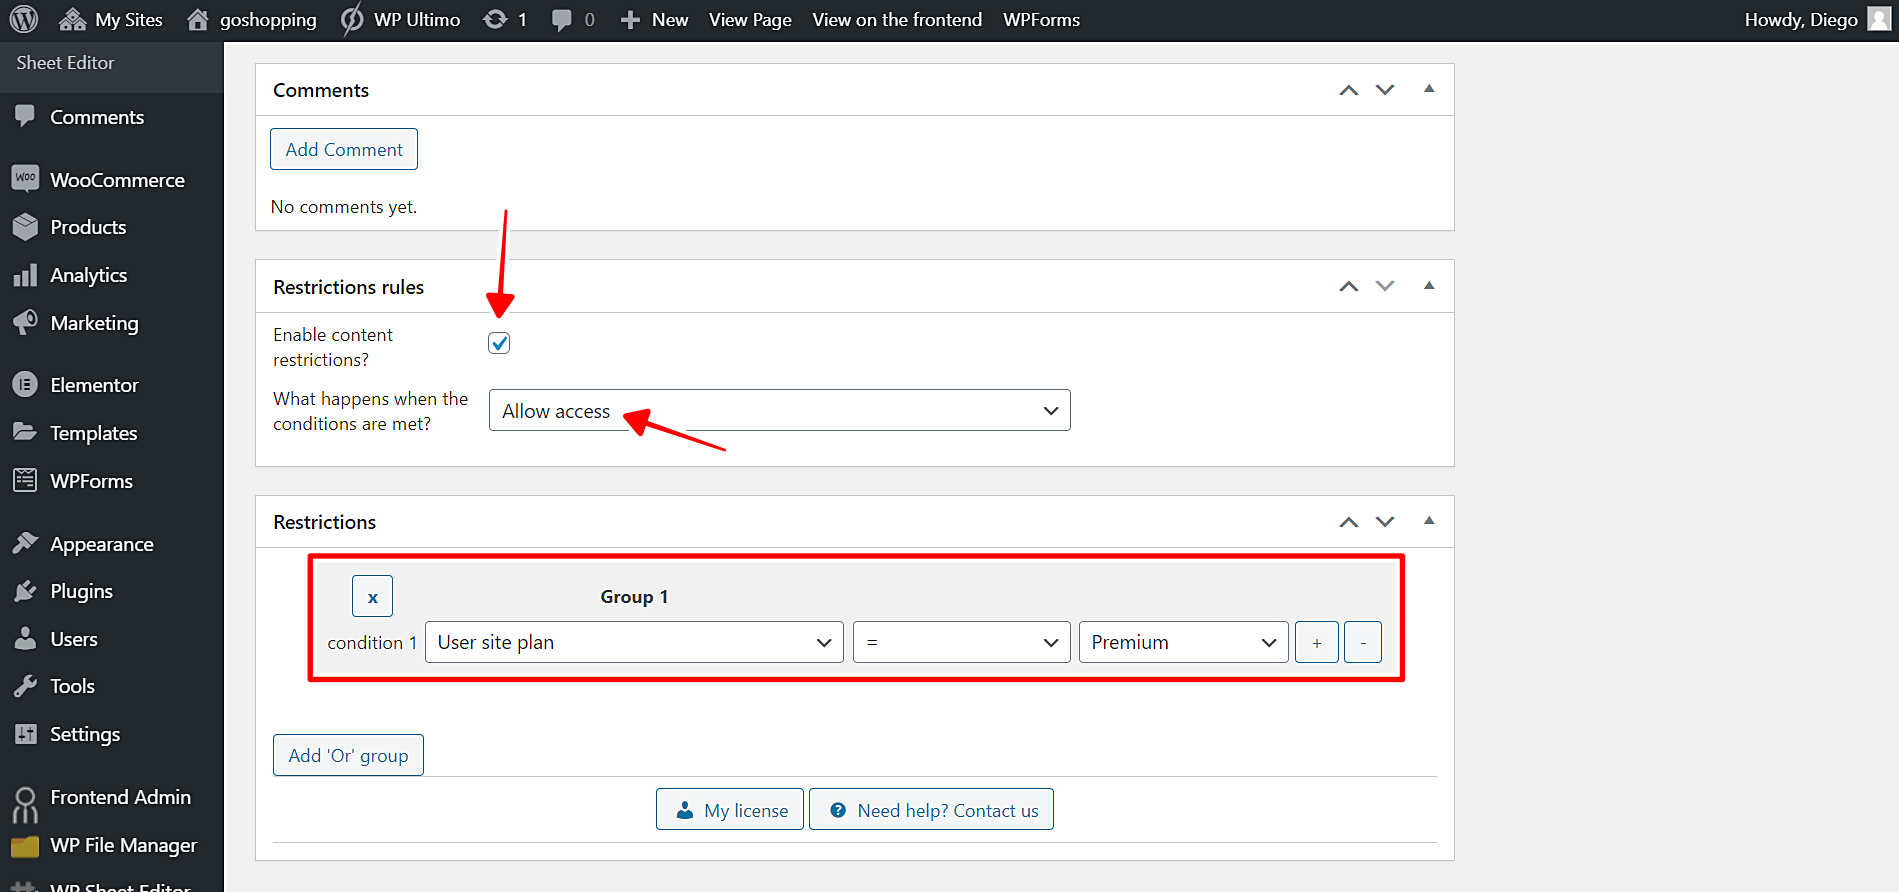
Once you’re in the post editor, scroll down to the Restriction rules section and select the following values:
- Enable content restrictions: Yes
- What happens when the conditions are met: Allow access
- Condition 1: User site plan = Premium
- The selected plan is just an example. You select the one you want.
- Update the post to save the changes.
Done. With these simple values, you’ll be able to restrict individual posts based on WP Ultimo site plan. If you want to restrict other posts, you just need to apply the same values to each post. Really simple.
2- How to restrict post categories based on the site plan
Maybe you don’t want to restrict posts individually because that’s a little tedious, yet you don’t want to block all your posts. In that case, you may want to restrict an entire category of posts based on WP Ultimo site plan.
In this section, we show you how to easily do it. Just follow these simple steps:
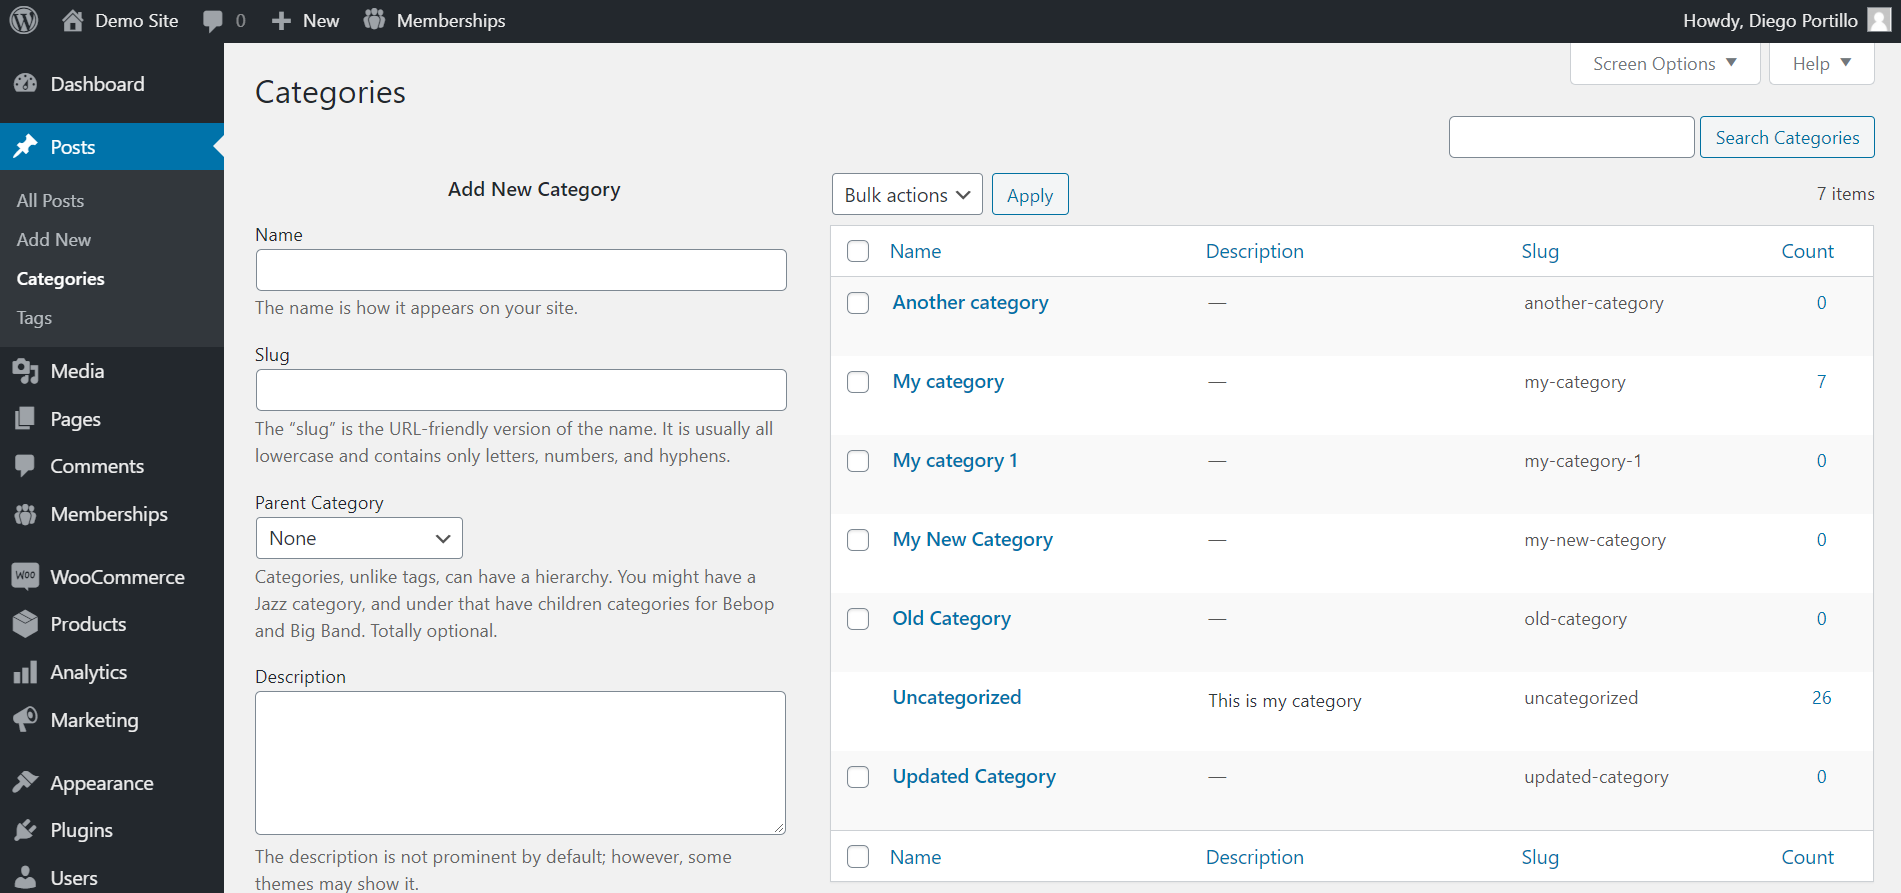
- Go to Posts > Categories in wp-admin.
- Open the category you want to restrict by user plan.
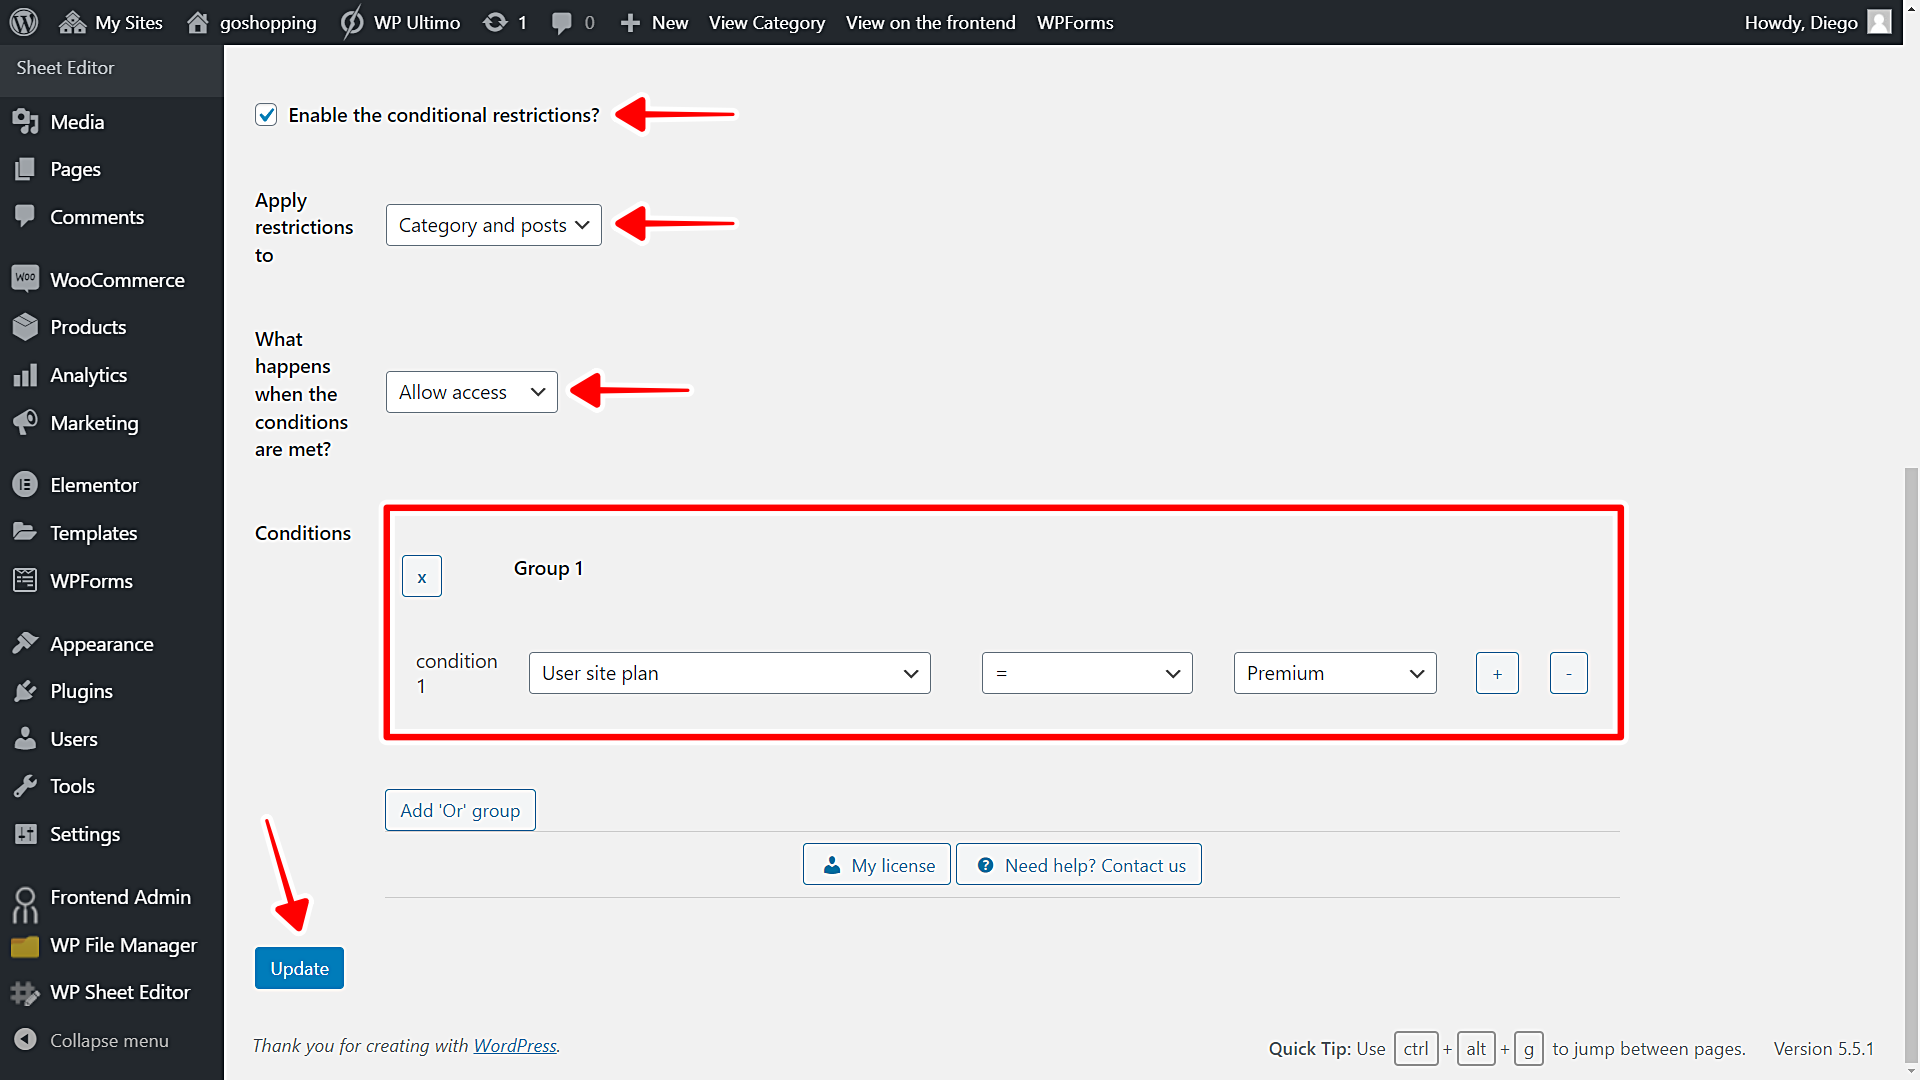
Now you need to scroll down to the Post and Category restrictions section and select these values:
- Enable the conditional restrictions: Yes
- Apply restrictions to: Category and posts
- What happens when the conditions are met: Allow access
- Condition 1: User site plan = Premium
- The selected plan is just an example. You select the one you want.
- Update the category to save the changes.
These are the values you need to select in order to restrict an entire posts category based on WP Ultimo site plan. If you want to restrict other categories, you just need to select the same values in the other categories.
3- How to restrict all posts based on the site plan
Besides restricting individual posts and post categories, you can restrict all your posts based on the site plan. For this, you need to apply a global restriction to your posts. Just follow these simple steps:
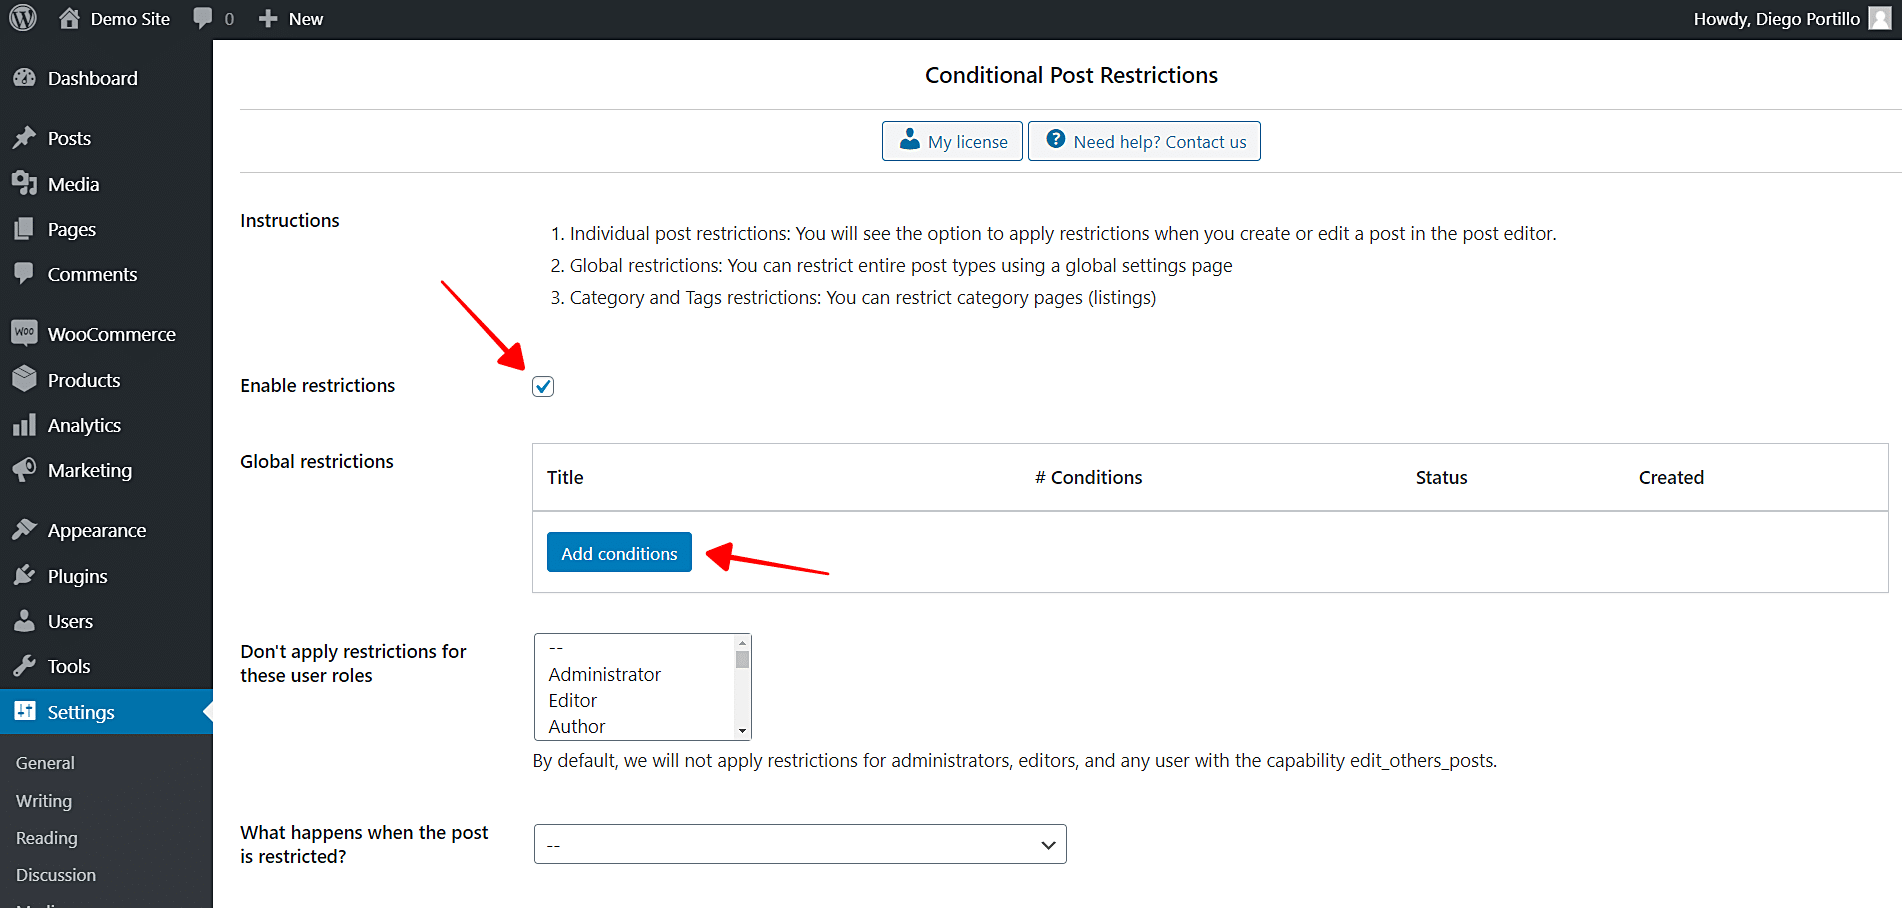
- Go to Settings > Post restrictions in wp-admin.
- Tick the Enable global restrictions checkbox.
- Click Add conditions to create a global condition.
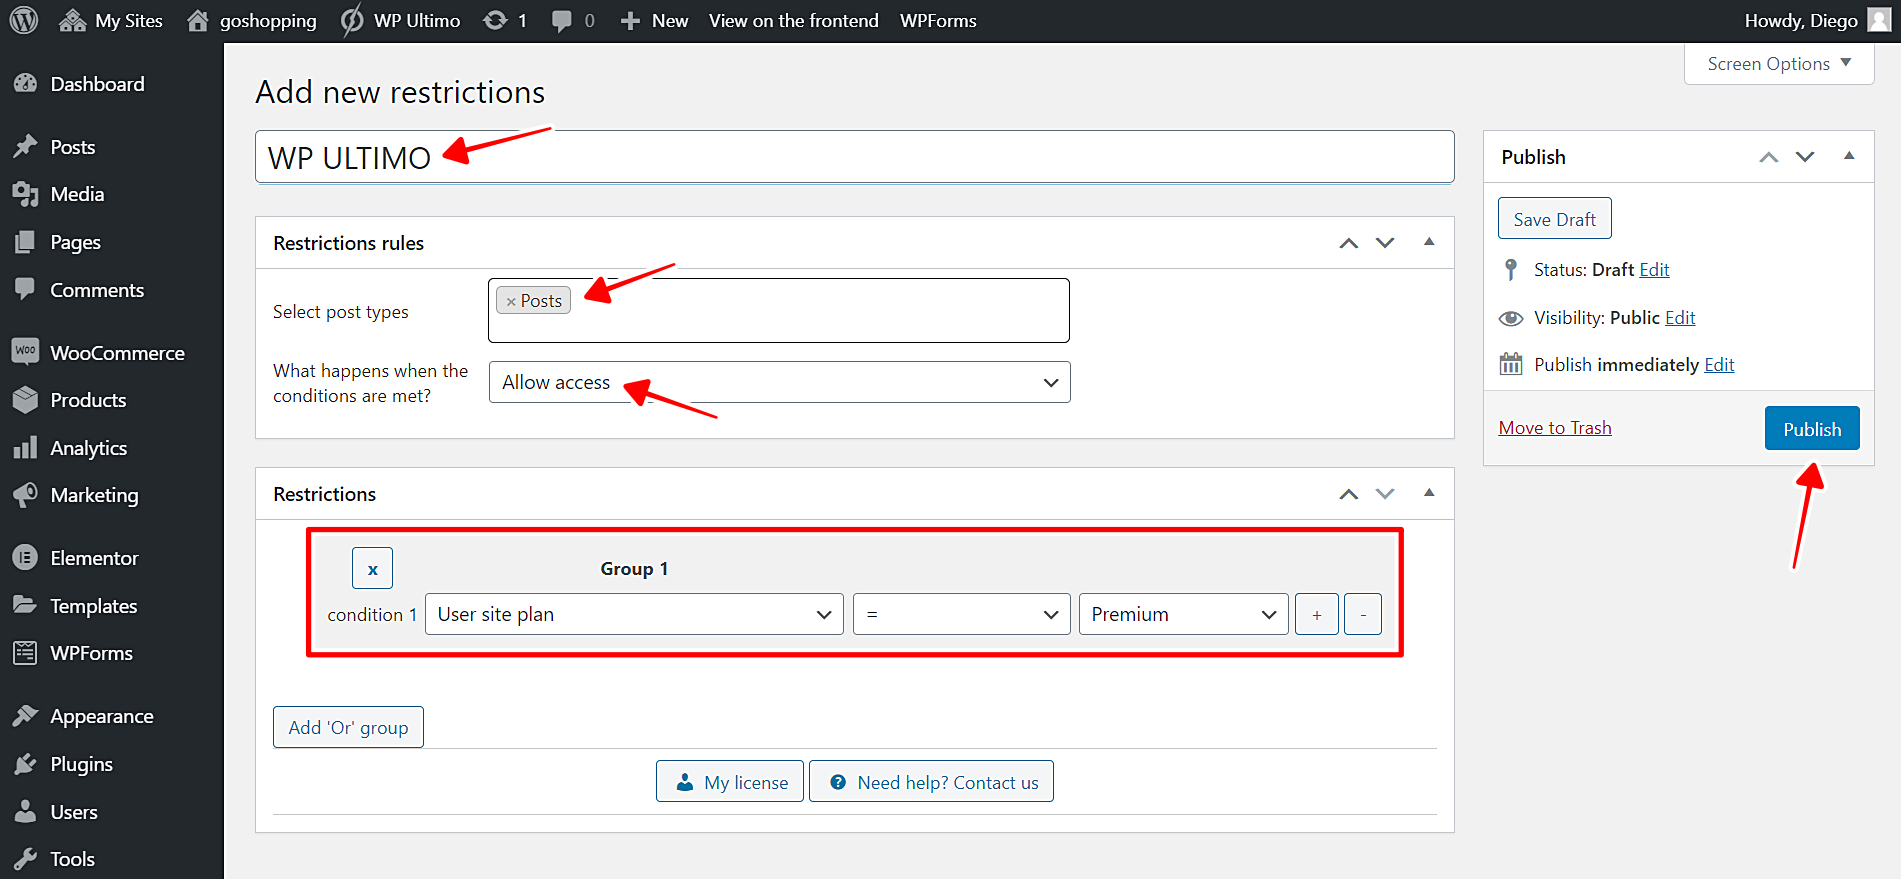
Now you need to select these values to restrict all your posts based on the site plan:
- Add new restrictions: Enter the restriction title
- Select post types: Posts
- What happens when the conditions are met: Allow access
- Condition 1: User site plan = Premium
- The selected plan is just an example. You select the one you want.
- Publish the condition.
Done! With these values, you’ll have restricted all the posts based on the site plan.
4- How to restrict individual pages based on the site plan
To restrict individual pages based on the site plan, you just need to follow some simple steps. These pages may be support pages or forums, landing pages, course pages, etc. You decide which page you want to restrict based on the user plan. Just follow these steps:
- Go to Pages > All Pages in wp-admin.
- Open the page you want to edit with the normal WordPress editor.
Once you open the page you’ll restrict based on the site plan, you need to select these values:
- Enable content restrictions: Yes
- What happens when the conditions are met: Allow access
- Condition 1: User site plan = Premium
- The selected plan is just an example. You select the one you want.
- Update the page to save the changes.
With these simple steps and values, you can restrict any of your WordPress pages based on site plan. Repeat the same steps in this section to restrict other pages.
5- How to redirect users to another URL when they try to access blocked posts or pages
With WordPress Conditional Post Restrictions, you can easily redirect your users to an upgrade page to ask them to upgrade their membership plans in order to access the restricted content.
- Go to Settings > Post Restrictions in wp-admin.
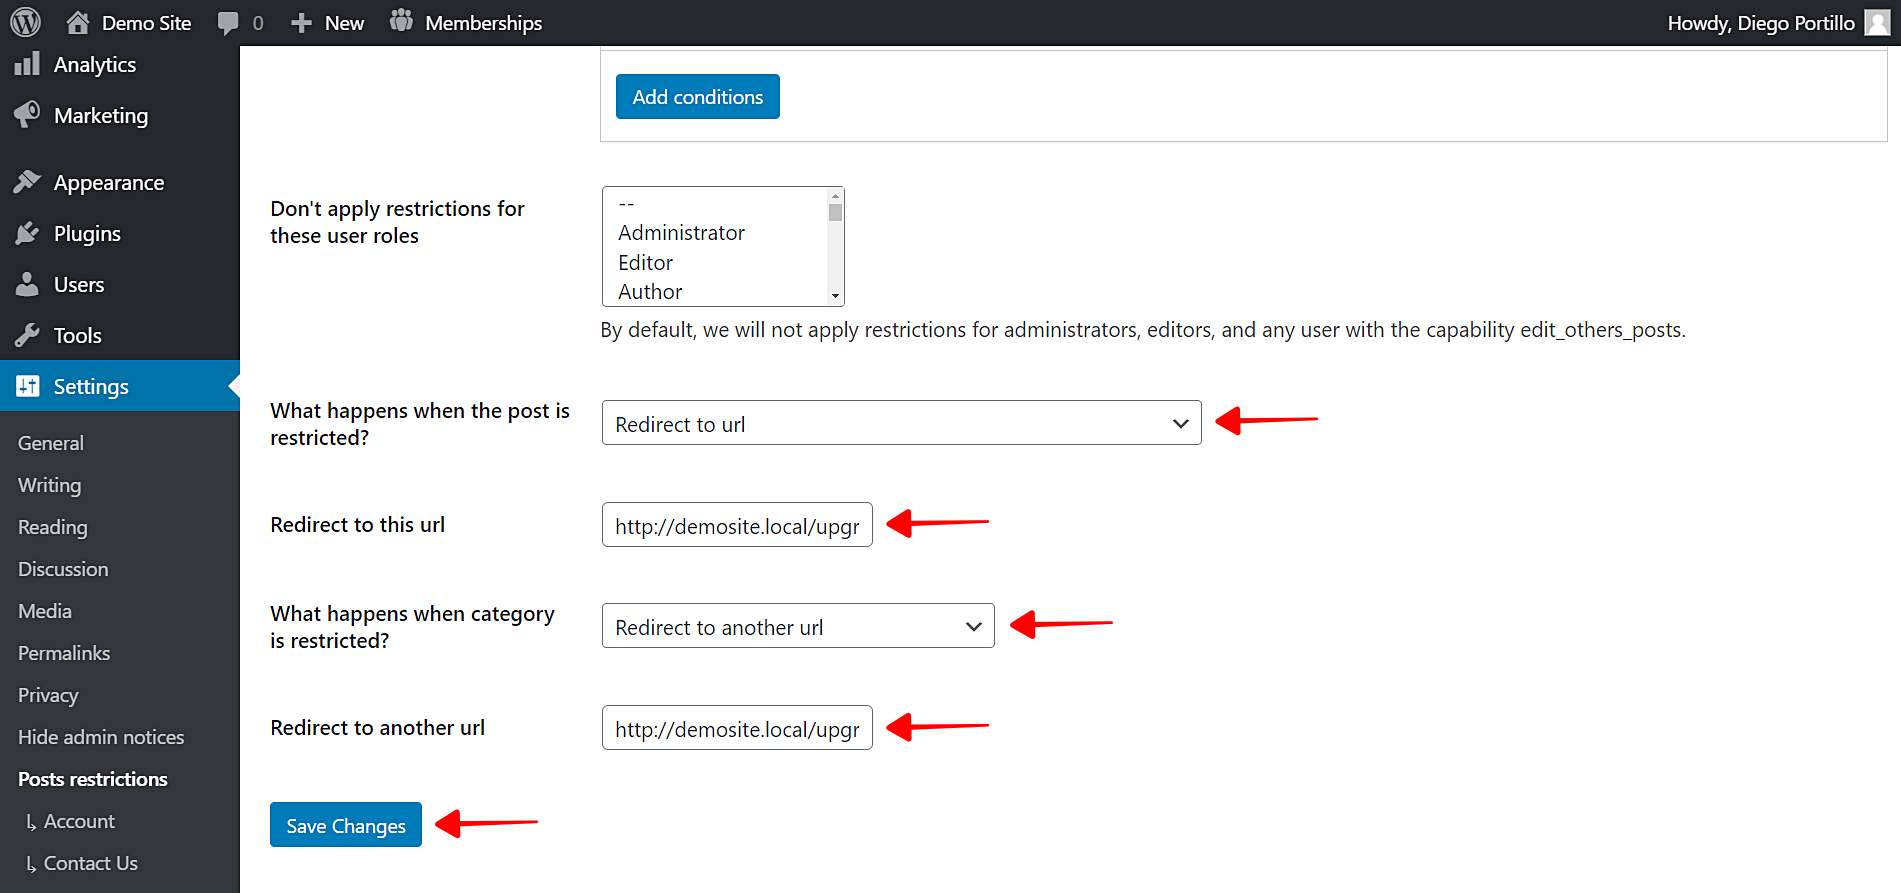
Once there, you need to select these values:
- Don’t apply restrictions for these user roles: You’ll see a list of user roles for which the conditions won’t be applied. By default, we will not apply restrictions for administrators, editors, and any user with the capability edit_others_posts.
- What happens when the post is restricted? Redirect to URL
- Redirect to this URL: Enter the upgrade or pricing page.
- What happens when a category is restricted? Redirect to another URL
- Redirect to another URL: Enter the upgrade or pricing page.
- Save the changes.
After you apply these values, your users will be redirected to the selected URL every time they try to access blocked posts or pages.
That’s really simple!
WordPress Conditional Post Restrictions is, with no doubt, the easiest way to apply conditional restrictions to your posts because you can do it with a few clicks. You don’t have to program anything nor hire experienced programmers. You can easily apply conditional restrictions to any custom post type generated by a WordPress plugin.
You can download the plugin here:
Download WordPress Conditional Post Restrictions Plugin - or - Read more

