In this tutorial, we show you how to create events for corporate donors only using GiveWP. This is very useful when you want to hold an event such as a charity dinner or a presentation of a new project with a worldwide scope, and you only want those users who are directly related and committed to your fundraising project to attend.
What is a corporate donor?
Some fundraising companies give their committed donors their own email account on their sites; we think that’s a great method of distinguishing between corporate donors and general donors. Normally, normal/general donors will have free email accounts from companies like these:
- Gmail
- AOL
- Outlook
- Zoho
- Mail.com
- Yahoo! Mail
- ProtonMail
- iCloud Mail
- GMX Mail
- Mozilla Thunderbird
- Yandex Mail
In contrast, corporate donors may have email accounts like this: [email protected]. Therefore, what we’ll do is to deny access to this event to donors with any other email companies and allow donors with corporate email only.
Events and conditional restrictions
You can use any plugin that allows you to create and manage events in WordPress.
We will use The Events Calendar Plugin in this example, but any events manager that creates the “Event” post type on your WordPress website is useful.
Besides the events plugin, you need the WordPress Conditional Post Restrictions plugin, which allows you to easily apply conditional restrictions to your WordPress posts, pages, and any other custom post type created by other plugins such as events, downloads, donations, products, courses, etc.
You can download the plugin here:
Download WordPress Conditional Post Restrictions Plugin - or - Read more
Once you install and activate the WordPress Conditional Post Restrictions plugin, you need to follow these simple steps to create events for corporate donors only.
1- Create/open the event for corporate donors
Important: This tutorial assumes you already created the event to which you want to deny access to non-corporate donors. If you haven’t, you can create it quickly with your event’s plugin, and then continue this guide.
The first thing you need to do to deny access to non-corporate donors is to open the event list and then open the event you are going to edit.
- As we are using The Events Calendar plugin, we need to go to Events in wp-admin.
- Once there, open the event you want to restrict for corporate donors.
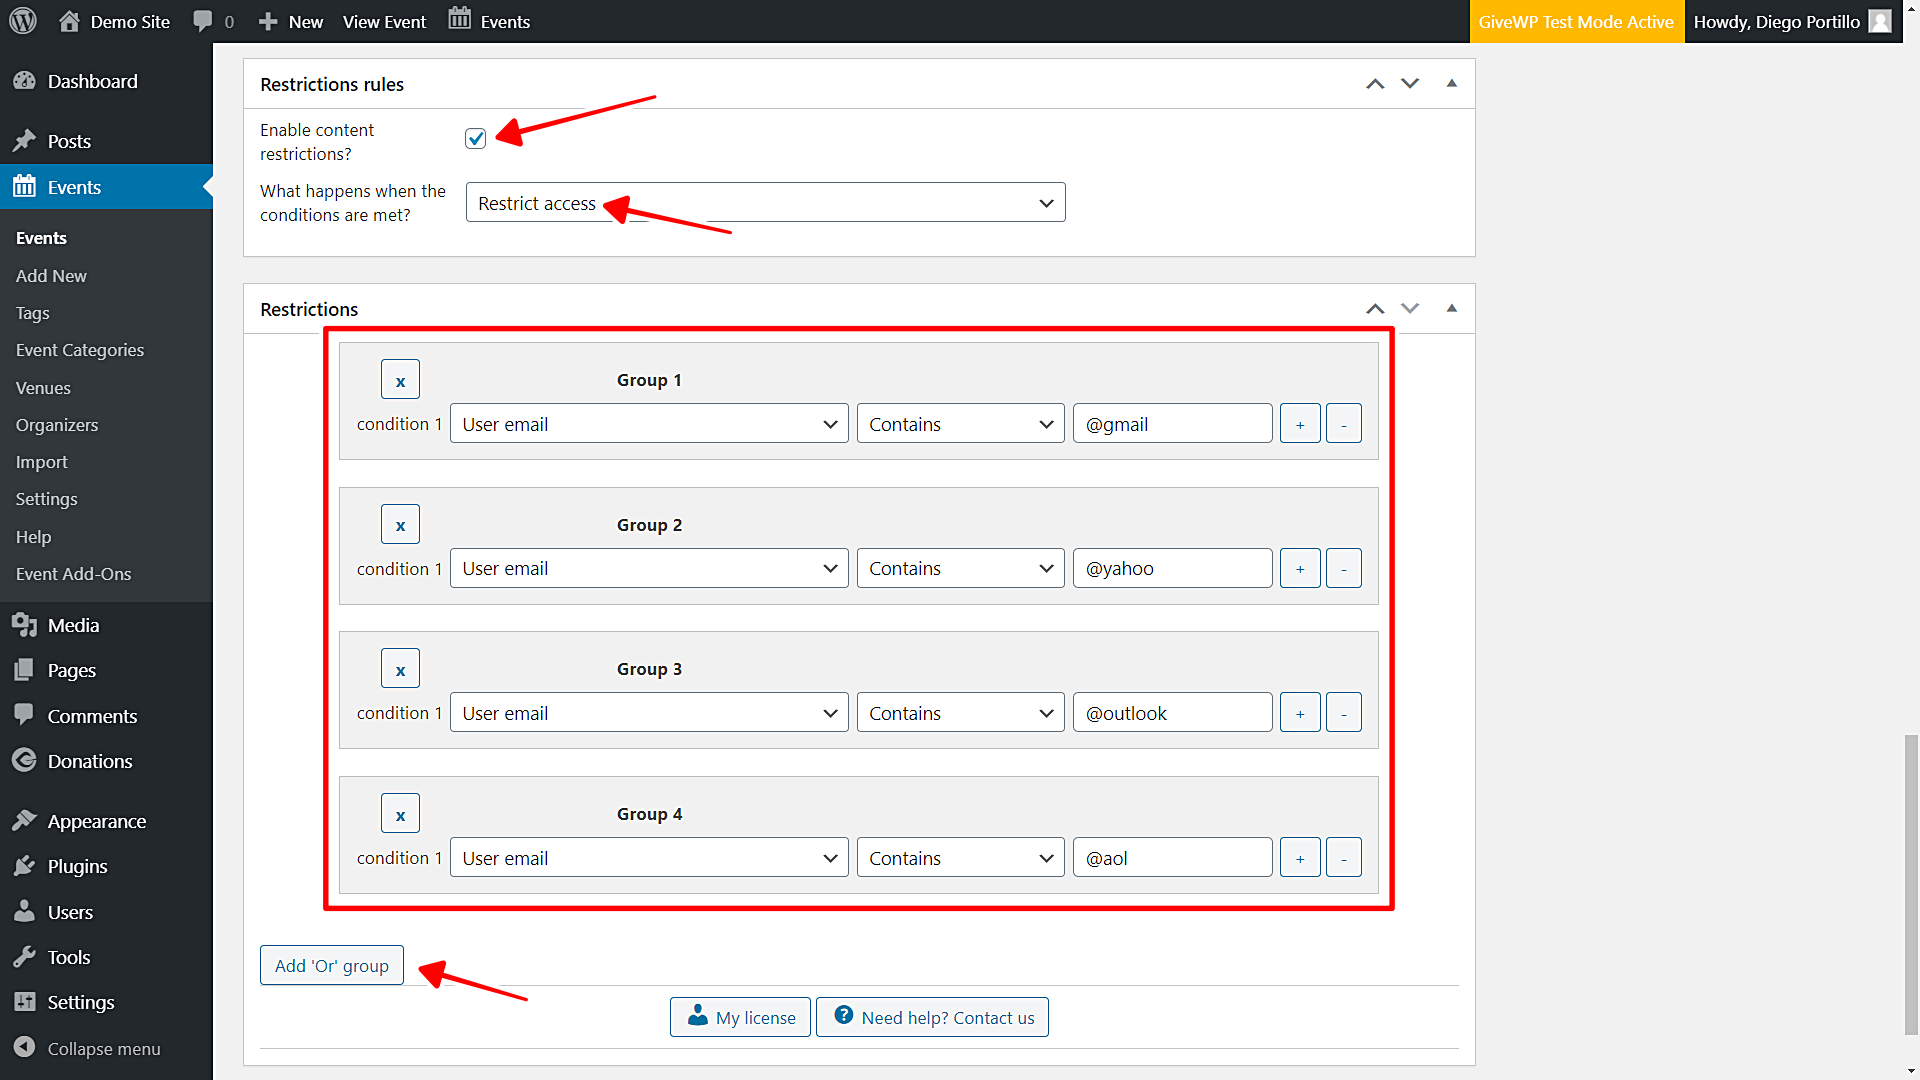
- Scroll down to the Restriction rules section in the event editor.
2- Deny access to events to non-corporate donors
Once you open the event you’ll restrict for corporate donors and scroll down to the Restriction Rules section in the editor, you need to select the following values:
- Enable content restrictions: Yes
- What happens when the conditions are met: Restrict access
- Condition 1: User email | Contains | @gmail
- Click Add “Or” group to create another condition group.
- Condition 1: User email | Contains | @yahoo
- Click Add “Or” group to create another condition group.
- Condition 1: User email | Contains | @outlook
- Repeat for each email company you want to restrict.
- Update the event to save changes.
Important
As you see, you need to Repeat for each email company you want to restrict. That means you have to add more OR groups, one for every email company. You can use the list we suggested at the beginning of this tutorial, or you can even add more email companies to restrict access.
3- Optional. Deny access to events category to non-corporate donors
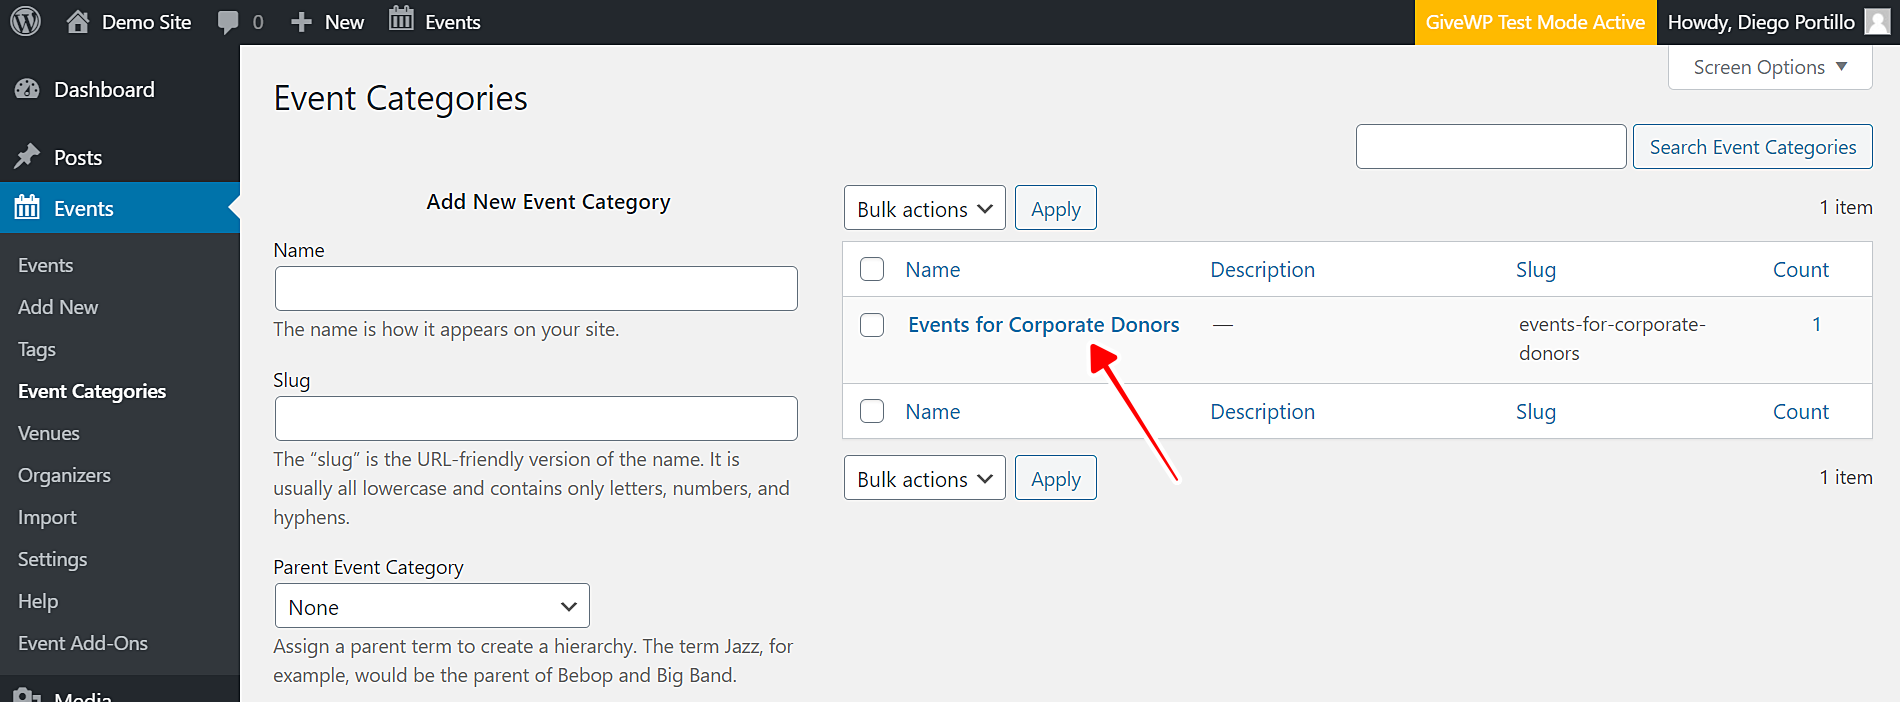
If you create an events category called something like Events for Corporate Donors, you don’t need to restrict each event individually. Instead, you can restrict the complete category.
Just open your categories list and open the category you want to reserve for corporate donors only.
In this case, we need to go to Events > Categories and open our Events for Corporate Donors category.
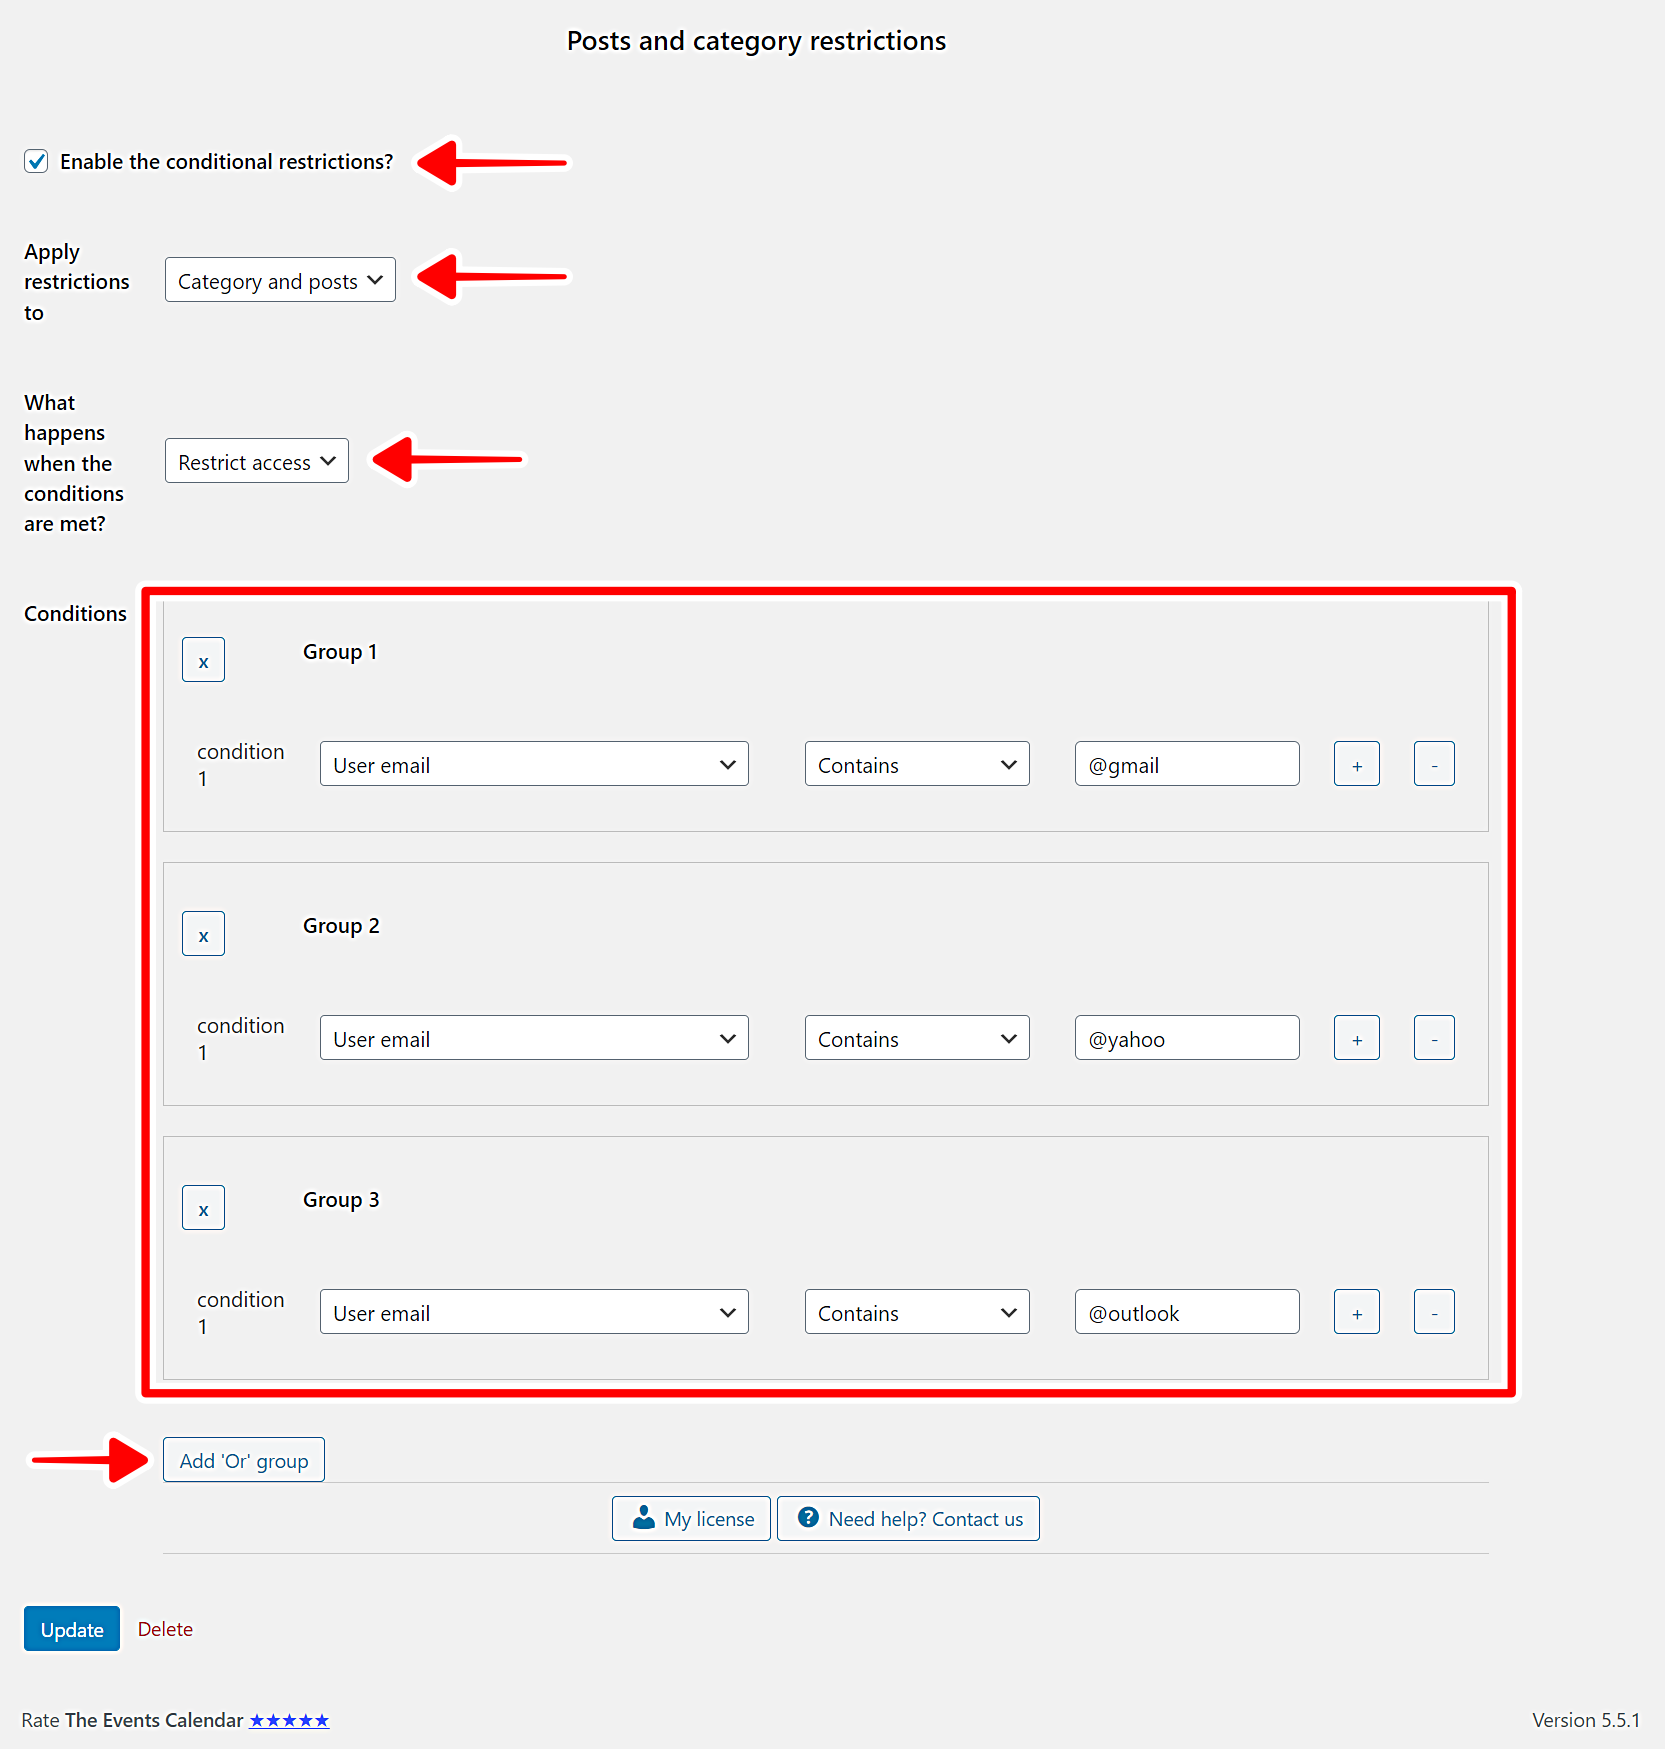
Once you open the category you want to reserve for corporate donors, you need to select the following values:
- Enable the conditional restrictions: Yes
- Apply restrictions to: Category and posts
- What happens when the conditions are met: Restrict access
- Condition 1: User email | Contains | @gmail
- Click Add “Or” group to create another condition group.
- Condition 1: User email | Contains | @yahoo
- Click Add “Or” group to create another condition group.
- Condition 1: User email | Contains | @outlook
- Repeat for each email company you want to restrict.
- Update the category to save changes.
Important
As you see, you need to Repeat for each email company you want to restrict. That means you have to add more OR groups, one for every email company. You can use the list we suggested at the beginning of this tutorial, or you can even add more email companies to restrict access.
4- What if a donor tries to access a restricted event?
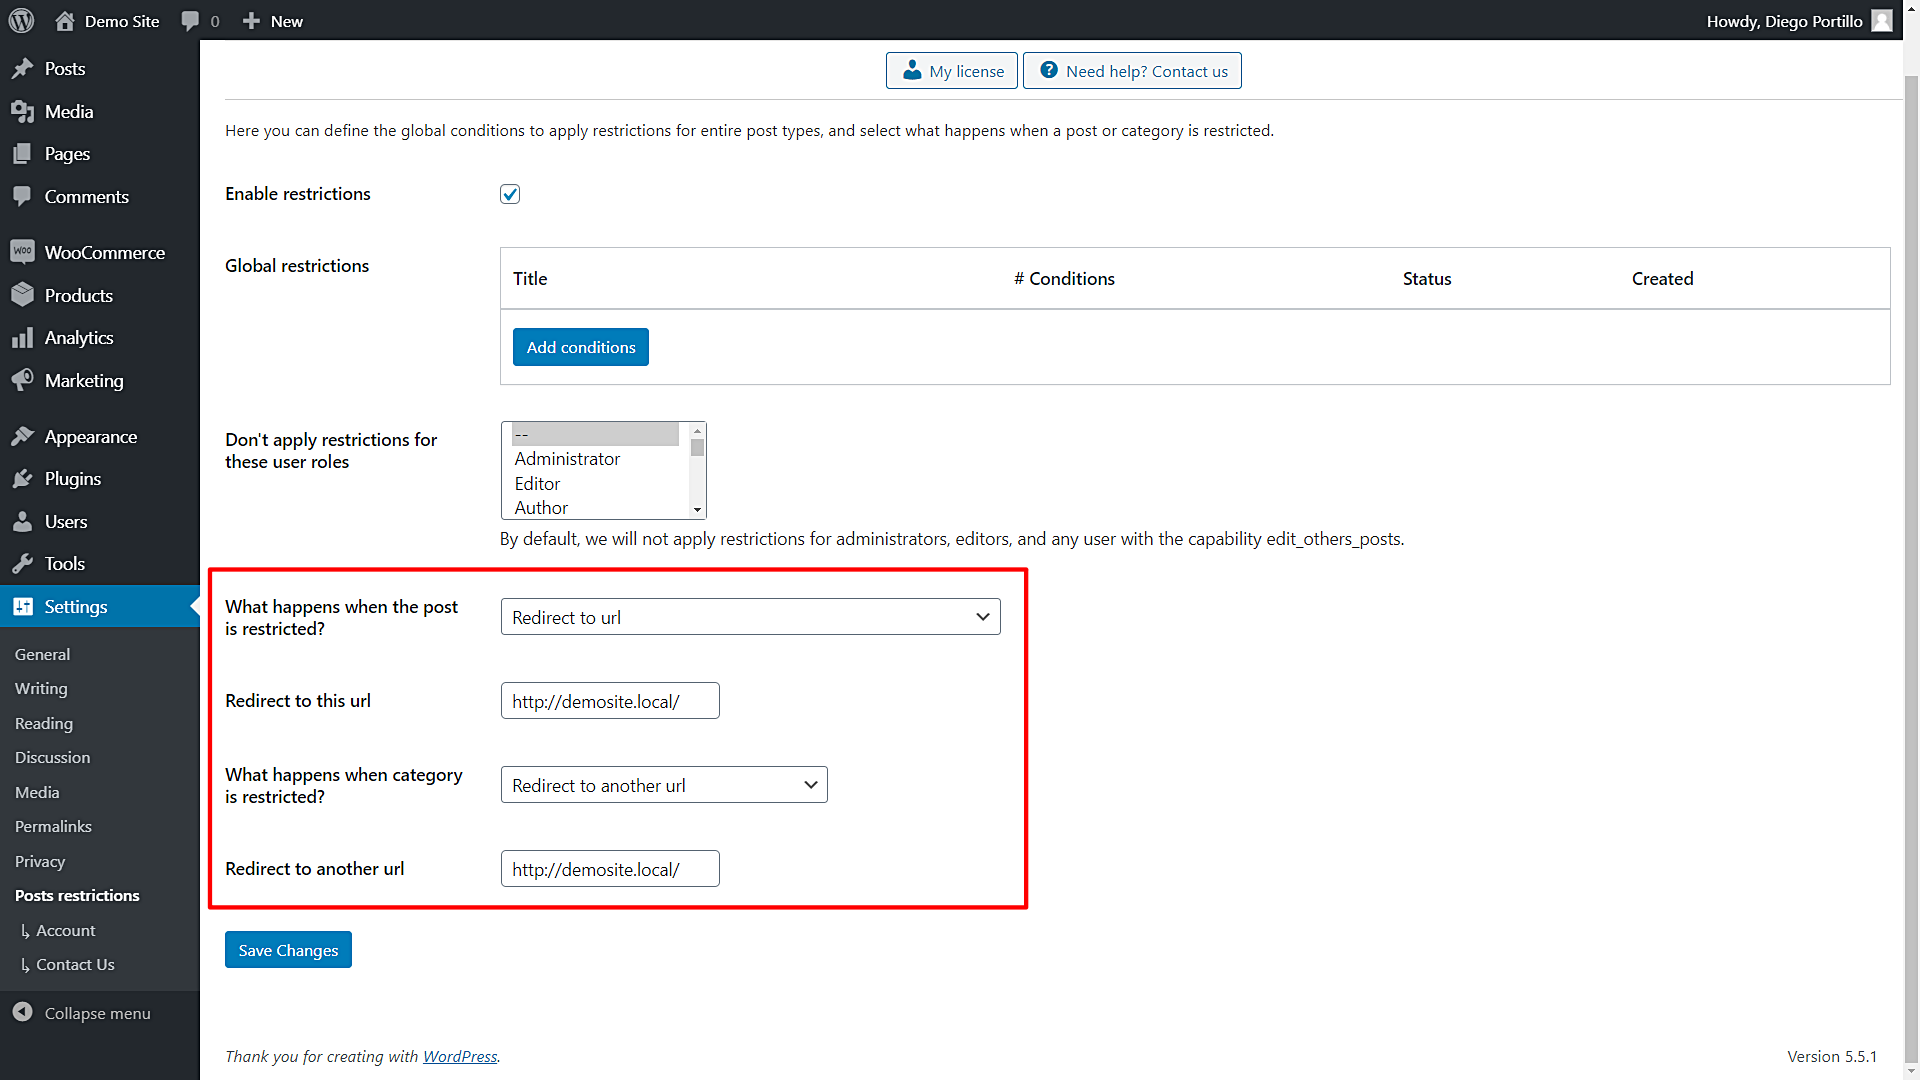
WordPress Conditional Post Restrictions allows you to select what happens if a donor tries to access a restricted event.
- Go to Settings > Post Restrictions to open the plugin’s global settings.
Once you’re there, can redirect users to another URL, show a fragment of the content, or completely remove the content and show a message.
Once you select the options you want, just save changes.
Creating events for corporate donors is really easy!
After creating the event, it’s a matter of some simple clicks and fields to allow corporate donors in only. With the WordPress Conditional Post Restrictions plugin, you don’t have to spend lots of time programming the conditional restrictions.
You can easily apply conditional restrictions to any post, page, or custom post type in WordPress.
You can download the plugin here:
Download WordPress Conditional Post Restrictions Plugin - or - Read more


